this is a recording/podcast that i recorded in march of this year! it details the history of our ochre way, kuska wiñasun homestead, and the jason and emma partnership that just became a legal one!
click on the link below to hear the details!
.:.
this is a recording/podcast that i recorded in march of this year! it details the history of our ochre way, kuska wiñasun homestead, and the jason and emma partnership that just became a legal one!
click on the link below to hear the details!
.:.
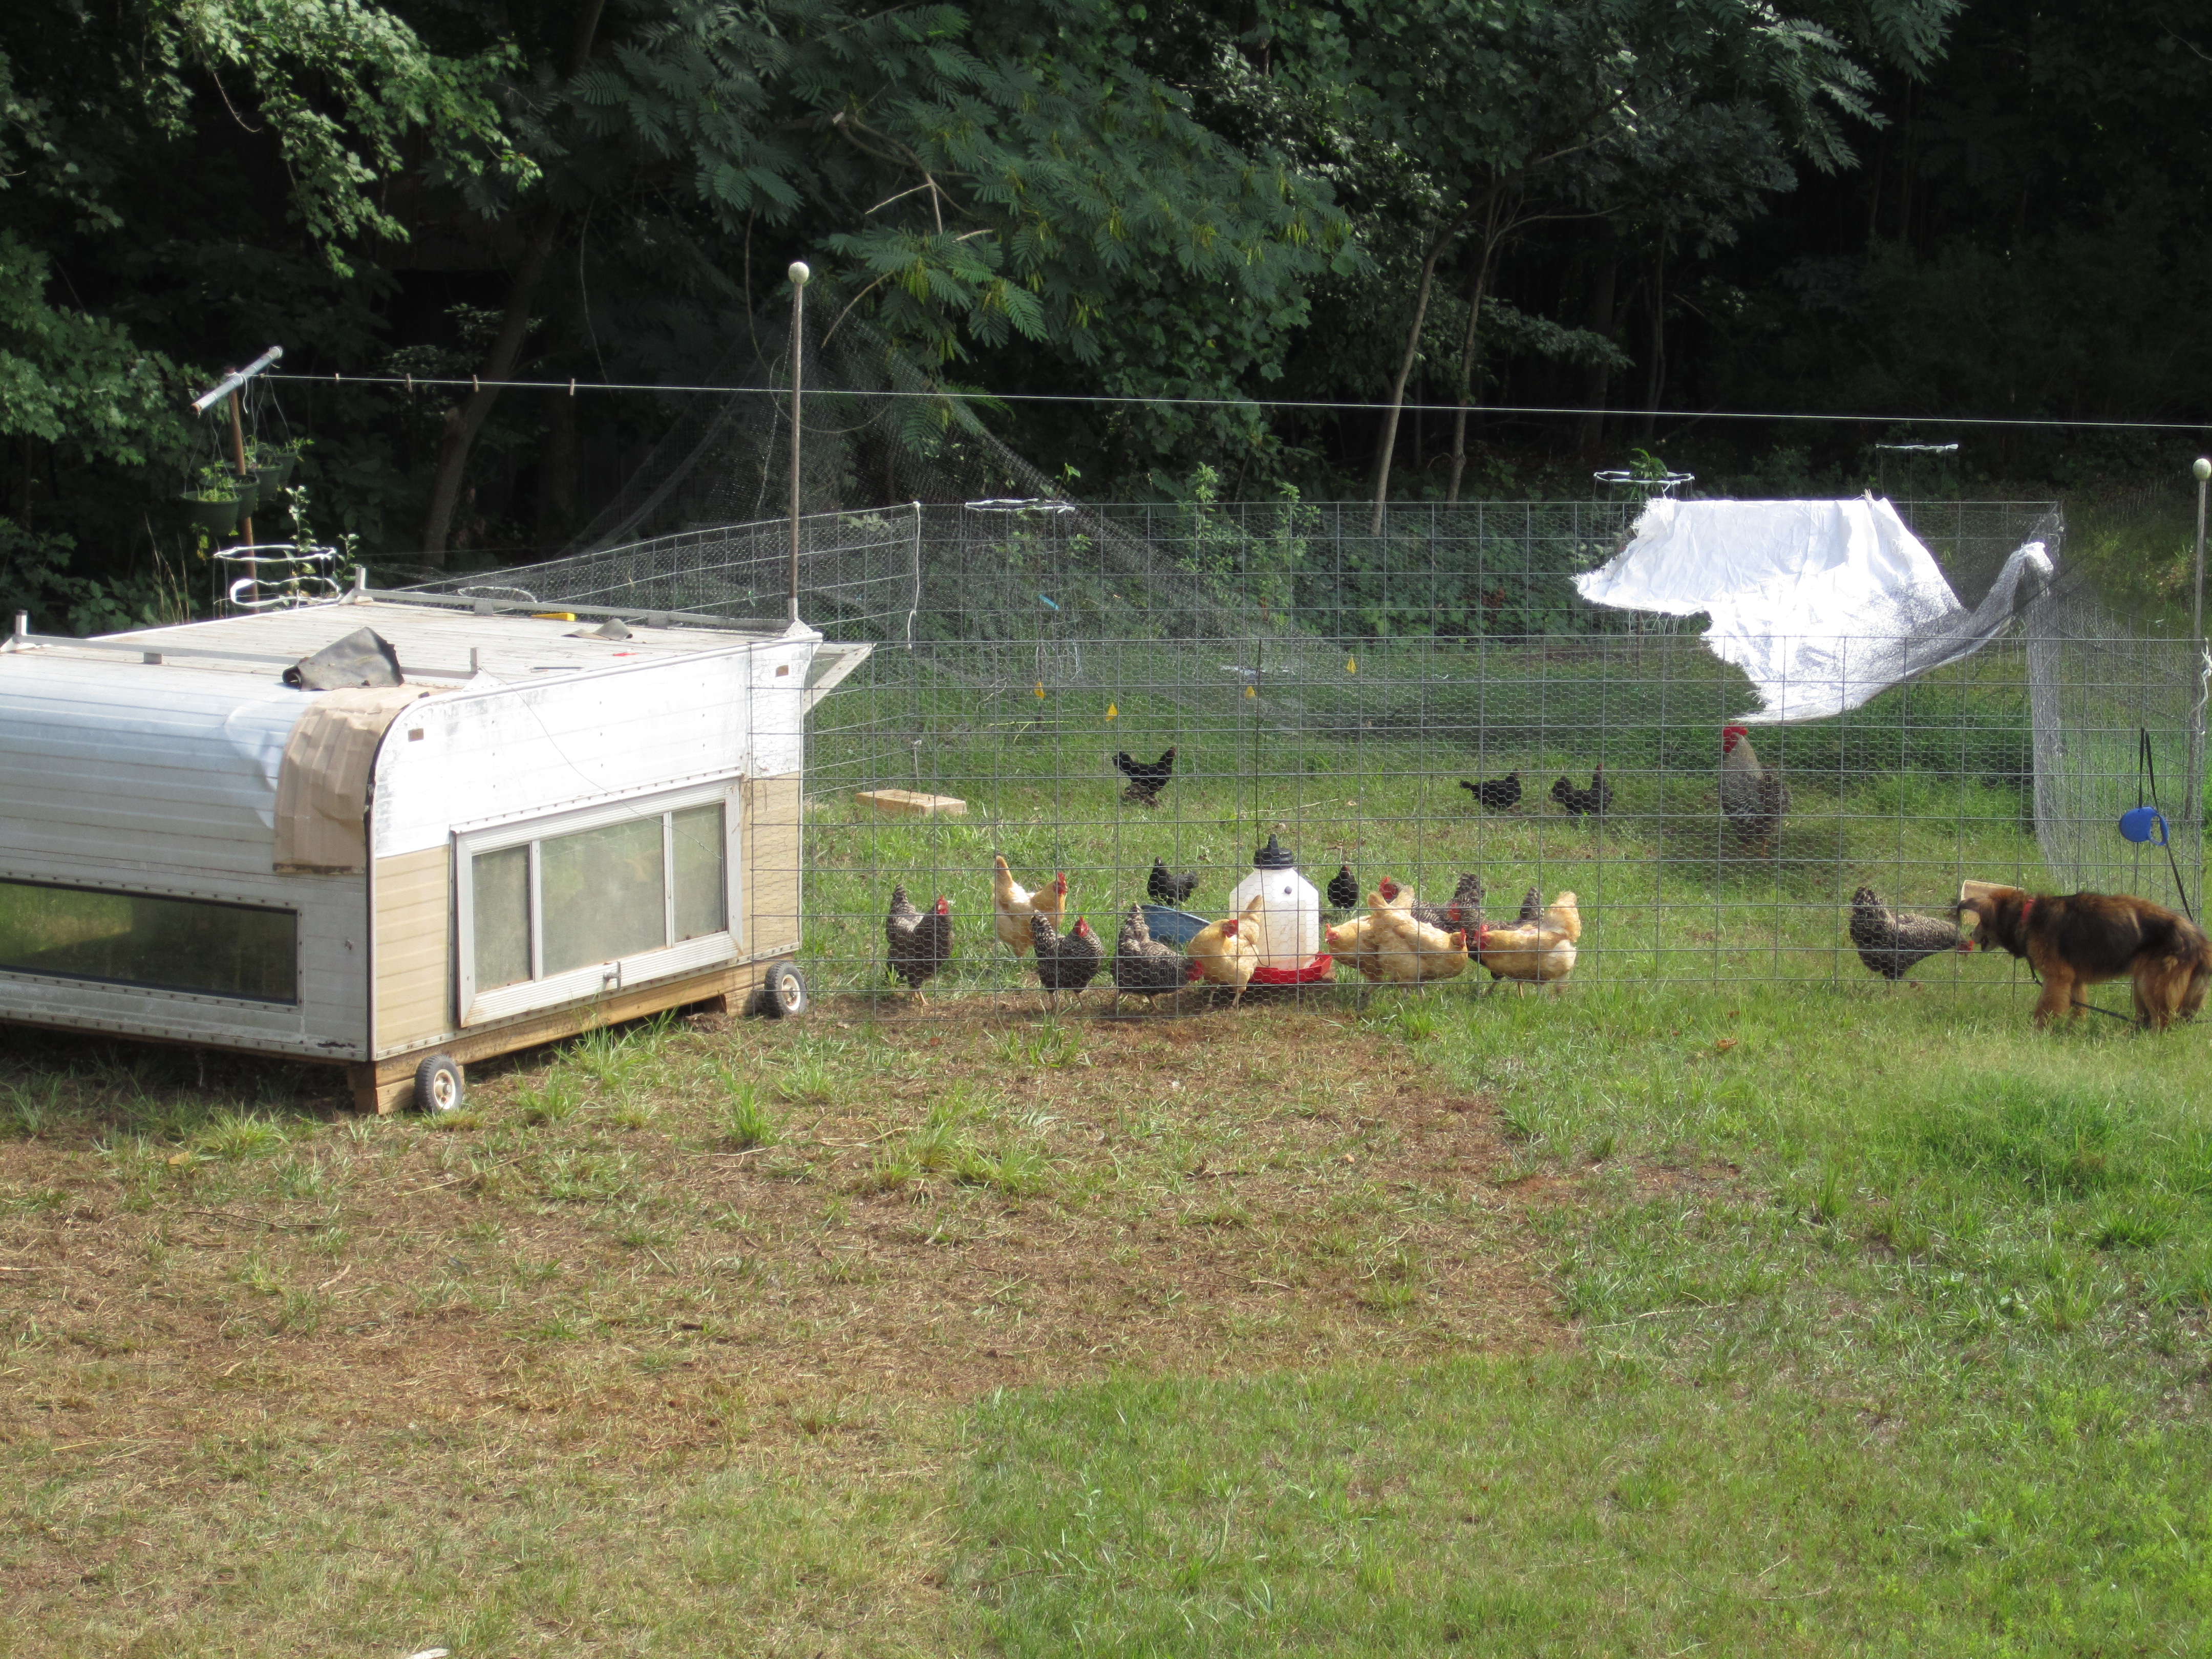
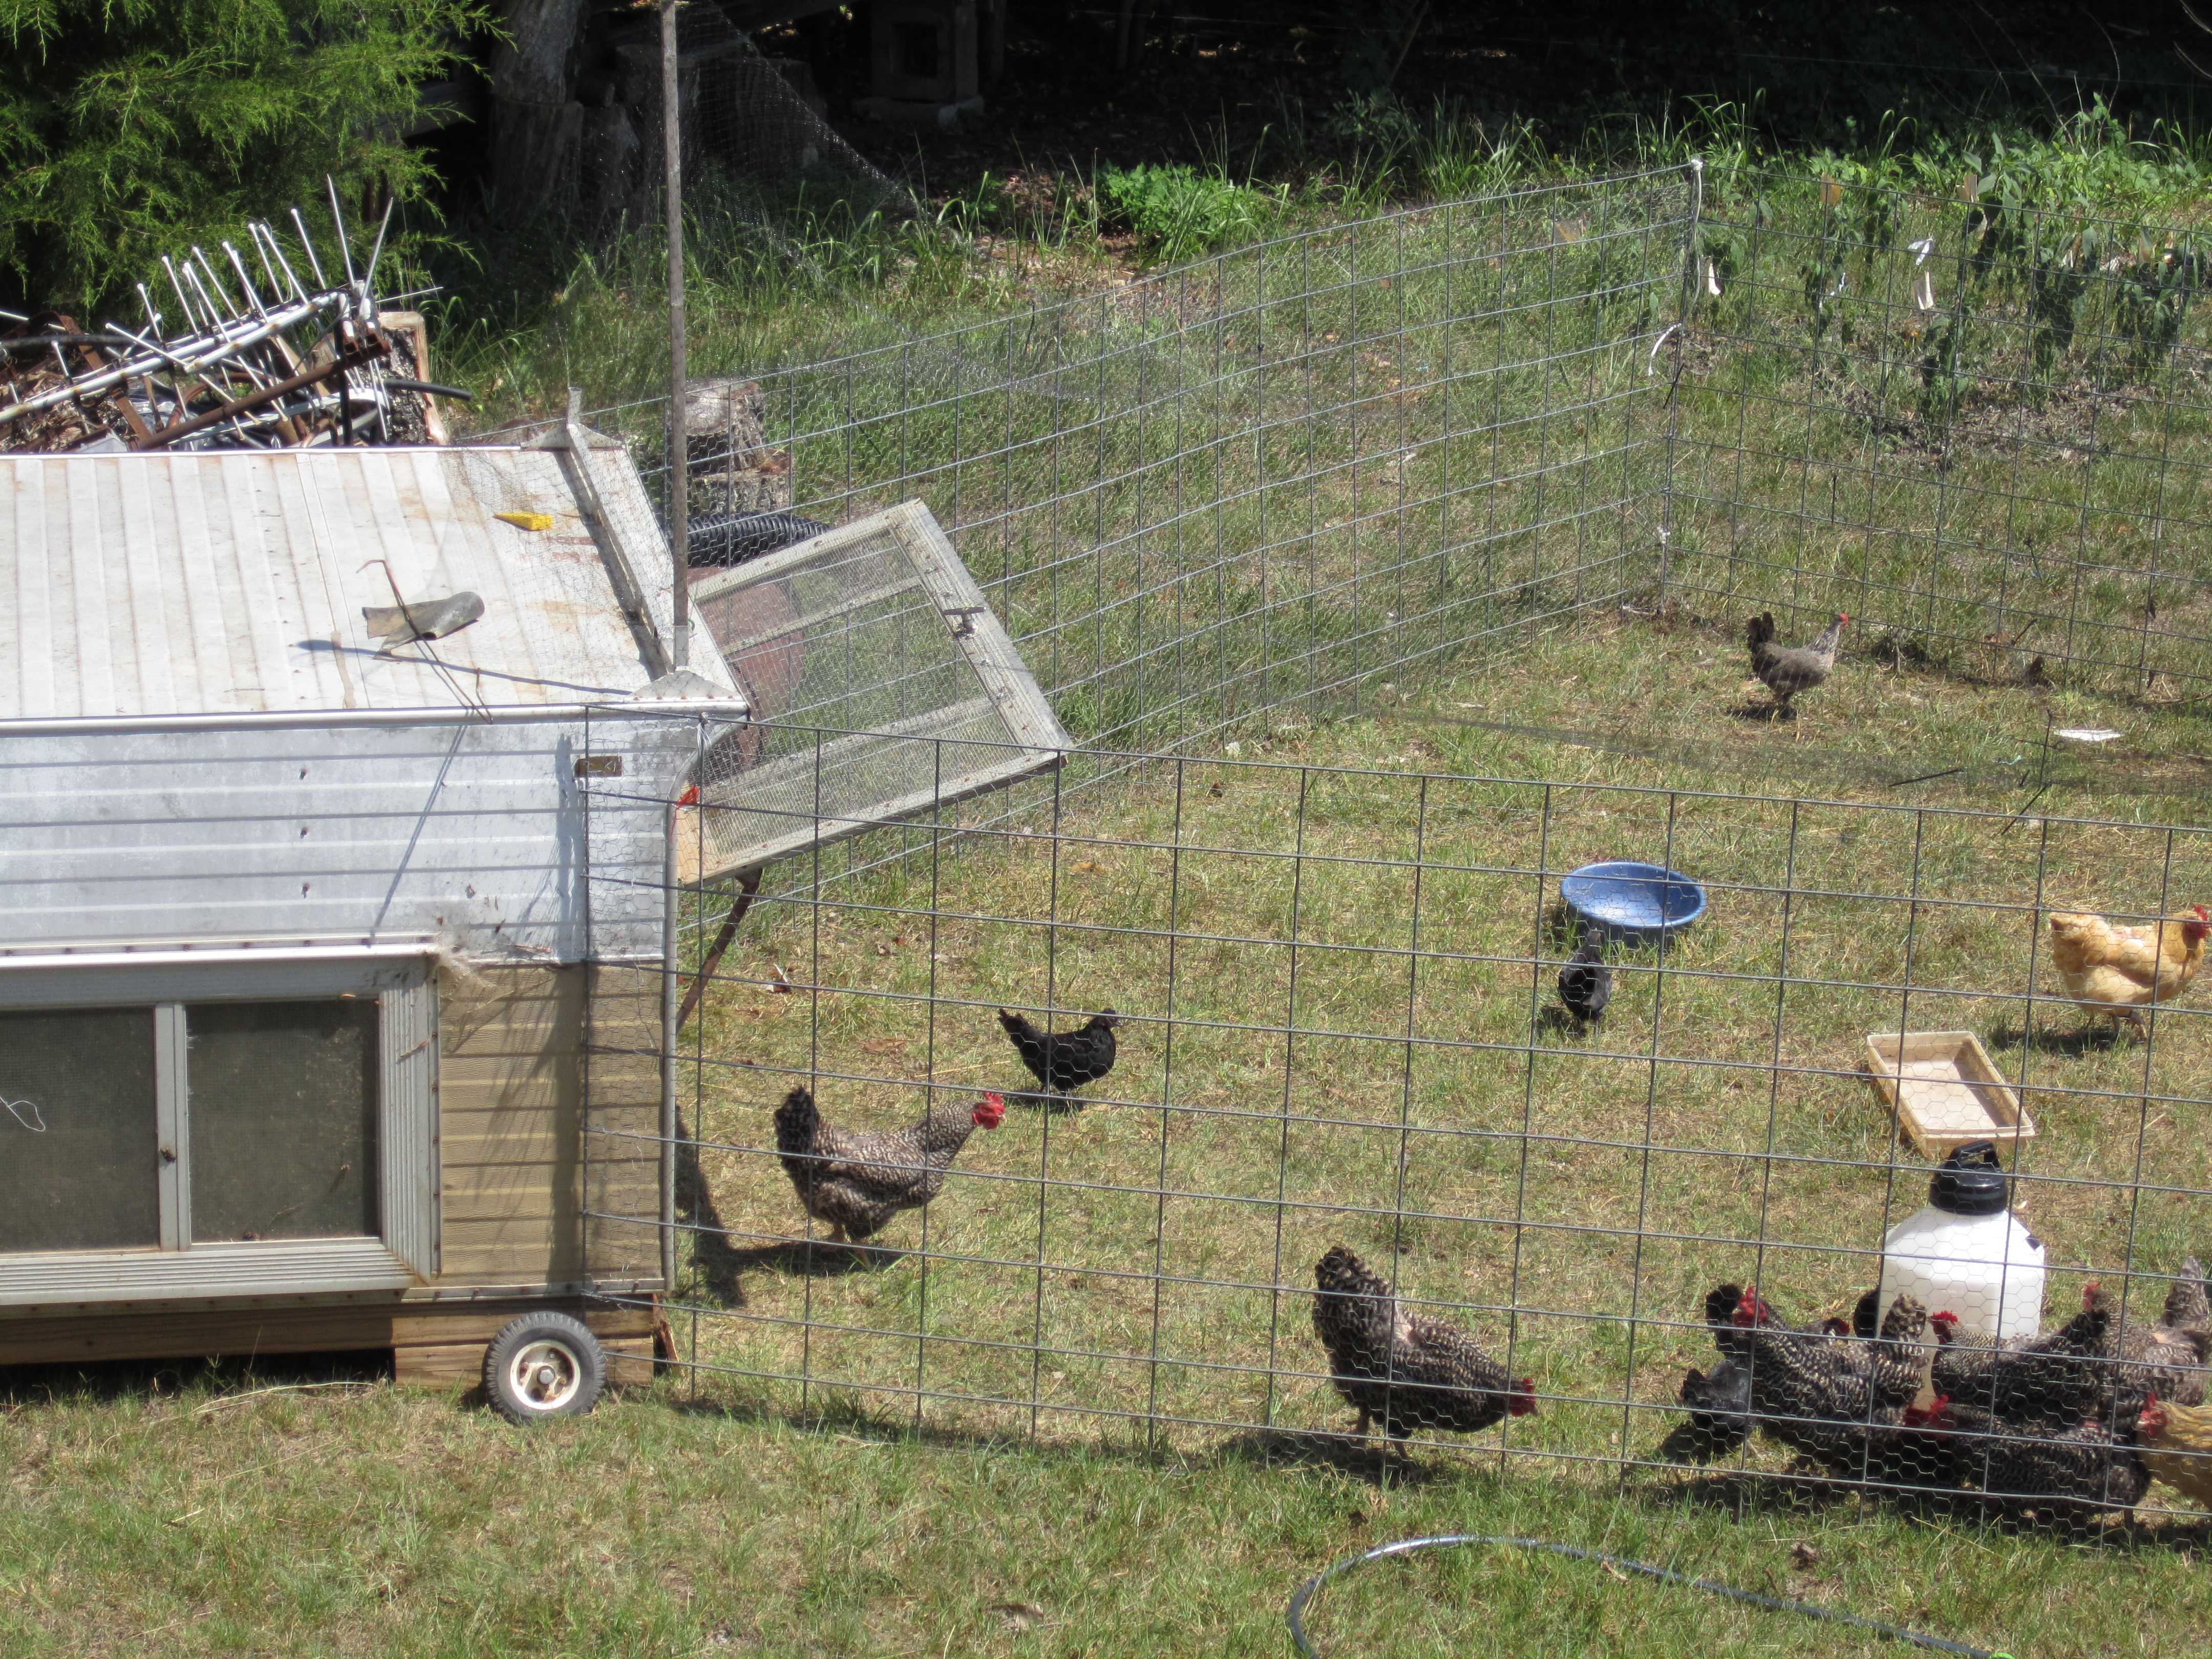
Emma wrote the other day about our new mobile chicken run design, and after moving this system twice I figured I would give an update on its functionality. The chickens have been in this new setup for about 1 week. In our old system, we would typically wait 2 weeks before moving them to a new piece of pasture, but in the past week I have moved them twice. As Emma mentioned, even though the fenced area is half of what it used to be, because the coop is no longer inside, the chickens actually have around 75% of the space they used to have.
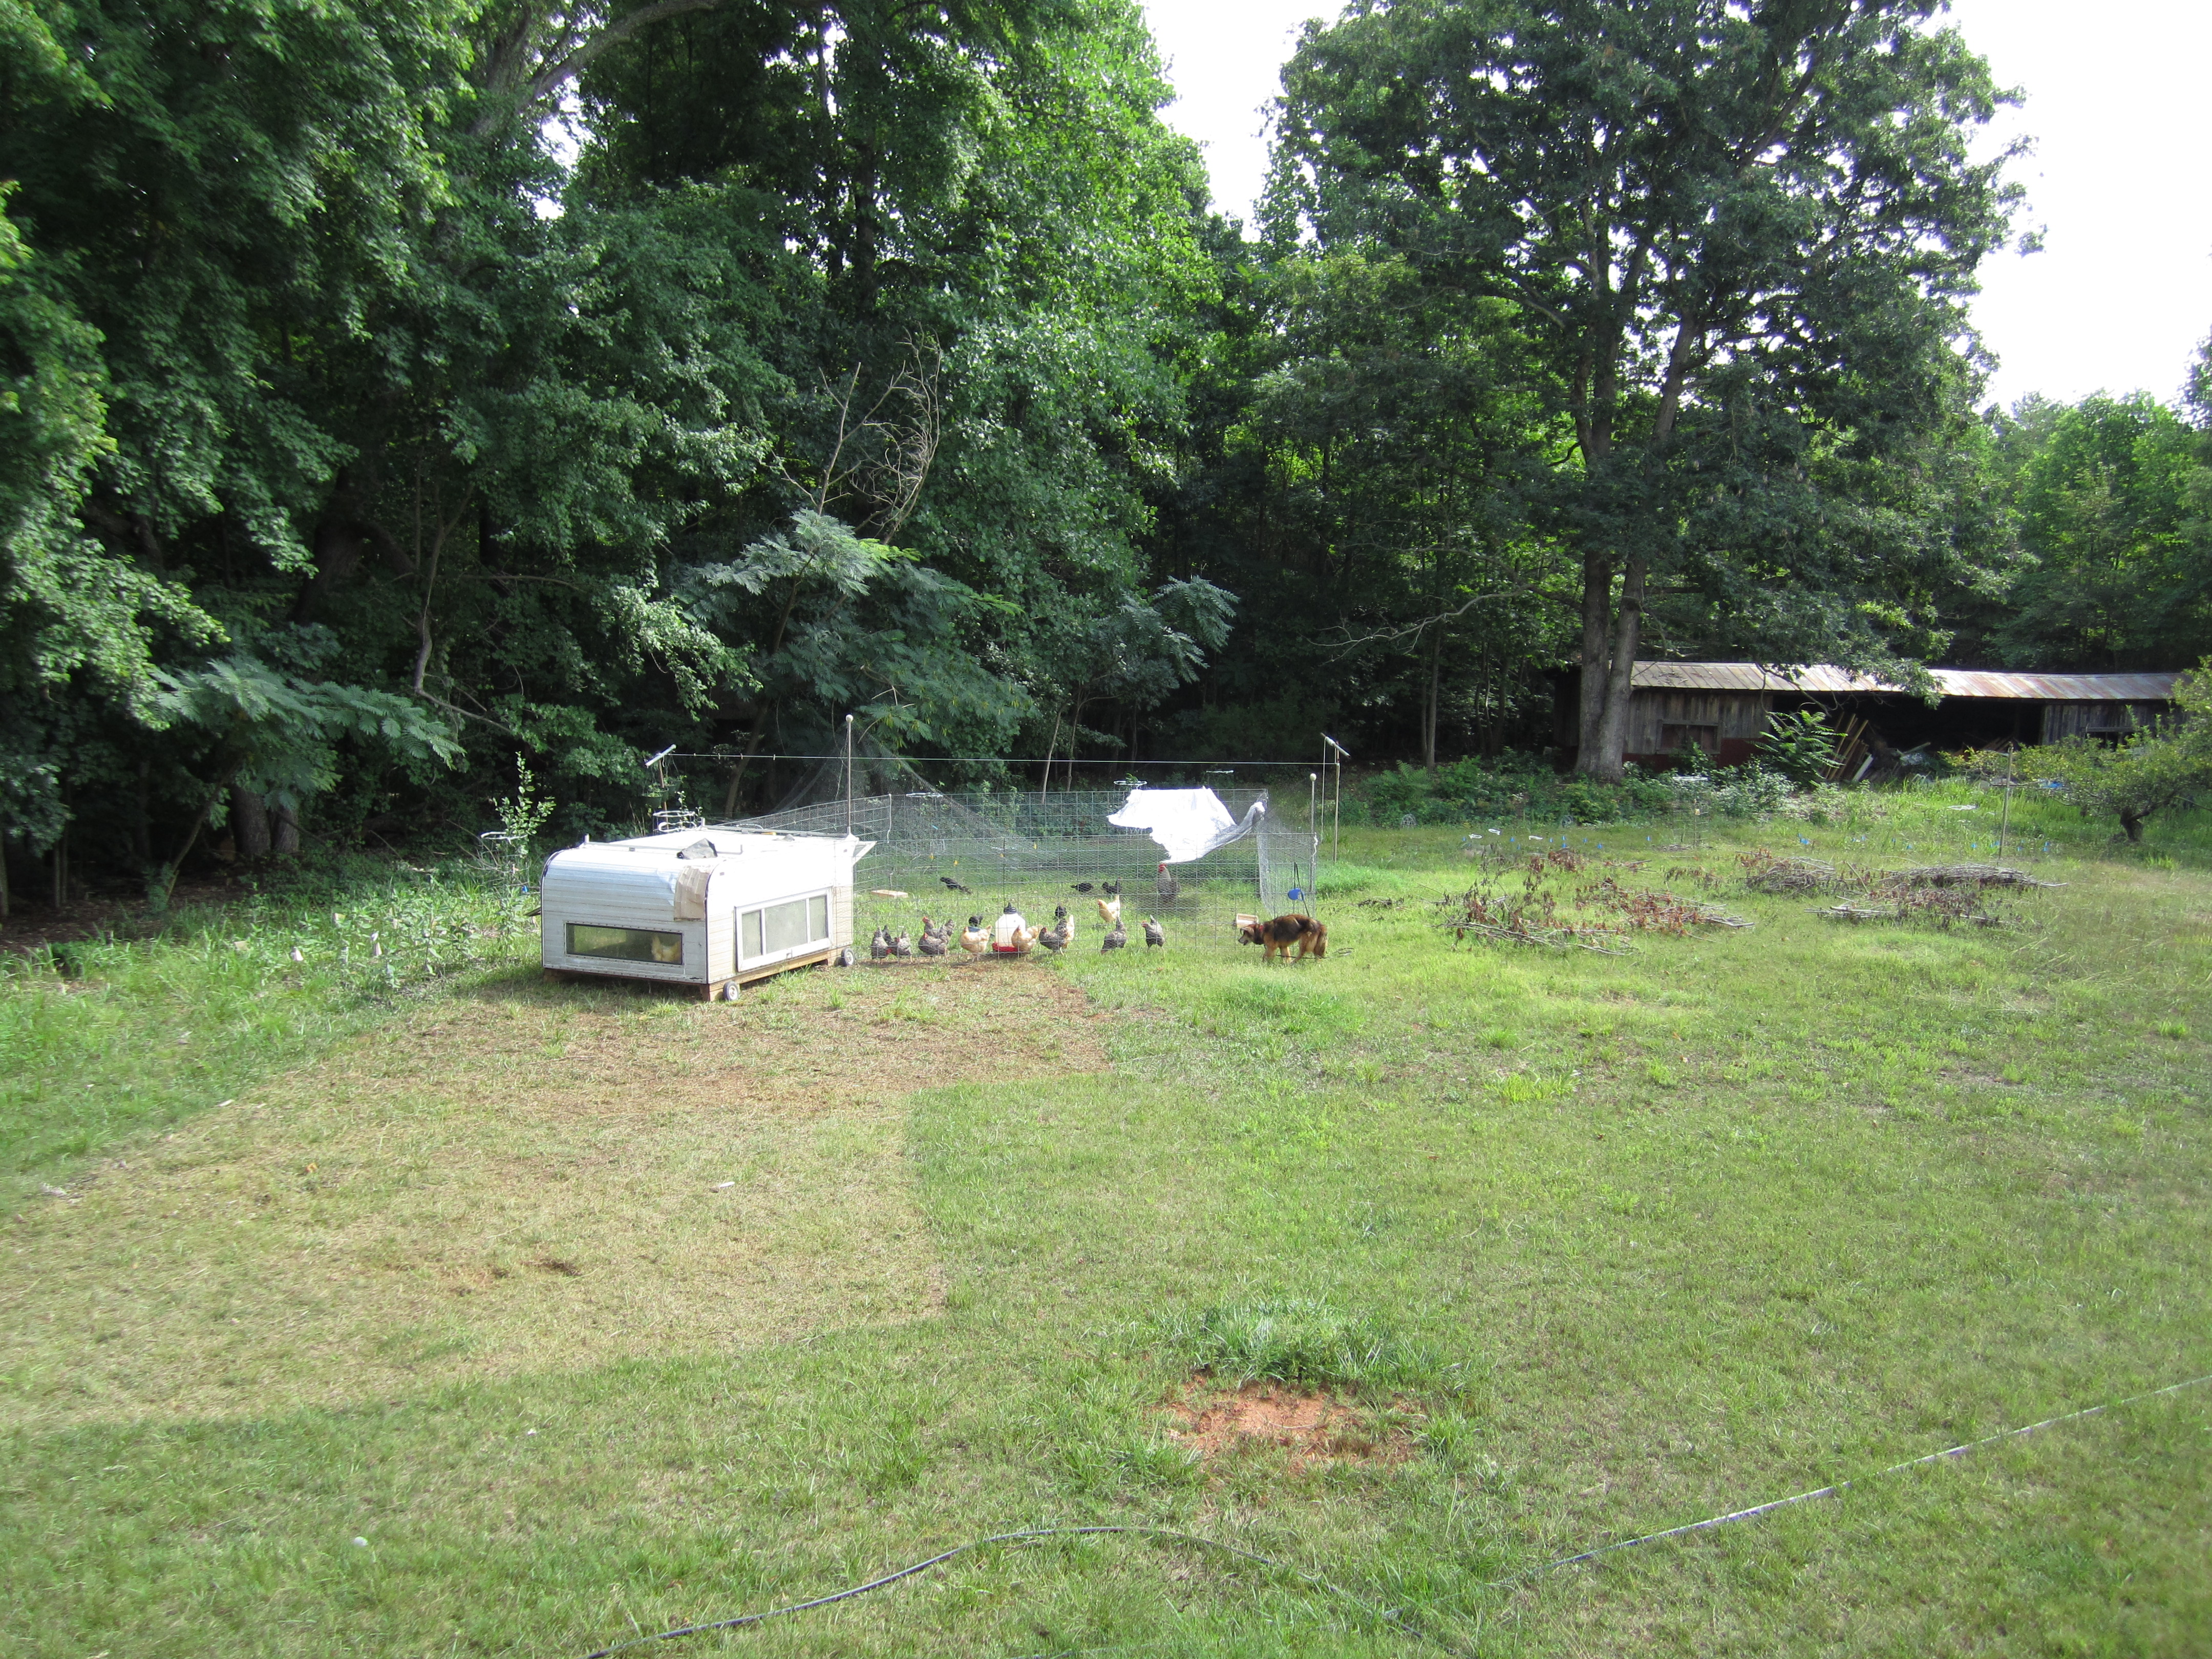
the new mobile coop and paddock system is easier to move, which means we move it more often
However, thanks to the redesign, moving the chickens is now a much easier proposition. It can be done at any time of day, and is now a 1 man job. Compare this to the old system where we had to wait until dusk, take down the entire thing, pull up posts, roll up the bird netting, put up the posts and panels, zip tie everything, by this point it was dark, we were frustrated, and we still had to untangle the bird netting and fix any rips that had happened. Not fun, and not a chore we looked forward to. This meant that we often put off moving the chickens, and the would end up staying in the same spot for longer than two weeks. This lead to overgrazing, compaction, and further frustration.
Our new system easily slides to a new spot, and because it is smaller (16 ft. by 16 ft.), it fits easier into tight spaces around garden beds and fruit trees. The hawk netting does not need to come off, there are no posts, and this can all be done at any time of the day. I have already done it twice, and at this rate the chickens will have access to 300% more pasture in 2 weeks than before. This allows us to more easily monitor their behavior and impact on the land, and more efficiently harness their energy toward improving our land, and avoid the harm that comes from overgrazing, all while they enjoy more grass, weeds, and bugs than ever before.
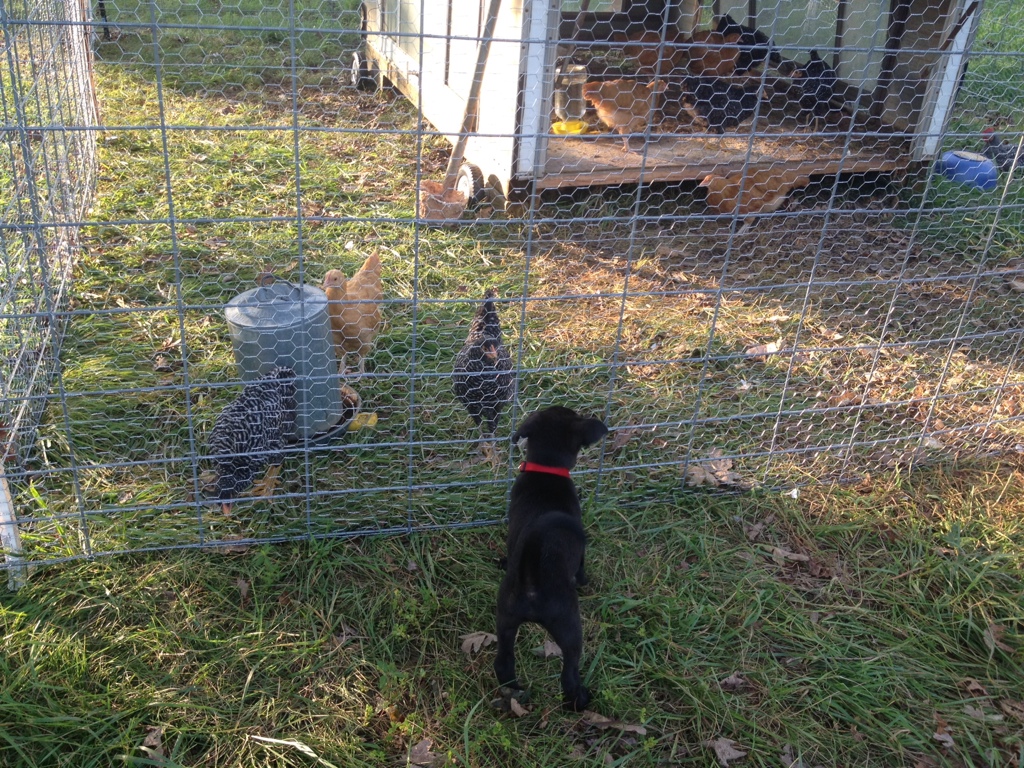
bridey watching the chickens in their new paddock
I think we learned a valuable lesson; that if you design an aspect of your life to be difficult, you will dread and avoid it, and when it doesn’t get done, it becomes harder and harder to catch up. This starts a cycle of stress and frustration that is hard to beat. However, if we design these things so that are easily accomplished, we are more likely to do them. This fits in with the permaculture concept of zones, where you design the elements of your property that need attention everyday (vegetable gardens, livestock, etc.) to be closer to your house where you constantly see and interact with them. For example, if you have to milk goats everyday, don’t put the milking area half a mile away, down a steep gully and then up a rocky hill. If you wan’t to remember to take a multivitamin everyday, don’t put the vitamins in that cabinet that you can’t reach unless you get that stool that’s in the garage.
It’s a simple concept, but we all have things that for one reason or another we have made harder for ourselves, whether it’s on a homestead or not. Some of things we can’t change, but the other ones should be designed to fit into our life in a way that enhances it, not make it harder. With thoughtful design, things tend to fit together easier and our life systems function more efficiently, giving us more time to focus on whatever it is we want to focus on, be it writing, working, gardening, or eating delicious eggs from pasture raised chickens.
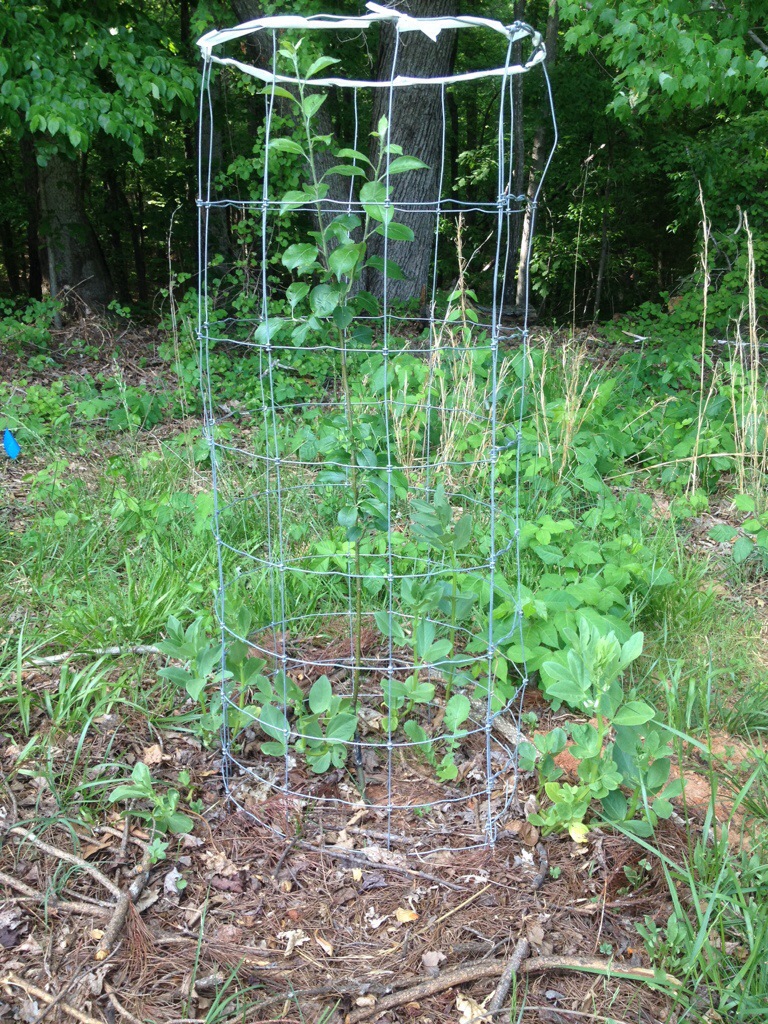
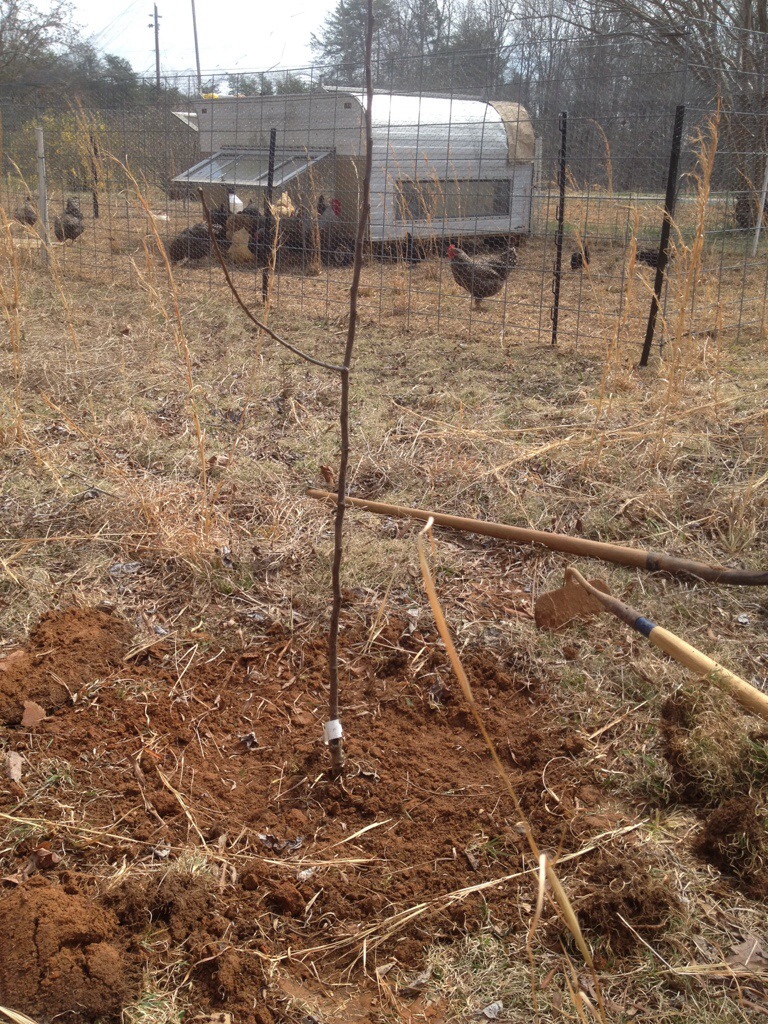
hilariously, our “backyard” chickens have never actually been on any of our backyard pasture. for some reason, we started them in the front yard and they never ran out of green spaces to occupy. now, though, after a year of having them, they’ve made their journey to the back. and with that journey came a new way of piecing together their fencing. instead of the usual 6 cattle panels that made up their old chicken pen, we’re only using 4 of those panels, permanently tied together on three of the four corners just like with our goose pen. we also are not rolling their house inside the pen, instead using it as a fifth side that the two unattached fence corners can lean against. the space between the front wheels of the house and the house itself act as perfect slots for holding the 2 fence pieces in place. one of those connections act as the gate, and all you have to do to get in is lift the fence up and over the wheel and walk on in. bird netting is still draped over the top to deter hawks and escaped chickens, and a metal bar is leaned up against the base of the house to prevent small bantams from escaping that way. we have 2 wooden poles with tennis balls attached to keep the netting up higher and we remove when we move the fence so that the netting won’t get too taut from pulling and rip.

our backyard chickens get a newly designed pen!
some of our reason for making this change are:
our chickens, enjoying their fresh grass.
.:.
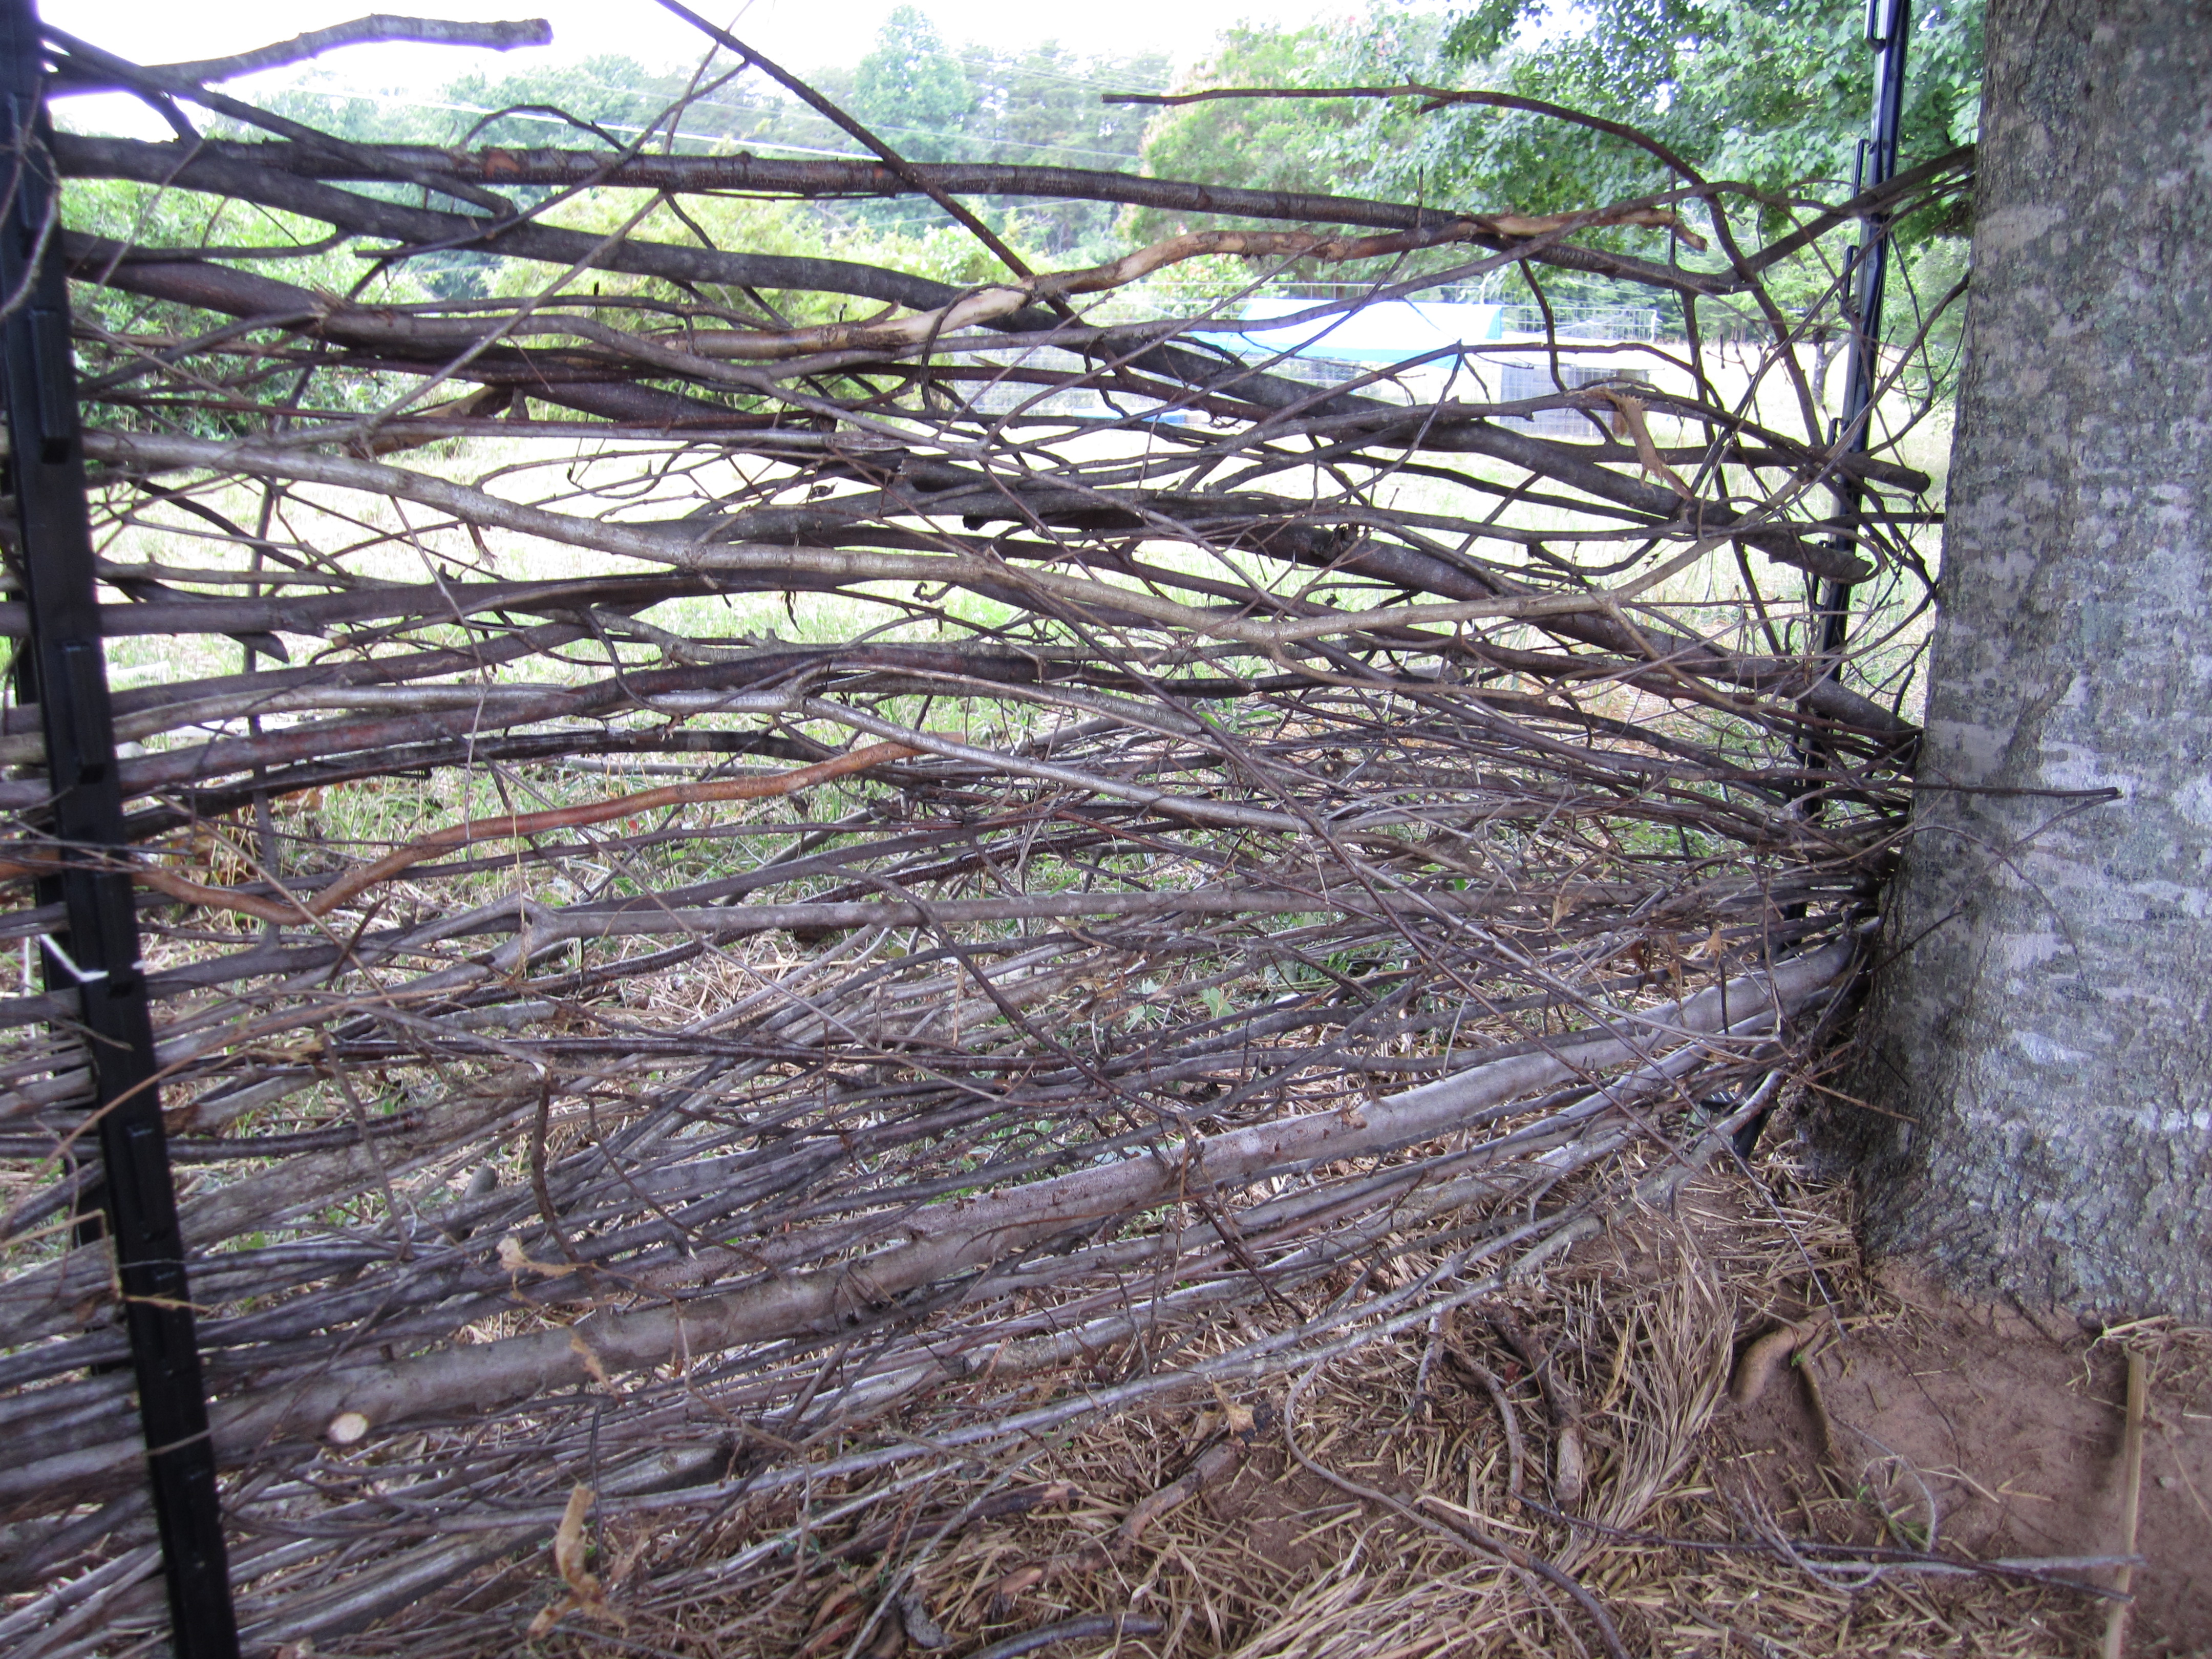
Part of the process of clearing land is dealing with the abundance of small trees, branches and other woody material. On our property, we try to utilize as much of the wood as possible, either by burying the wood to make hugelkulture raised beds, dropping it as rough mulch, piling it in gullies to slow erosion, or as firewood. But the other day we came up with another way to use this surplus…wattle fencing.
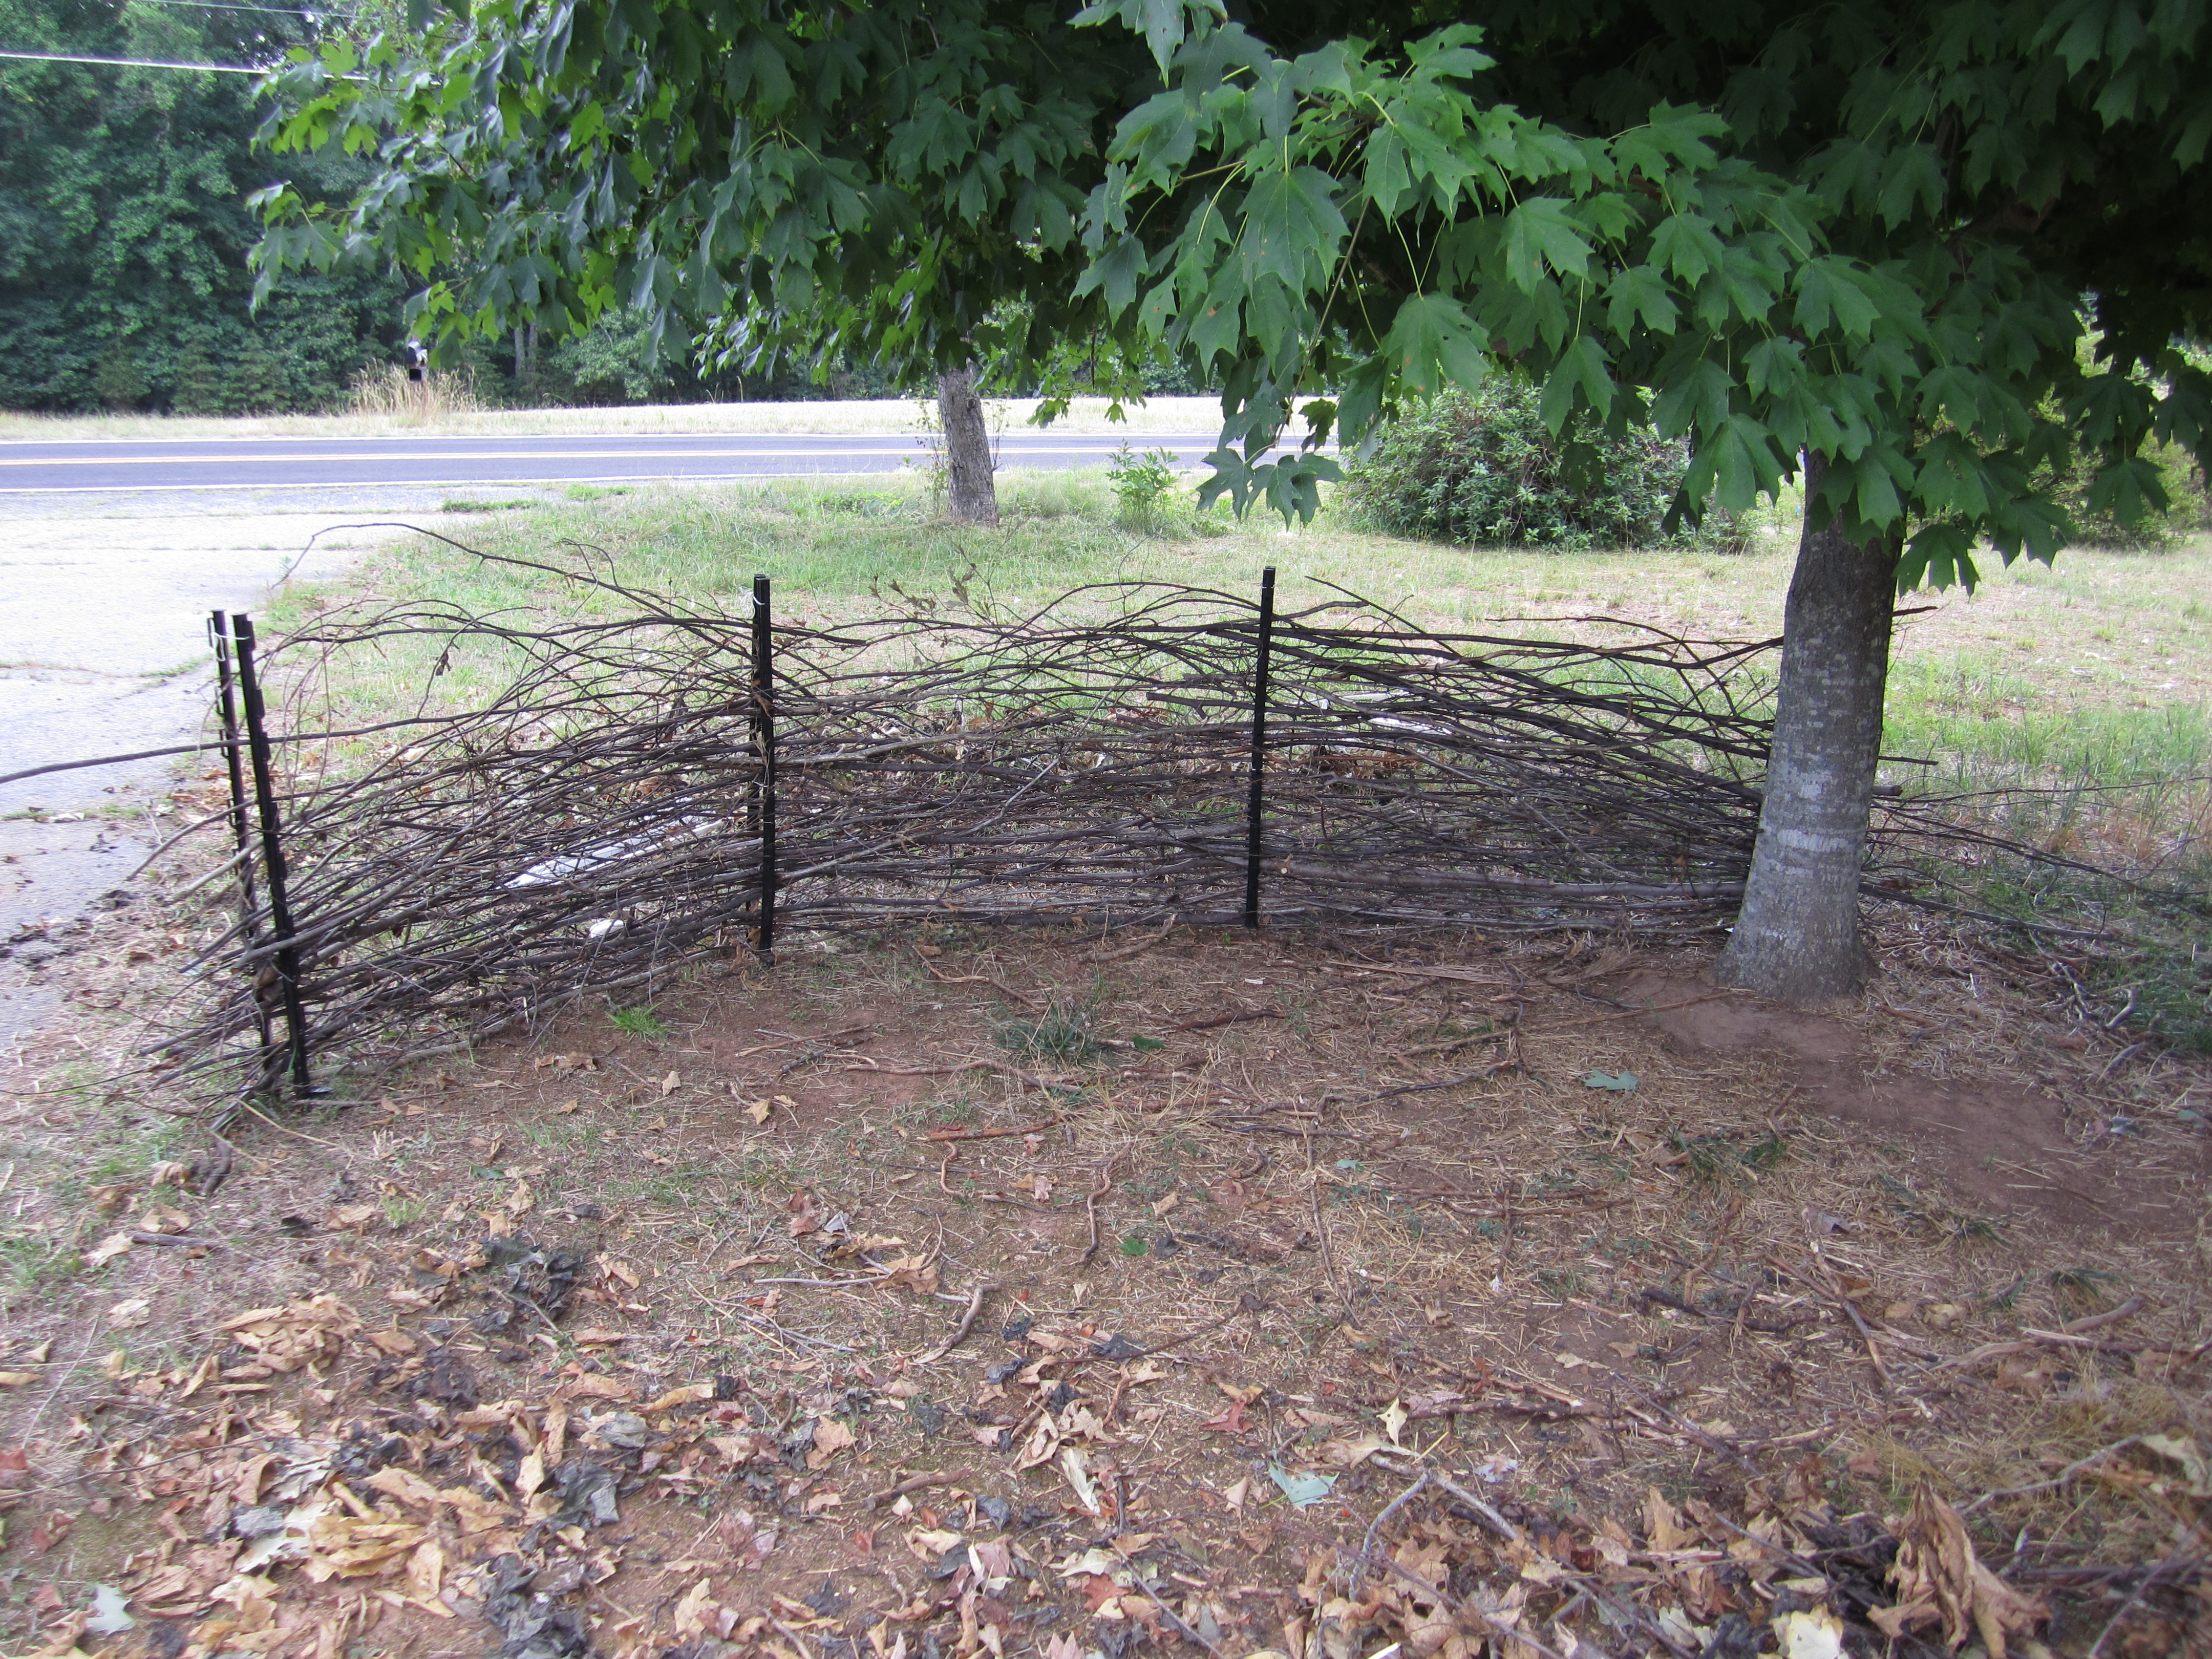
Wattle fencing is an easy and elegant way to re-purpose waste wood for good use.
Wattle fencing is an ancient technique that farmers, peasants, and the rest of humanity have utilized for hundreds of years. At it’s most basic level, it involves weaving long, thin pieces of supple wood around upright posts to form a solid fence. We decided that a wattle fence would be a great way to make an attractive dog enclosure for Bridey in our front yard under a nice shady maple tree. Much more appealing than the chicken wire paddock she has now.
The natural variation among the different sizes and types of wood looks great in our homemade wattle fence.
Traditionally, coppiced woods like hazel, willow, and chestnut were used for both the vertical poles and the horizontal weavers, but we used the mixture of woods that we had piled up from our recent clearings, mainly oak, poplar, tree of heaven, and some maple. For uprights, we used fiberglass step-in-posts that are used for electric fencing and portable poultry netting. We decided on a circular shape that matched the shadiest area beneath the tree, and placed pairs of posts a few inches apart, every 4-5 ft to hold the fence together. We then slid the long pieces of wood between the pairs of posts, following the natural curve of the branches, and weaving the supple twigs together to form a pretty weave that is simple, strong, and sturdy.
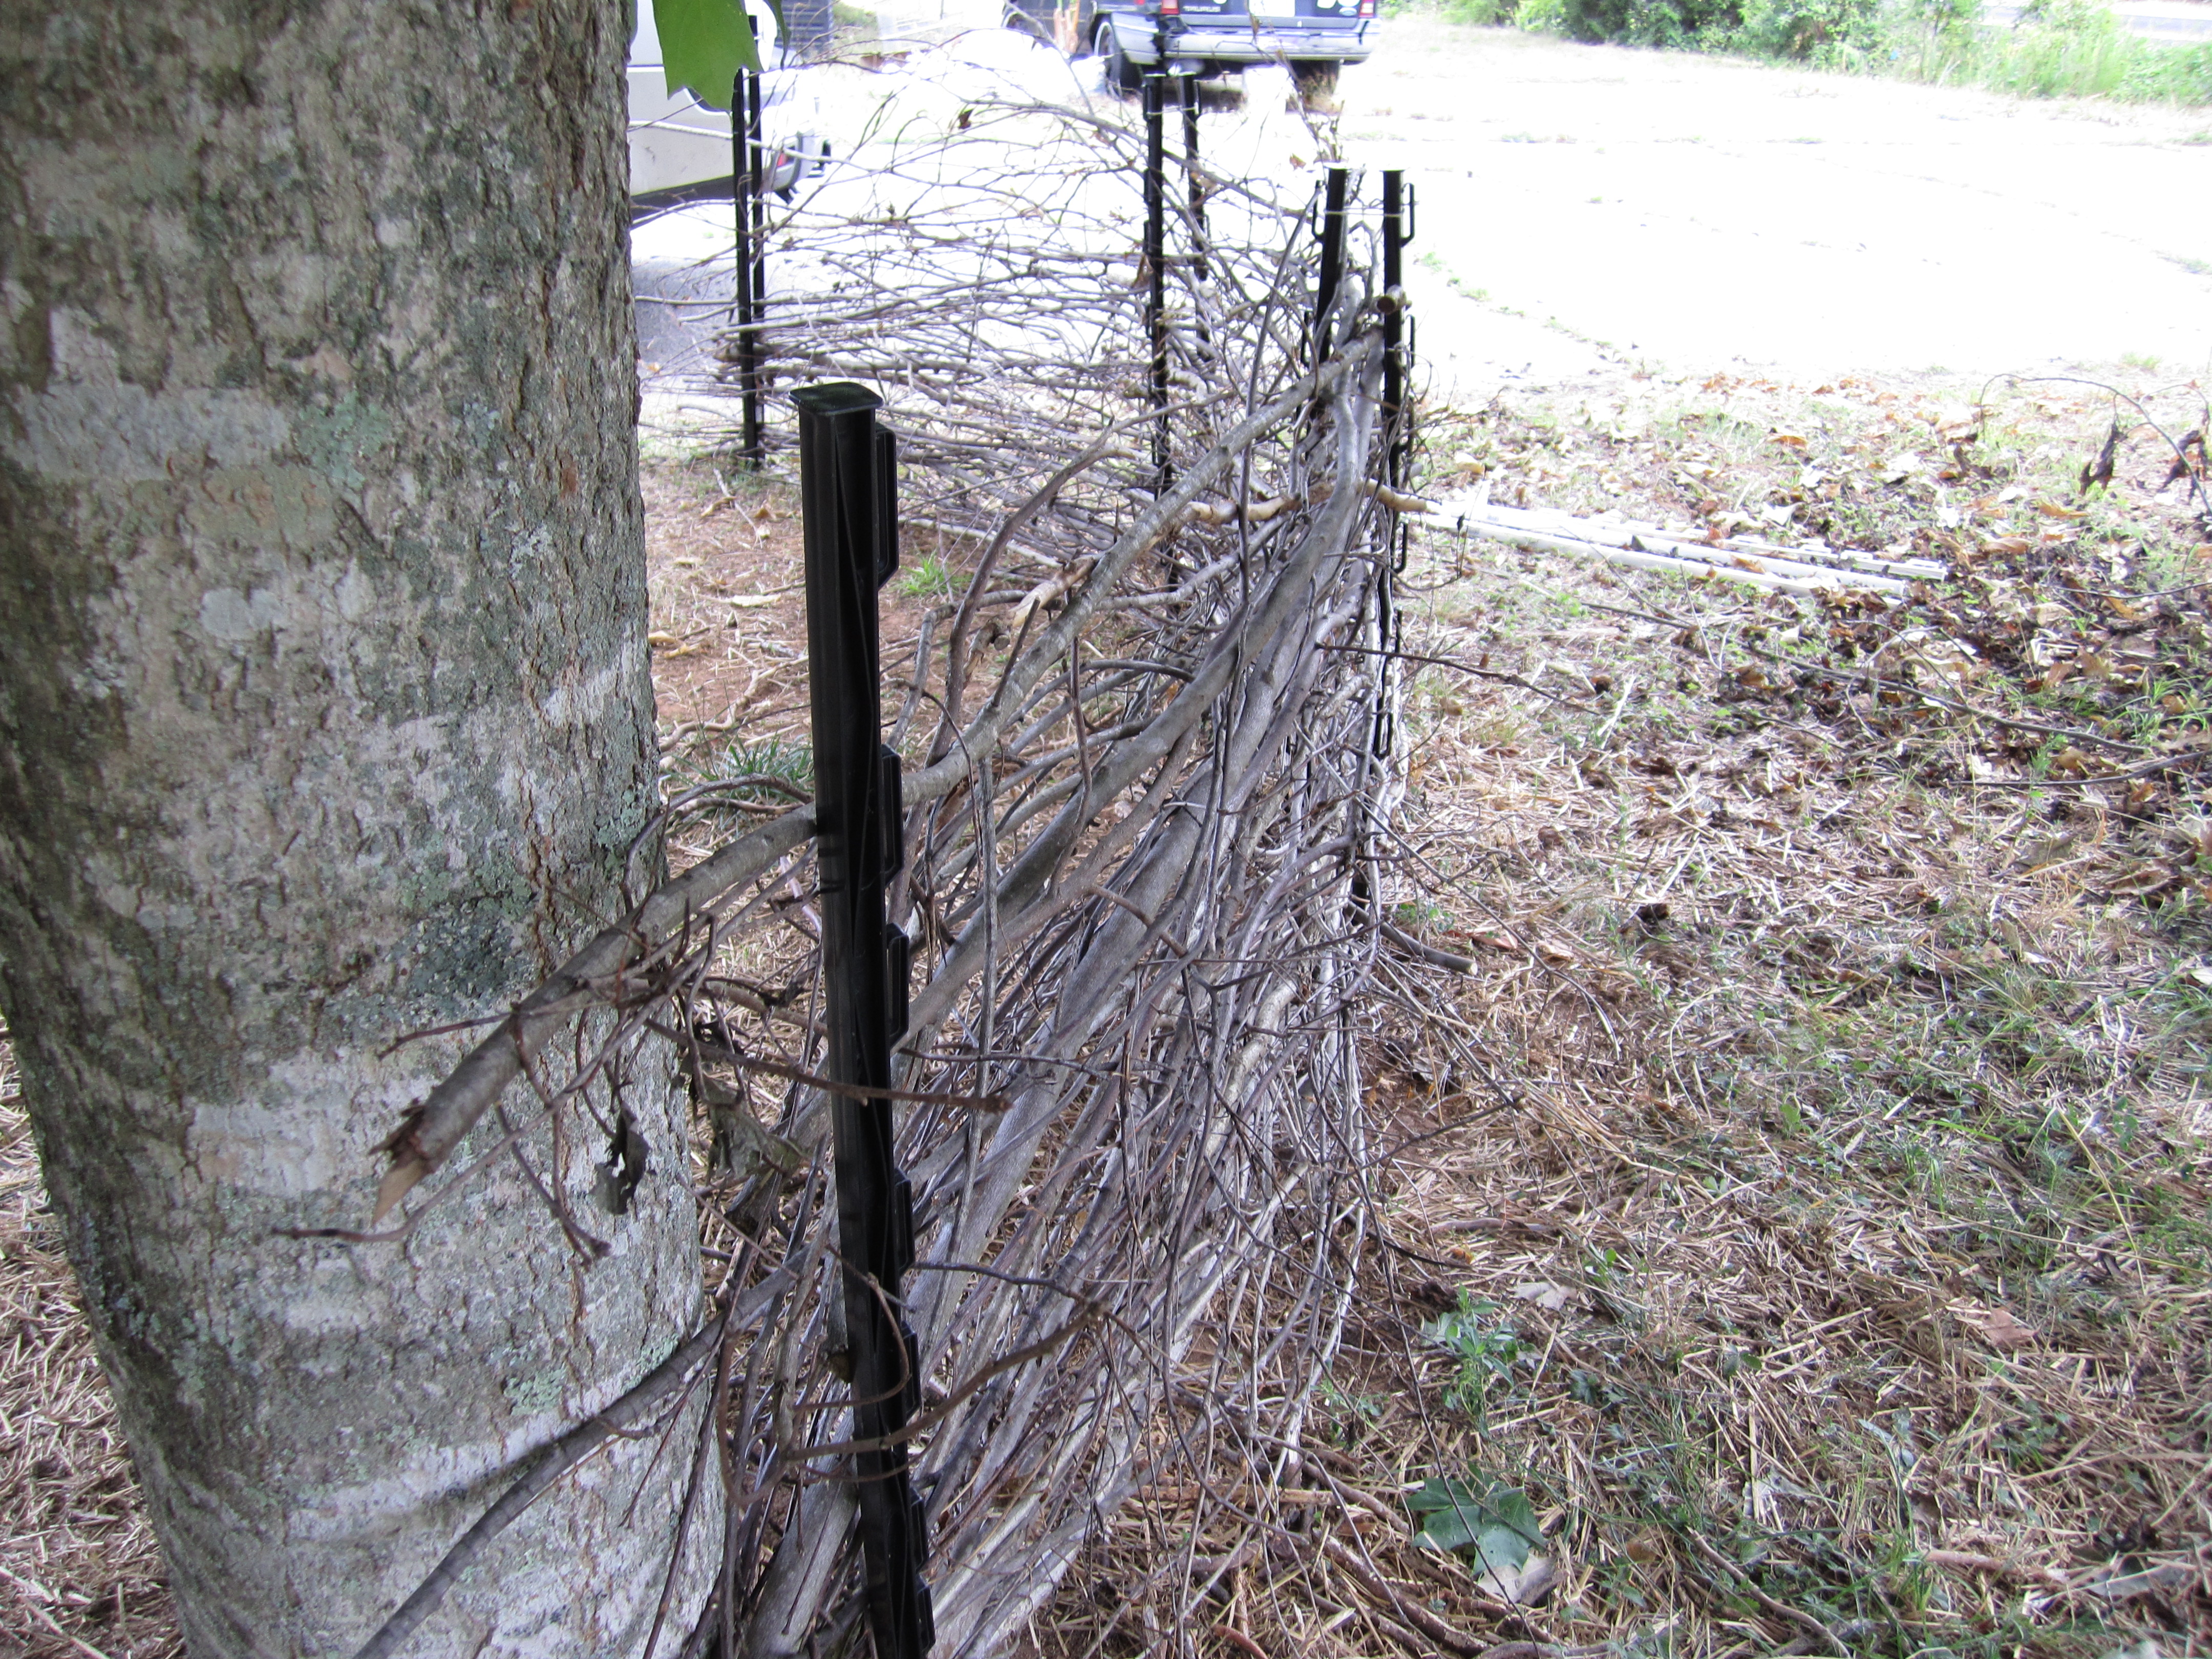
We used step in posts to keep the wood in place, but next time we will probably just use wooden posts.
This is actually a lot of fun, and is half puzzle, half art project. Our mix of woods makes for a rustic look, and we are already planning where else we can build some wattle fencing, but first we’ll have to finish Bridey’s new dog pen. In the future we will definitely use wooden posts for a more authentic feel, most likely digging with a post-hole digger and setting the uprights in place like corner posts. Either way, wattle fencing is an age old technique, but a beautiful one that modern homesteaders should consider when designing and laying out their property.
What do you do with your food scraps? You know, those tiny bits of leftovers, peels, and stems. Some people toss them on the compost pile as a decent source of nitrogen, or in the trash, but we are lucky enough to have a flock of 28 avian composters right outside our door. Our chickens readily devour anything from pizza to outer cabbage leaves from the garden. In order to separate these nutritious treats from the rest of our waste, we employ a simply, yet effective strategy.The chicken bucket.
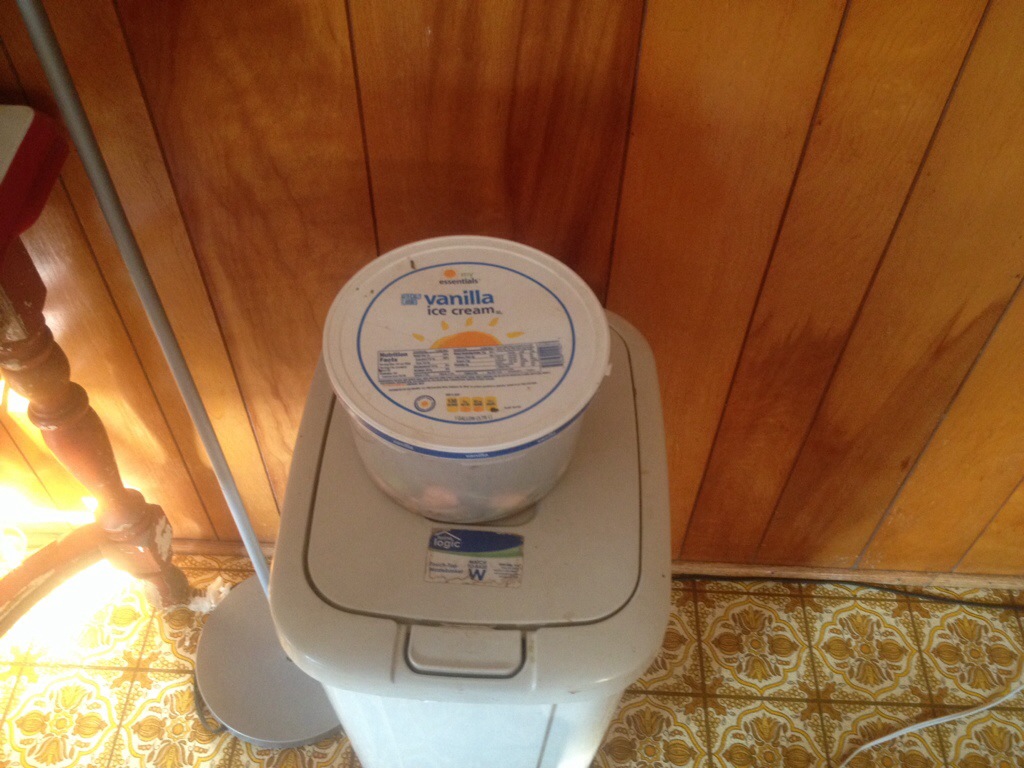
Old ice cream containers make great chicken buckets for holding and transporting food scraps.
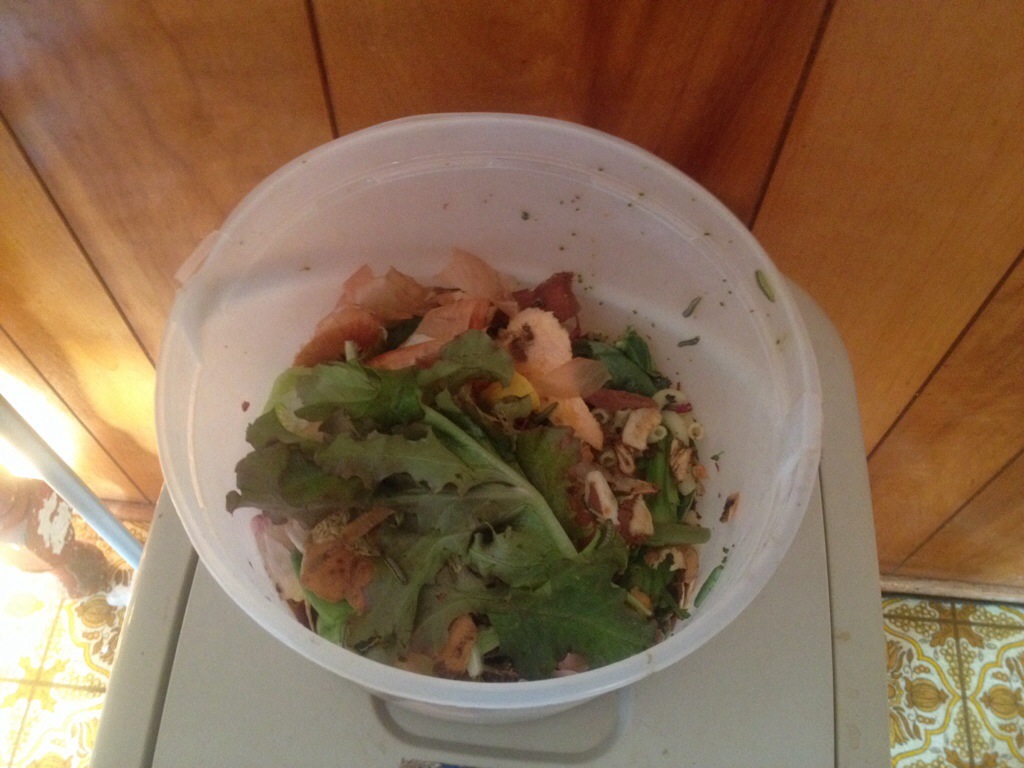
Almost everything except coffee grounds and eggshells go into the chicken bucket.
We have found that an old 1 gallon, plastic ice cream container works perfectly as a chicken bucket. The cheap, store brand version is best for the application. It has a handle that makes for easy transport, is made of rigid plastic that holds up at least 6 months, and is easily rinsed and cleaned. Right now we have our chicken bucket on top of the trash, and any time we peel sweet potatoes, snap green beans, or have leftovers that are just a little too old for our taste, we dump them in the bucket. Then, about once every few days, we dump the contents into the chicken yard and stand back and watch as they turn our leftovers and waste into high quality eggs. What do you do with your food scraps? Let us know in the comments!
I wrote yesterday on how to plant fruit trees and it got me thinking about the potential value and return on investment that a food forest, or even just 1 fruit tree can provide. Today I want to look at what an apple tree can yield during it’s lifespan, and maybe try and persuade you that planting one just may be the best investment opportunity around.
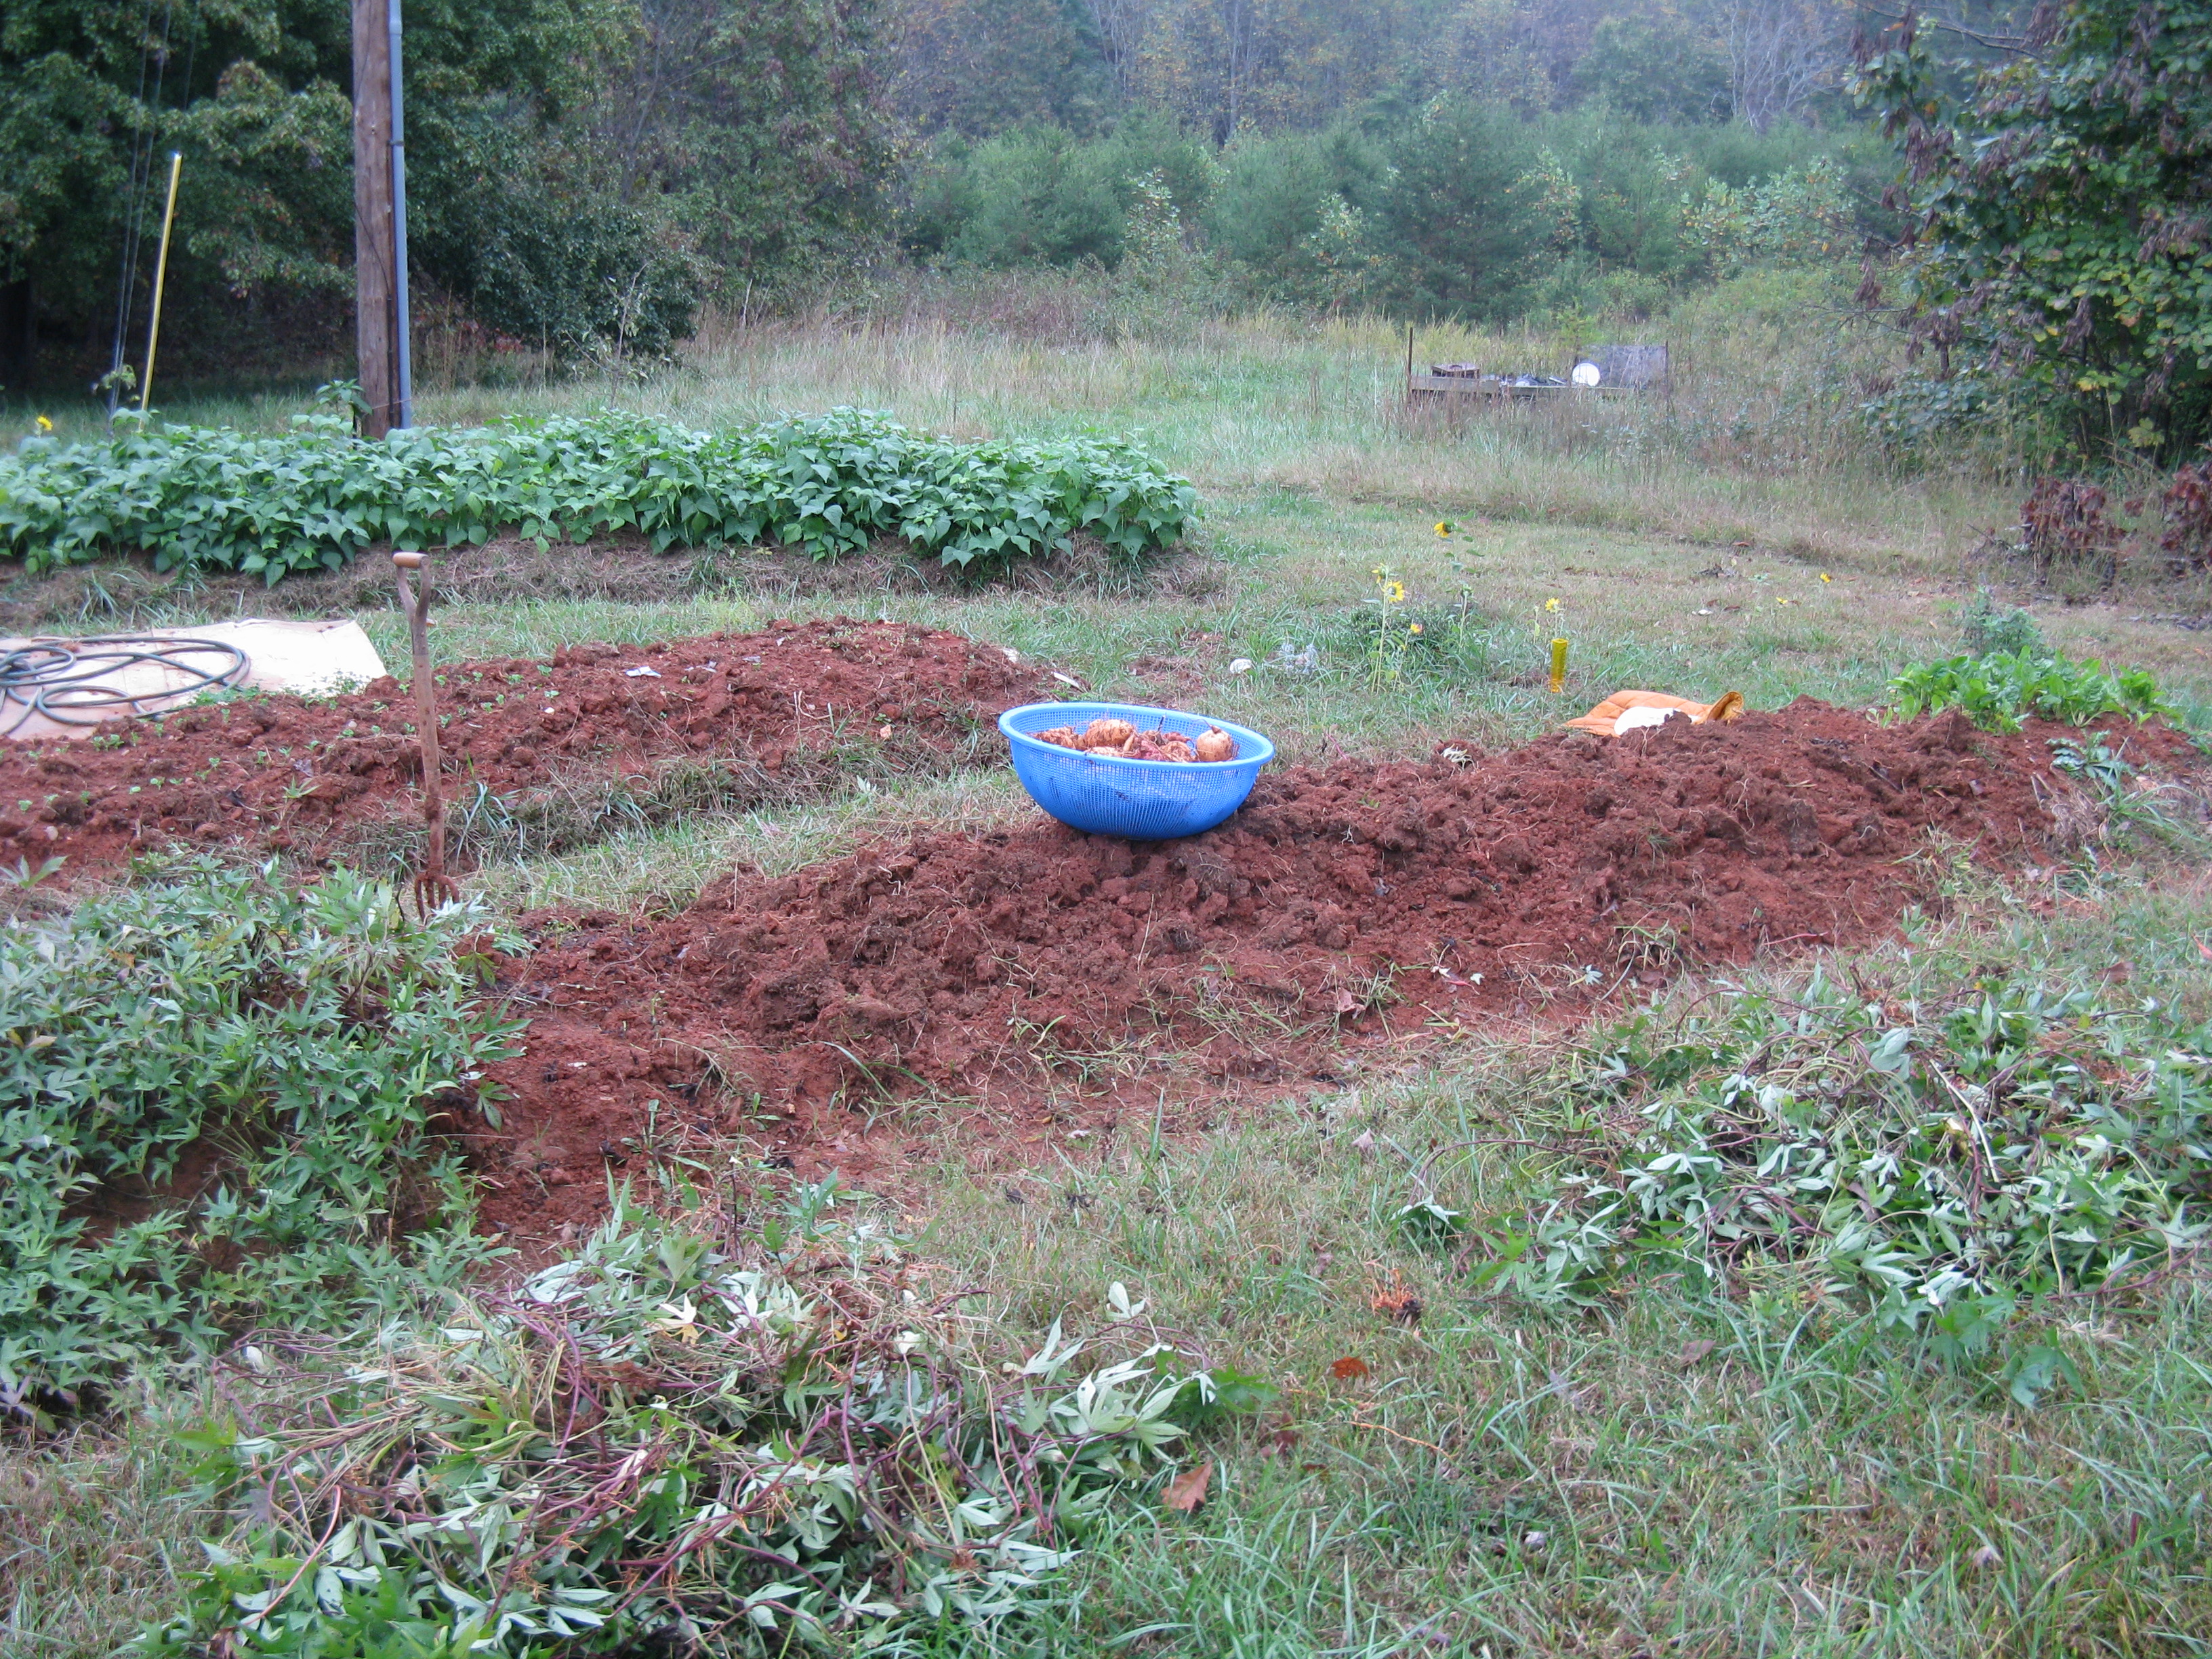
One of our heritage apple trees with a tomato cage to protect from deer, and fava beans planted around it to produce mulch and fix nitrogen.
Okay. Let’s look at a semi-dwarf apple tree, like the William’s Favorite apple that I showed in the pictures of yesterday’s post. A semi-dwarf apple tree will cost anywhere from 15-40 dollars and you can definitely find a high quality, heritage variety for under 30 dollars. After planting, you can expect some yield in 2 years, but 3-5 years is when this tree will really hit it’s stride.
How much does a semi-dwarf apple tree produce? Around 4-7 bushels of apples per year. A bushel of apples is about 45 pounds, so that makes 180-325 pounds of apples every year. That’s a lot of apples. It’s actually 500-880 medium-sized apples, and would likely satisfy your “apple a day”.
How much are these apples worth? Well, first off, go down to a store and try to buy a beyond organic, no spray William’s Favorite apple. How much is it? It doesn’t exist. You can’t buy it at a store, but we’ll substitute organic apples for our calculations. So, organic apples run anywhere from 1.99/lb. to 3.99/lb., but I’ll use the lower number to be on the safe side. So, at 2 dollars per pound, 1 tree will produce $360-650 worth of apples per year.
But what can you do with hundreds of pounds of apples? Well, you could make homemade apple pie, 60 -100 pies per tree actually.
What about cider? Did you know that President John Adams would drink a tankard of hard cider every morning to prevent gas? Well, your mature apple tree can produce enough apples to make 12-24 gallons of cider per year. That’s 128-256 bottles, or 21-42 6 packs of craft cider. If you’re not a cider drinker, I’ll tell you that a 6 pack of quality cider costs about 10 bucks, and most of these are made from the rejects of the fresh fruit market.
Now, for how long can you expect this investment to return? While standard apple trees, those grown on full size rootstocks, can easily live 100 years, semi-dwarf apples typically live from 20-25 years. So your $30 apple tree will produce around 5000 pounds of apples, enough to make 1500 apple pies, or 600 6 packs of apple cider. And thanks to inflation, who knows how much these will cost in the next 25 years.
I’d say that’s a pretty good deal. And after the first year, once the tree is established, it will require very little maintenance. Now if this 1 tree is surrounded by support species plants that fix nitrogen, attract pollinators, and provide mulch and predatory insect habitat, and maybe a small swale to hydrate the soil and reduce water needs, then this 1 tree becomes a self-supporting, and highly valuable aspect of your property.
And while you can drive out right now and buy a 2-3 year old apple tree to plant, you cannot buy a 10 year old tree that is in full production, with a root system 20 feet deep and capable of surviving drought like no corn field or garden can. All of these, and many more, are reasons to consider planting a fruit tree or two on your property. It’s not that hard, and can be an extremely profitable investment.
I thought it was time to lay out a post about some of the goals, hopes, and wishes we have about our homesteading endeavor here at Kuska Wiñasun Homestead. We’ve been out here in the country for over a year now, and sometimes I talk with people and I feel like they misunderstand our motivations and goals for homesteading. Nothing major, just some minor misconceptions.
First off, we aren’t trying to grow 100% of our food, medicine, fuel and clothes. We go to the grocery store about as much as any other family, and we are not burning bio-diesel made from cattails in our trucks to get there. We are hooked up to the grid, and watch movies, t.v. shows (my favorite is Survivor), and occasionally blog on the internet. Now, that’s not to say that we aren’t actively trying to reduce all of these things, except the blogging, and turn our homestead from a consumer to a producer, but we realize that achieving 100% self sufficiency is close to impossible, and not desirable
we try to produce as much as possible from our garden because it is the healthiest food money can’t buy
We do have a garden, and we try to grow as much produce as possible without the use of toxic chemicals. We preserve some of this food if we have surpluses, either by freezing, fermenting, or in the case of sweet potatoes and other root crops, storing in the guest bedroom. This spring we are expanding both our annual vegetable gardens, and our perennial based food forest in the hopes of producing more of our own fruits and vegetables.
We do this because you cannot buy this kind of quality at the store. This fresh, and completely free from any, whether organically certified by the USDA or not, toxic herbicides, insecticides, fertilizers and fungicides. We grow varieties of things that aren’t available in stores, and some fruits and vegetables so rare most people haven’t heard of them (loquats, seaberry, paw paw etc.).
We want to eat stuff that is actually good and we try to avoid stuff that isn’t. But we still eat out. We order pizza every once in a while, or stop at a fast food joint even though we know it’s crap. We know that soda made from GMO high fructose corn syrup is less than ideal, but every once in a while, we’ll crack open a can of coke.
We aren’t aiming for perfection because perfect is the enemy of good. Our goal is live healthy and enjoy life. To raise a family out here, to connect with our community (we need to get better here), and to learn a whole lotta stuff along the way. An all or nothing approach won’t get us very far, so join us, as we grow together on the path towards better food, better life, and self reliance. Let us know your homestead goals, and where you are trying to make the biggest difference in your life.
It’s been a little over a year since we moved onto our homestead in rural Stokes County, and while it has been amazing and one of the best decisions we have ever made, there were/are some things that took some getting used to. Life in the country is different than life in a city or town, and some of the things that we had come to take for granted, or depend on, are either not available in the country, or just inconvenient. So, I figured I’d jot some things down that we have experienced so far, to help prepare anyone who might be considering taking the leap to move out into the country.
Garbage and Trash
Our county does not provide a trash pickup service. Most rural counties do not, as the numbers don’t work out when you consider the low population densities on our county roads. While this keeps our taxes down, it means that we have to think about our waste products in a different way.
We have found that we produce less waste now than we did in the city, because all of our leftovers and food scraps get fed to our chickens. This also makes our trash less stinky, which is nice. It also diversifies our chickens diet, which makes their waste a higher quality product that can be cycled back into our farm.
Bolt and the garbage disposals.
But we still have trash to deal with, and for the moment, we are not signed up with a private waste disposal company. Instead, we fill up a few trash bags at a time, put them into our truck, and take them down to one of the county “green box” sites, where we can dump our trash and our recyclables for free. The closest site is maybe 5 miles away, right on the way to and from our city jobs, so this is not a very big hassle.
Septic Systems and Well Water
We have a septic system for our other wastes, and a well for our drinking water. We got both inspected and tested before closing on the homestead (very important), and have not had any problems so far.
An important thing to keep in mind with septic tanks is that the function by bacterial digestion, and that chlorinated bleach and other harsh chemicals can kill your septic systems bacteria, causing it to function inefficiently or worse. We avoid these products, and try to use the most natural and septic approved products we can find, but it does make shopping for detergents more difficult. We still haven’t settled completely on any brand, so feel free to offer any suggestions.
They sell packs of beneficial microbes that boost your septic systems health, but we haven’t used any yet. Our tank was pumped when we moved in, so I’m hoping that by not flushing stupid stuff down our drains, promoting good microbes, and being water conscience, we may not have to have it pumped for a long time. regardless, it’s a simple, and affordable process that only takes a respectable septic pumping company an hour or so to complete.
Our well has been great, providing us with great tasting, chemical free water that city water can’t hold a candle to. However, because it is powered by our electricity, it is dependent on the power being on. This isn’t a huge deal, but is something to consider when preparing for storms and the like.
Drive Times and Distances
We are used to it now, but things are just further away when you live in the country. The nearest grocery store is 15 min. away, which isn’t that far, but is far enough to make us try and get all of shopping done on our way back from work. Our city jobs are almost an hour away each way, which adds up both in time, and gas money. I don’t mind the drive, but it is definitely something to consider when choosing your homestead, or making the move to the country.

Living in the country means more driving, but it’s nothing Bolt can’t handle.
It took us almost a year to find any restaurant that would deliver to us, but we finally found one, a pizza place in Walnut Cove. We are right on the edge of their range, thankfully.
All of these things just require an extra level of planning, and time management. This is especially critical when we are extra busy, or already feel like daylight is in short supply to get all of the chores accomplished.
There are many other things that are different from city living, but most come down to the common theme that living in the country requires you to plan a little more, be more prepared, and take certain matters into your own hands. This isn’t a bad thing, just something to consider when you make the move the country.
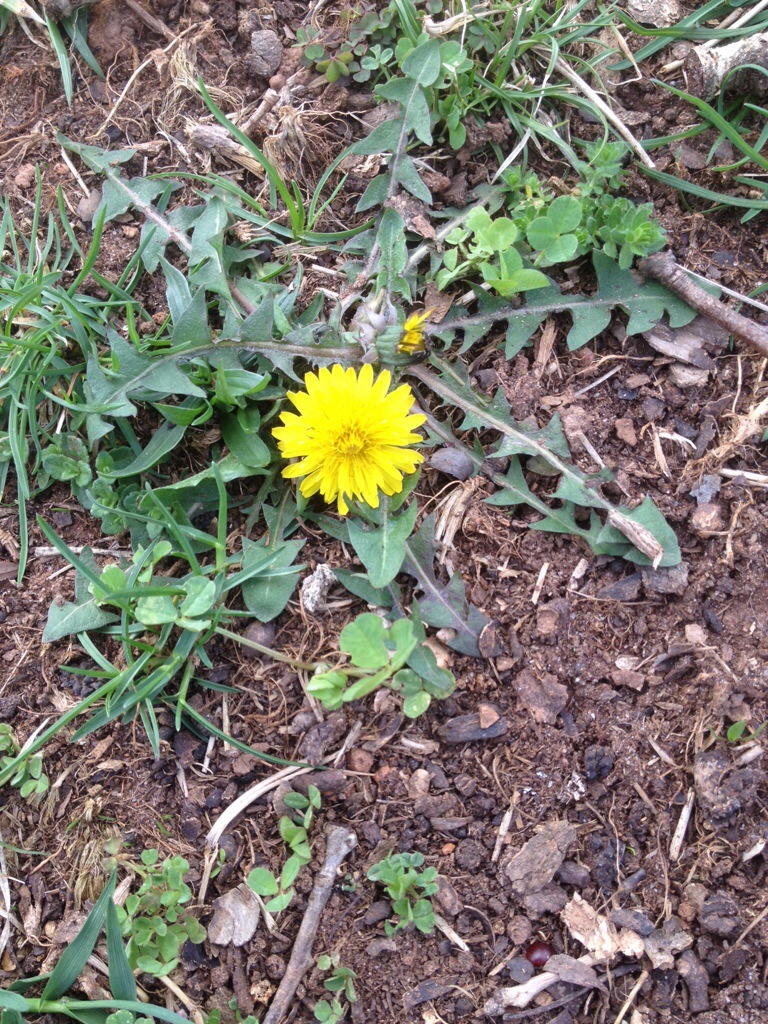
Dandelions are here! One of the most useful and nutritious plants you can find.
Spring has officially arrived at Kuska Wiñasun Homestead! The very first dandelion flower has sprung onto our land and I couldn’t be happier. It came up in the first place we housed our portable chicken coop. I’ve seen dandelions popping up in Greensboro for the last week, mainly in parking lots and sidewalk nature strips, and I couldn’t wait for them to start blooming in our lawn, sending their deep tap roots down deep into the soil to pull up all sorts of minerals and nutrients.
Because our homestead is some 30 miles north of Greensboro and is at a higher elevation too, our climate is slightly cooler than the sprawling NC Piedmont city. All that concrete also has an effect on temperatures, and so we generally lag a few days behind in Spring, but we never gave up hope!
The chickens checking out a newly planted “William’s Favorite” apple tree in our front yard.
But the dandelions are back, and that means spring. Spring is a busy time for any homesteading family, and we are no exception. We’ve planted 16 new fruit trees so far (more on that soon), and between our off farm jobs and planning our wedding, we’ve been keeping busy. Emma and I are out almost every day until it’s just too dark to see, taking advantage of the long days and perfect weather, and planting everything from cabbage and broccoli to comfrey and clover.
Spring is a busy time, but it’s a welcome change to the short days of winter. The solstice approaches, and soon summer will come, bringing with it the humid nights, open windows, and chorus of pond frogs we almost forgot about. But for now, we’ll focus on spring and the delicious and nutritious treat of dandelion greens.
i’m excited to report that we’ve officially begun our magical, mushroom adventure! this weekend my father and i cut 50 oak logs to serve as mushroom homes for the next 5 years!
we cut both white and red oak logs, to compare them as growing mediums and for the visual variety. the mushrooms that we are growing this year love oaks the best! we made both 3-foot and 4-foot logs, based on diameter of the limb/trunks (i have to be able to lift each of them for soaking in the future!). as luck would have it, 24 of the logs ended up as 3-footers and 26 as 4-footers. talk about balance!
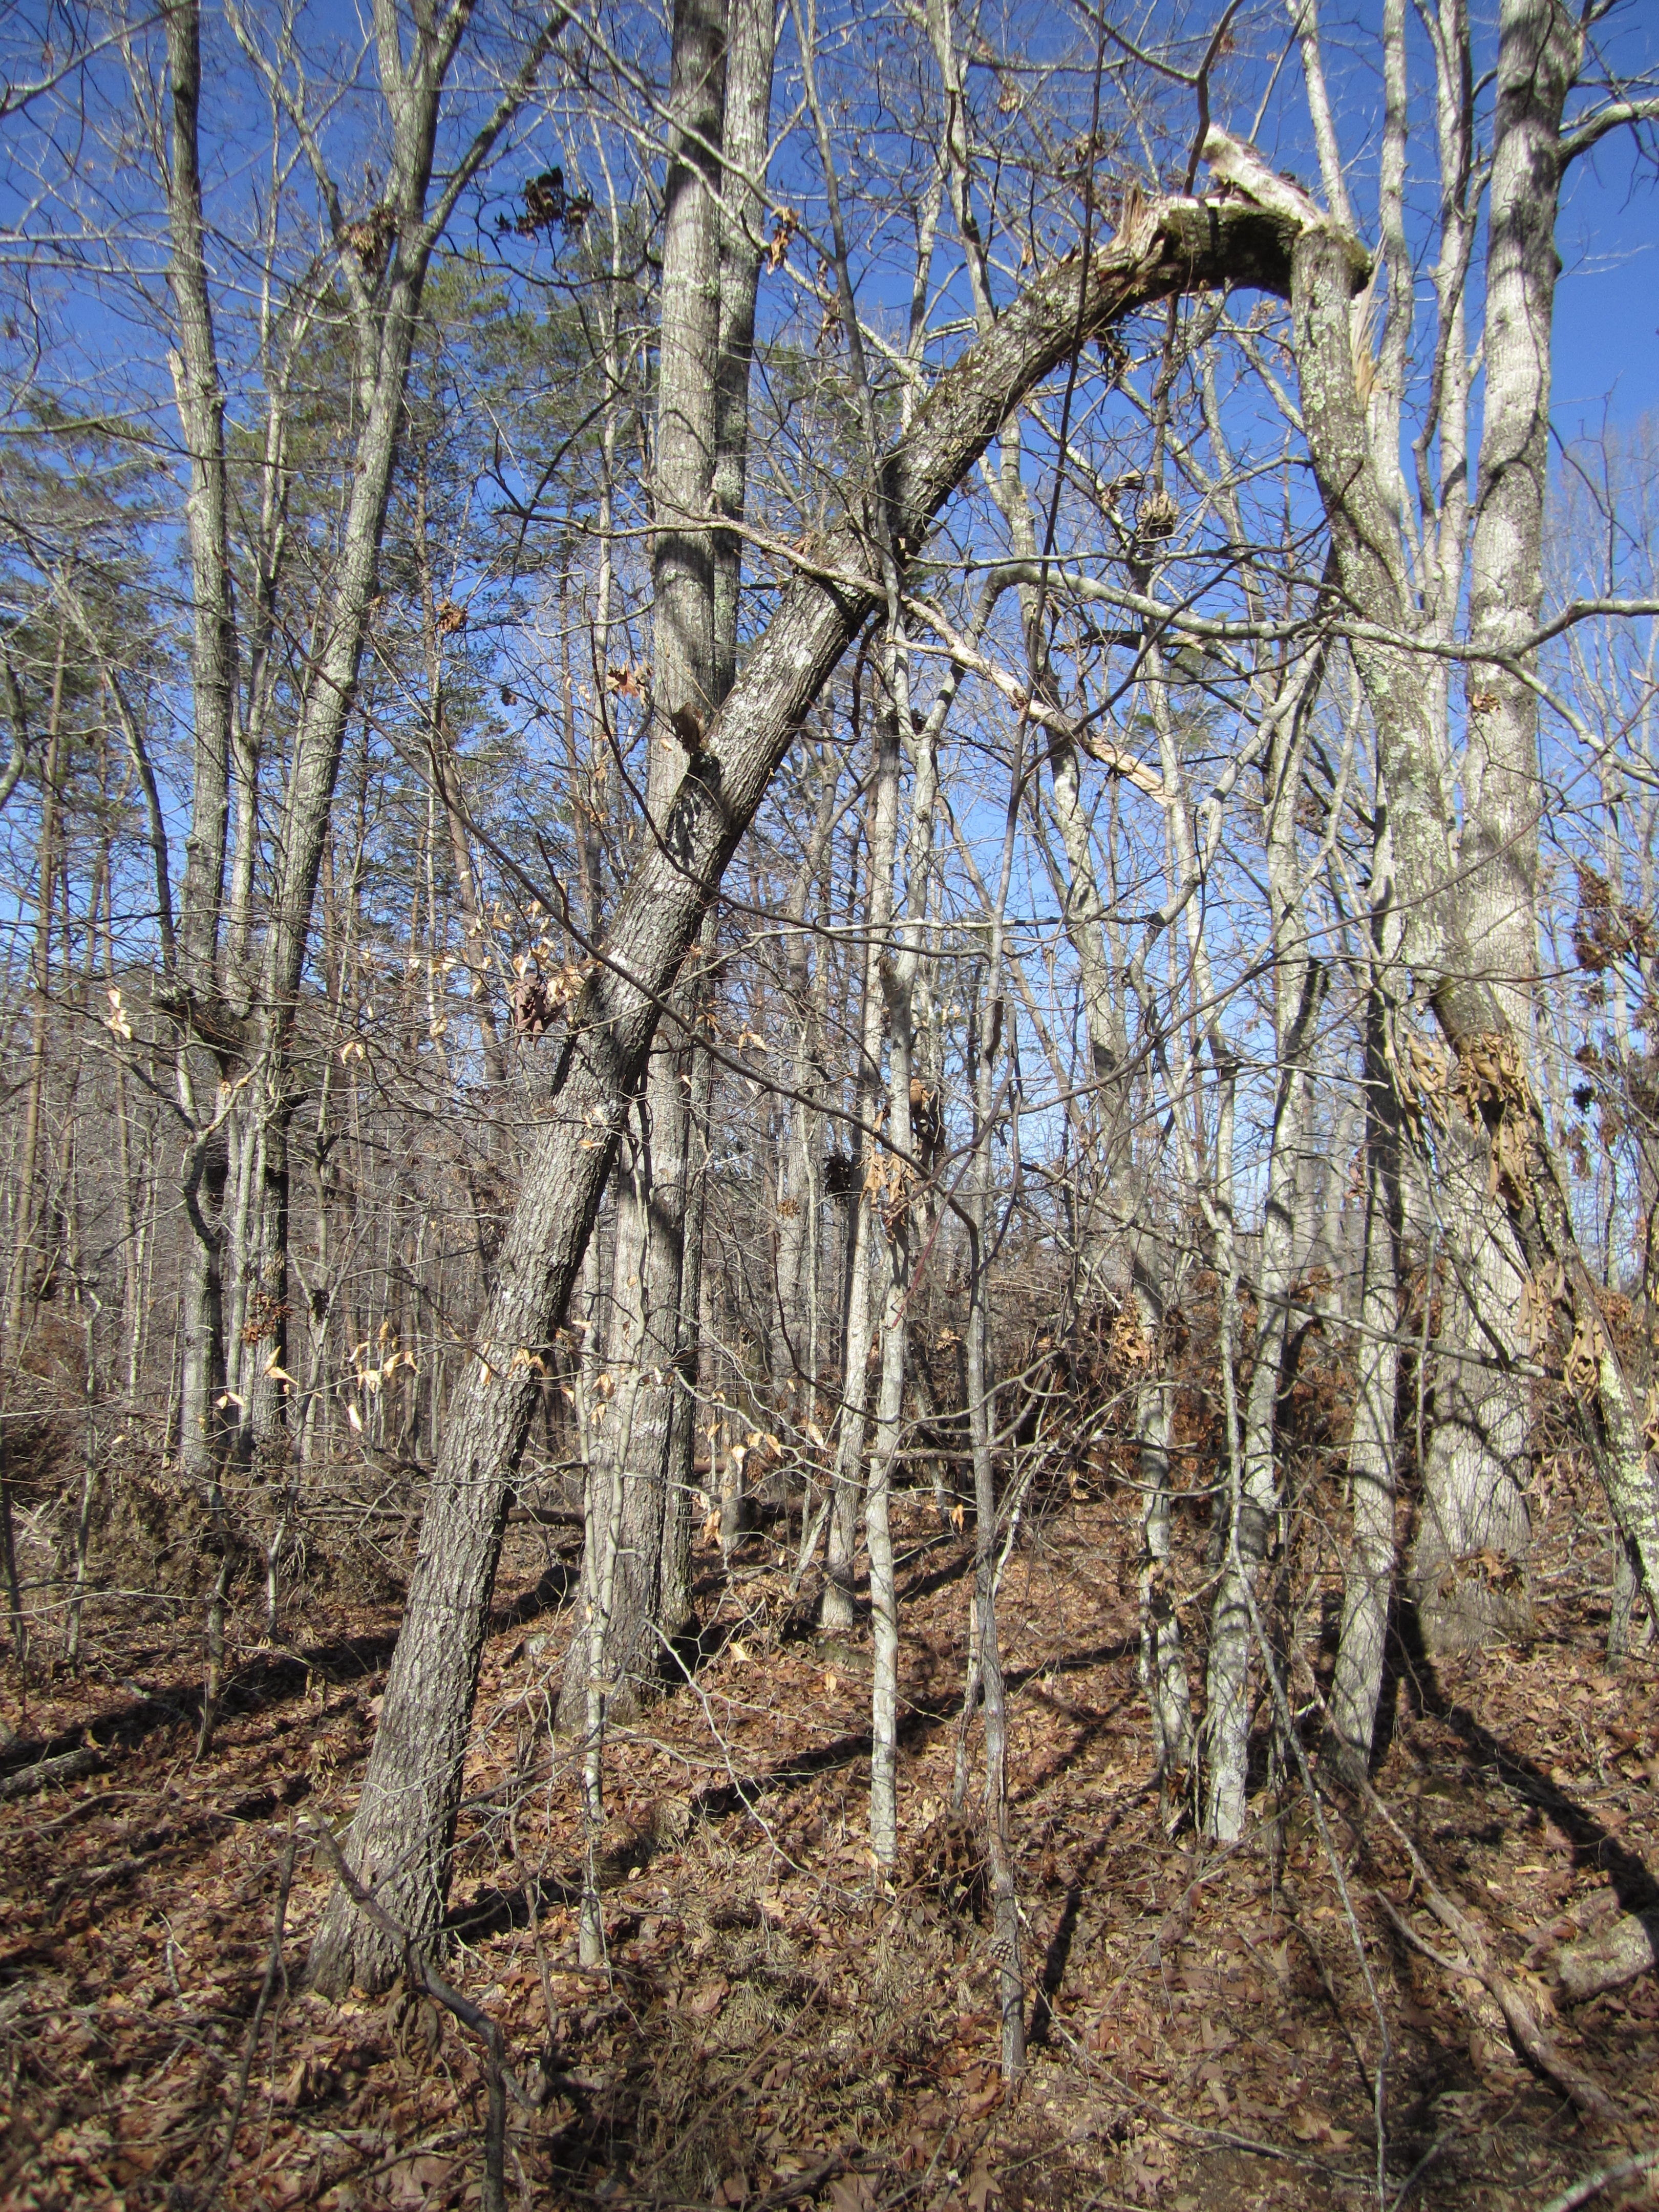
a red oak (leaning in the foreground) that we cut, only using the bottom portion that was alive at time
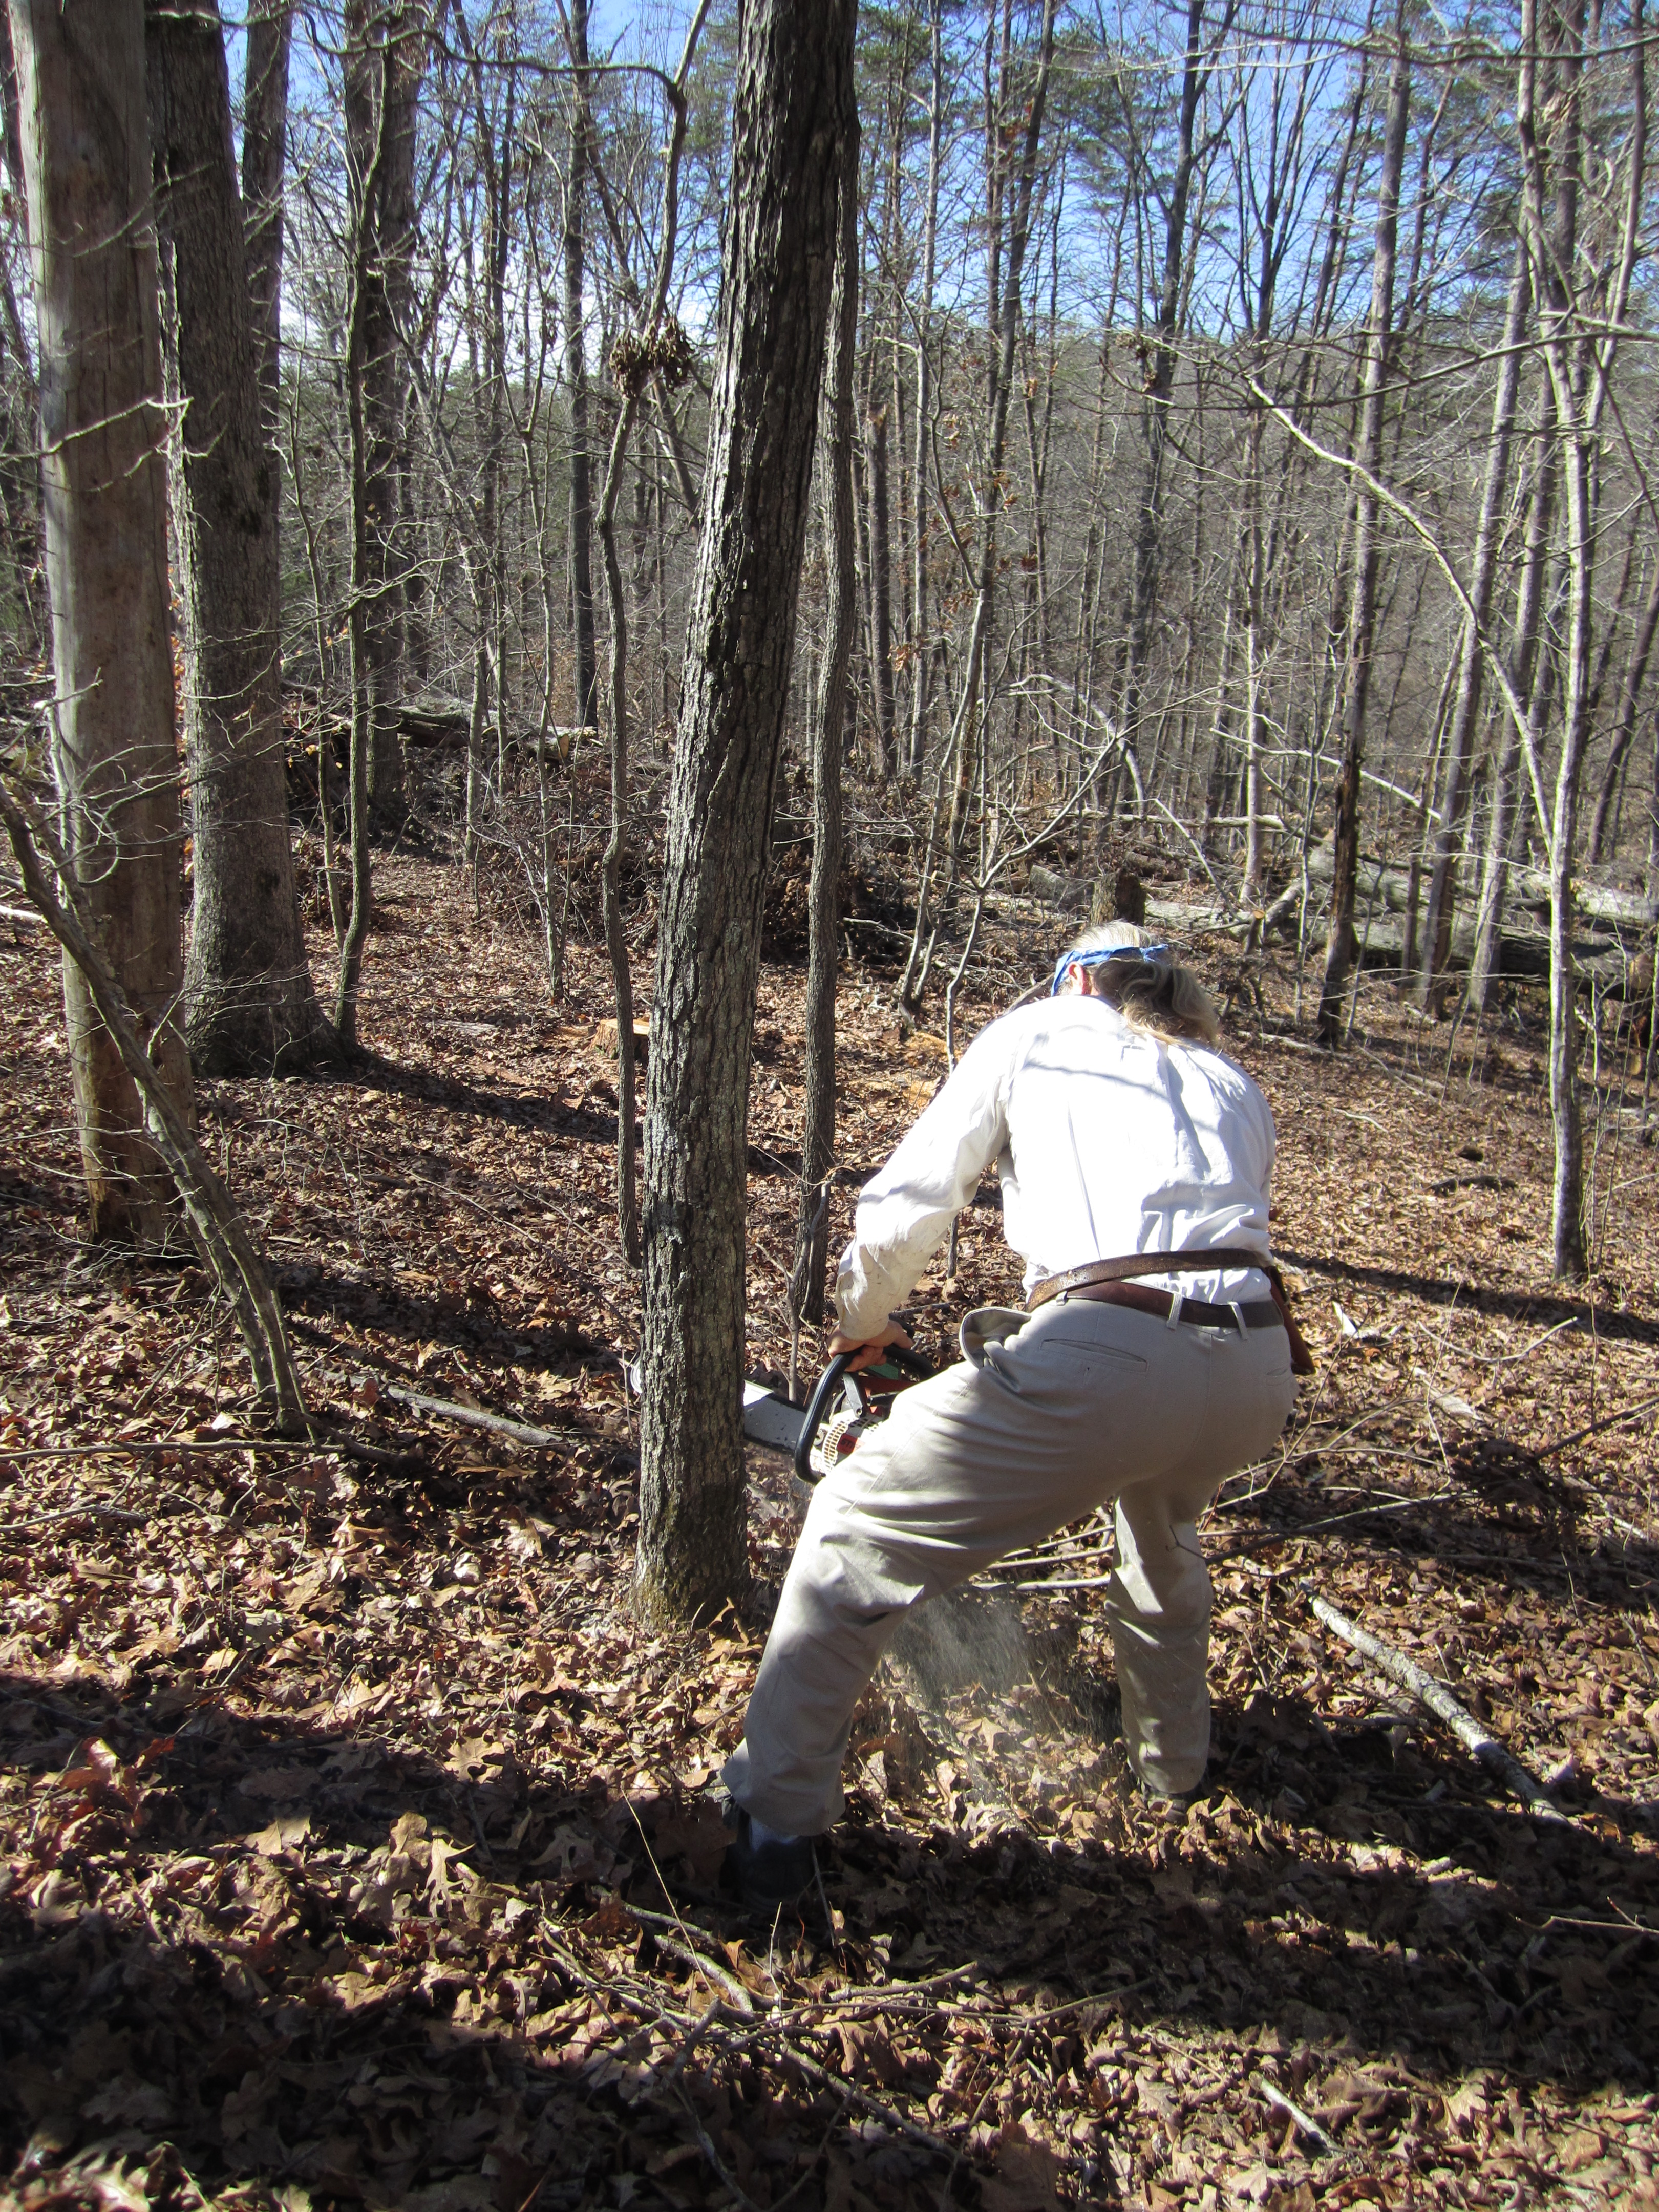
my dad cutting an oak!
when selecting trees, we picked ones closer to the road and ones that we could use most, if not all of, once felled. one of the trees we picked was broken off and hanging about 15 feet above the ground, so we cleared the area of the danger of the hanging wood while also getting our logs. we did not use the hanging portion of the tree, though, because that part had been dead for some time. we left that behind for future firewood and selected the green portions of the tree. choosing green wood is important because you don’t want to give bugs or molds and other fungi time to move into the dead wood before you inoculate. bugs might eat your spores and other fungi might compete with your own mushrooms!
my dad felled the tress with his chainsaw. ever since i was a kid he has impressed upon me the importance of chainsaw safety. the approach to felling these trees was no different than other times i have done tree work with him: i stood well away and was “ready to run” even though the trees were certainly on the small side!
after each tree hit the ground, i walked a wide circle around him (never walk up behind a chainsawing person!) and pulled the measuring tape to 3- or 4-foot lengths, depending. dad made a shallow cut at each measured length and once the entire tree was sectioned he cut the logs into individual pieces. some of the white oaks we chose were dead at the top (one of the reasons for choosing them), and this dead wood was also left behind for firewood or perhaps adding to hugelkulture beds soon.
after finishing each tree, we carried the logs to the road, taking careful not to scratch the bark too badly (the bark is important here, folks!)
in all, we cut 6 trees, half in the red oak family and half in the white oak family. our mushroom logs’ diameters range from 3-inches to 8-inches. once all the trees were done we loaded our trucks and drove them to the house.
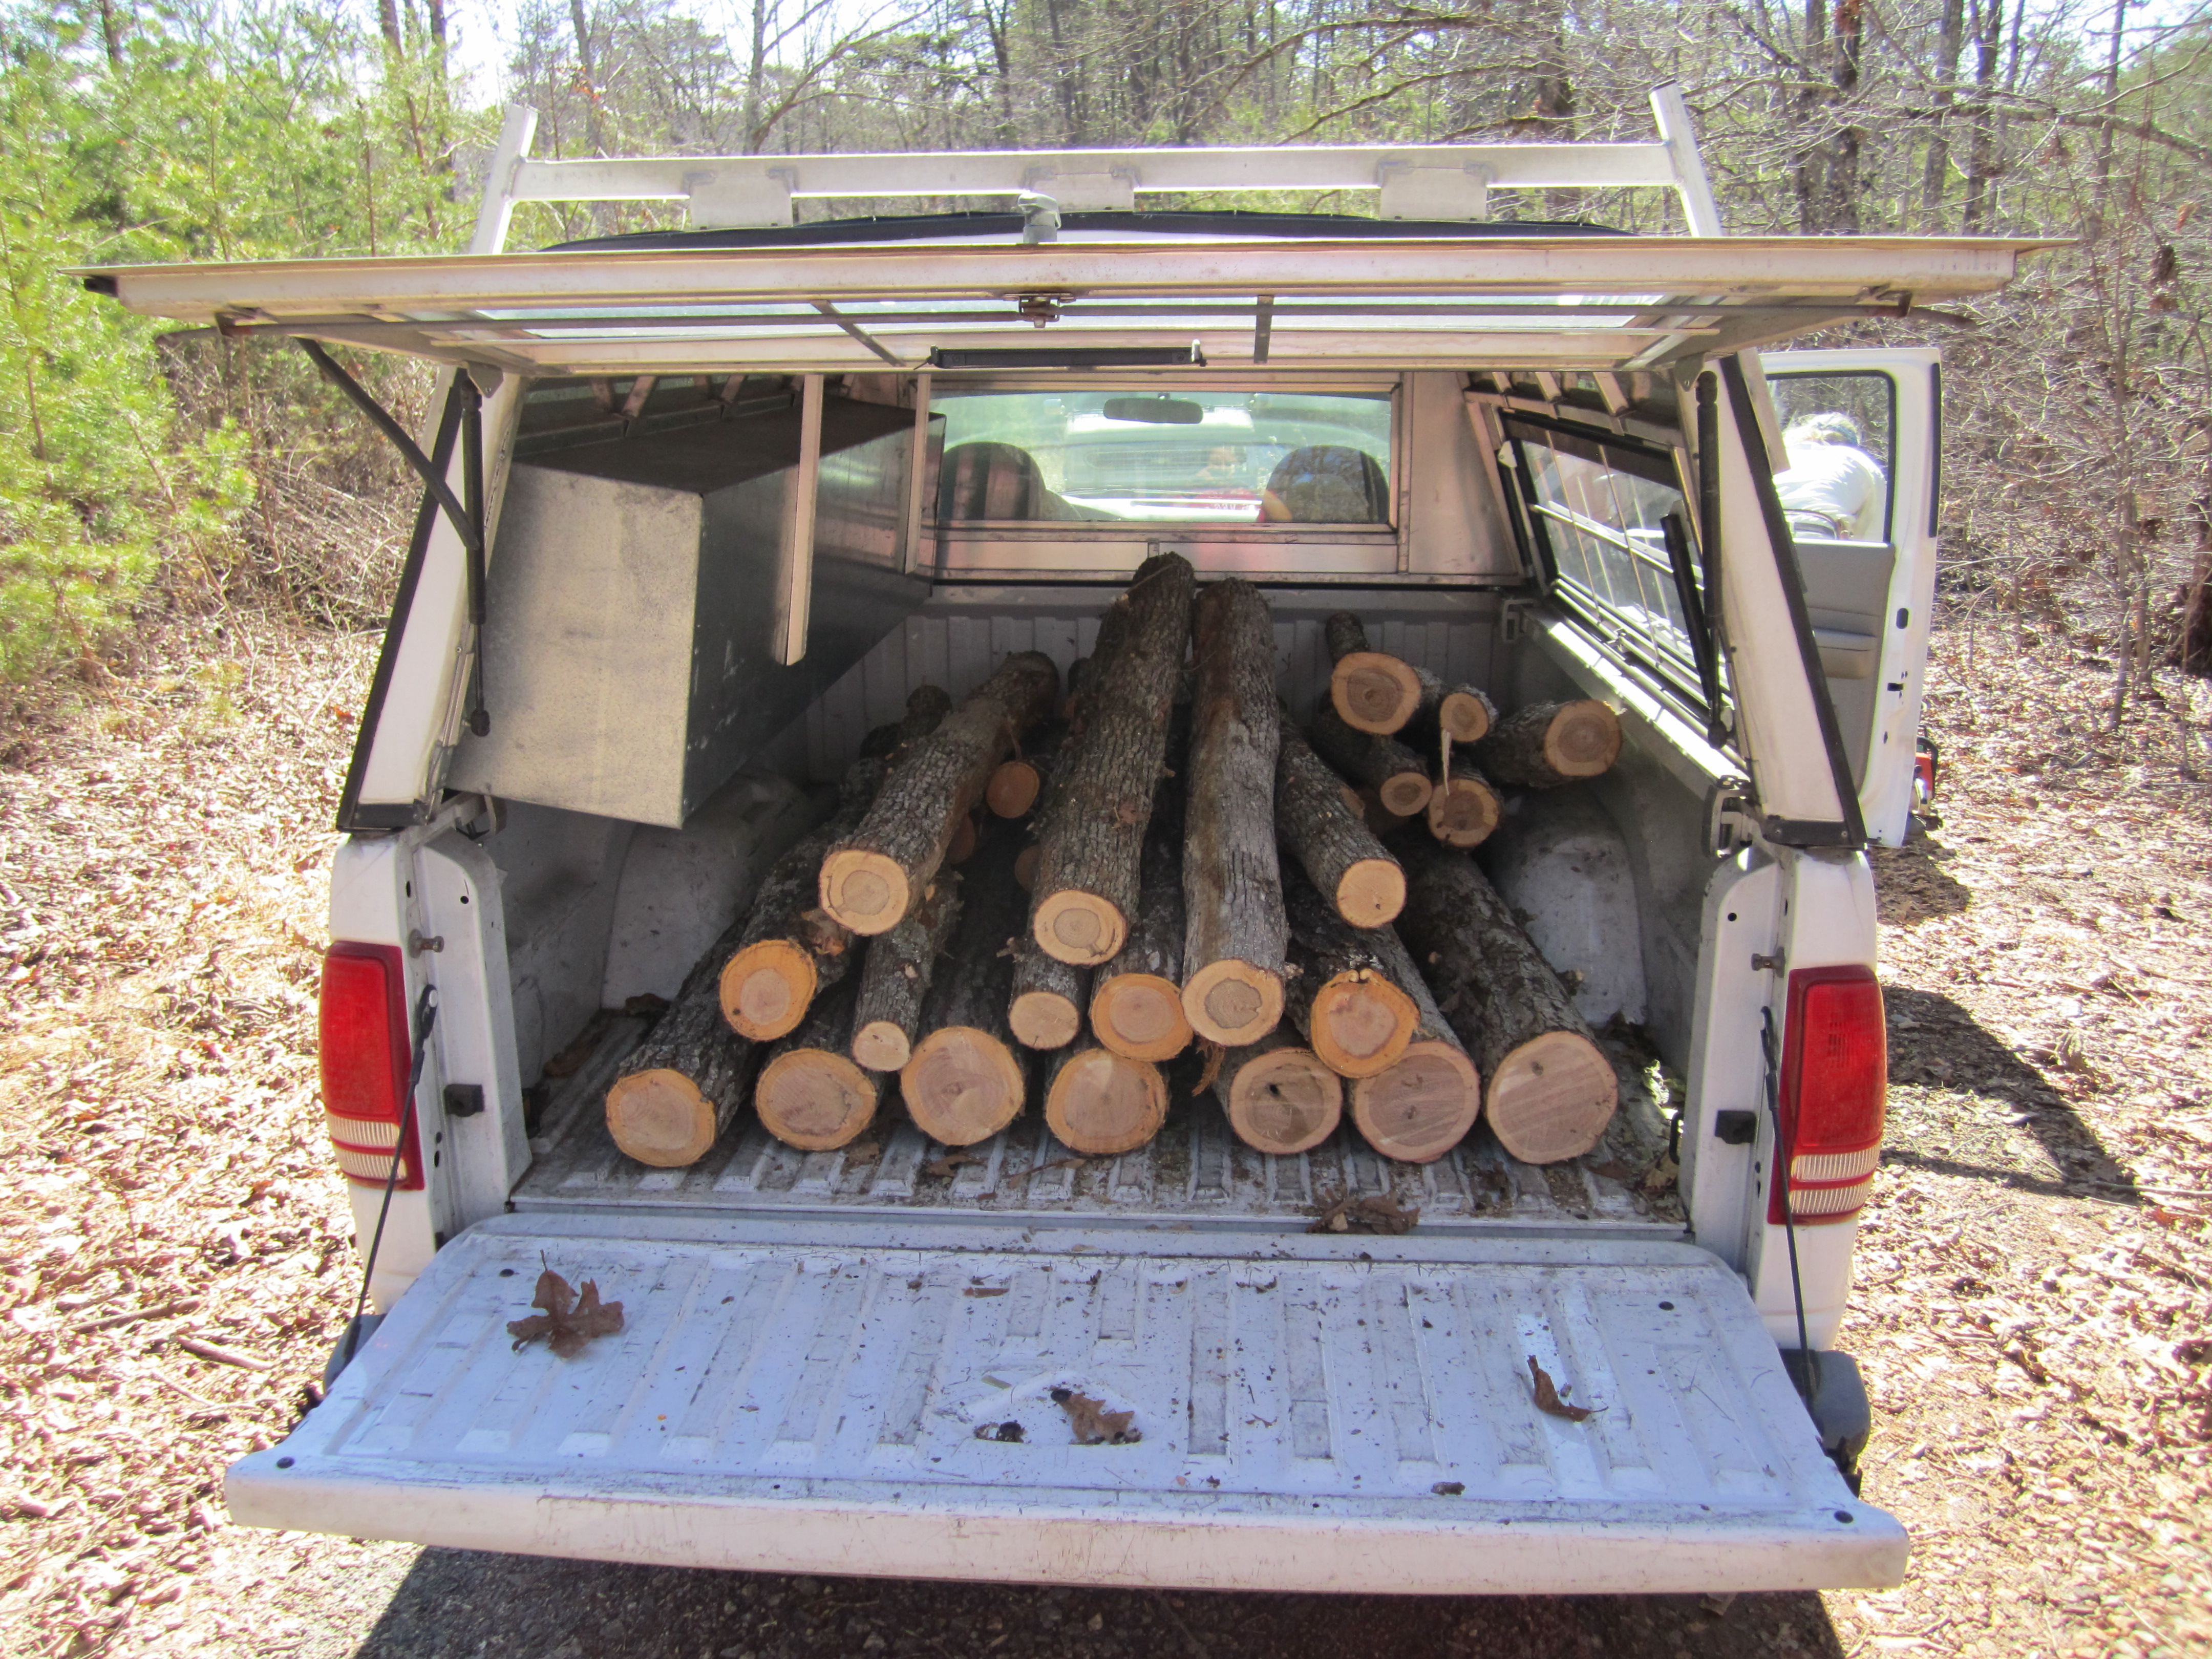
mushroom logs loaded in our truck
when we unloaded we were once again careful with each log, and i pruned the logs of any small limb nubs with a hand saw and held the logs still while dad chainsawed larger knots off. the purpose of this is to make sure that we can drill holes uniformly over the log before inoculation, as knots can be tough on drill bits.
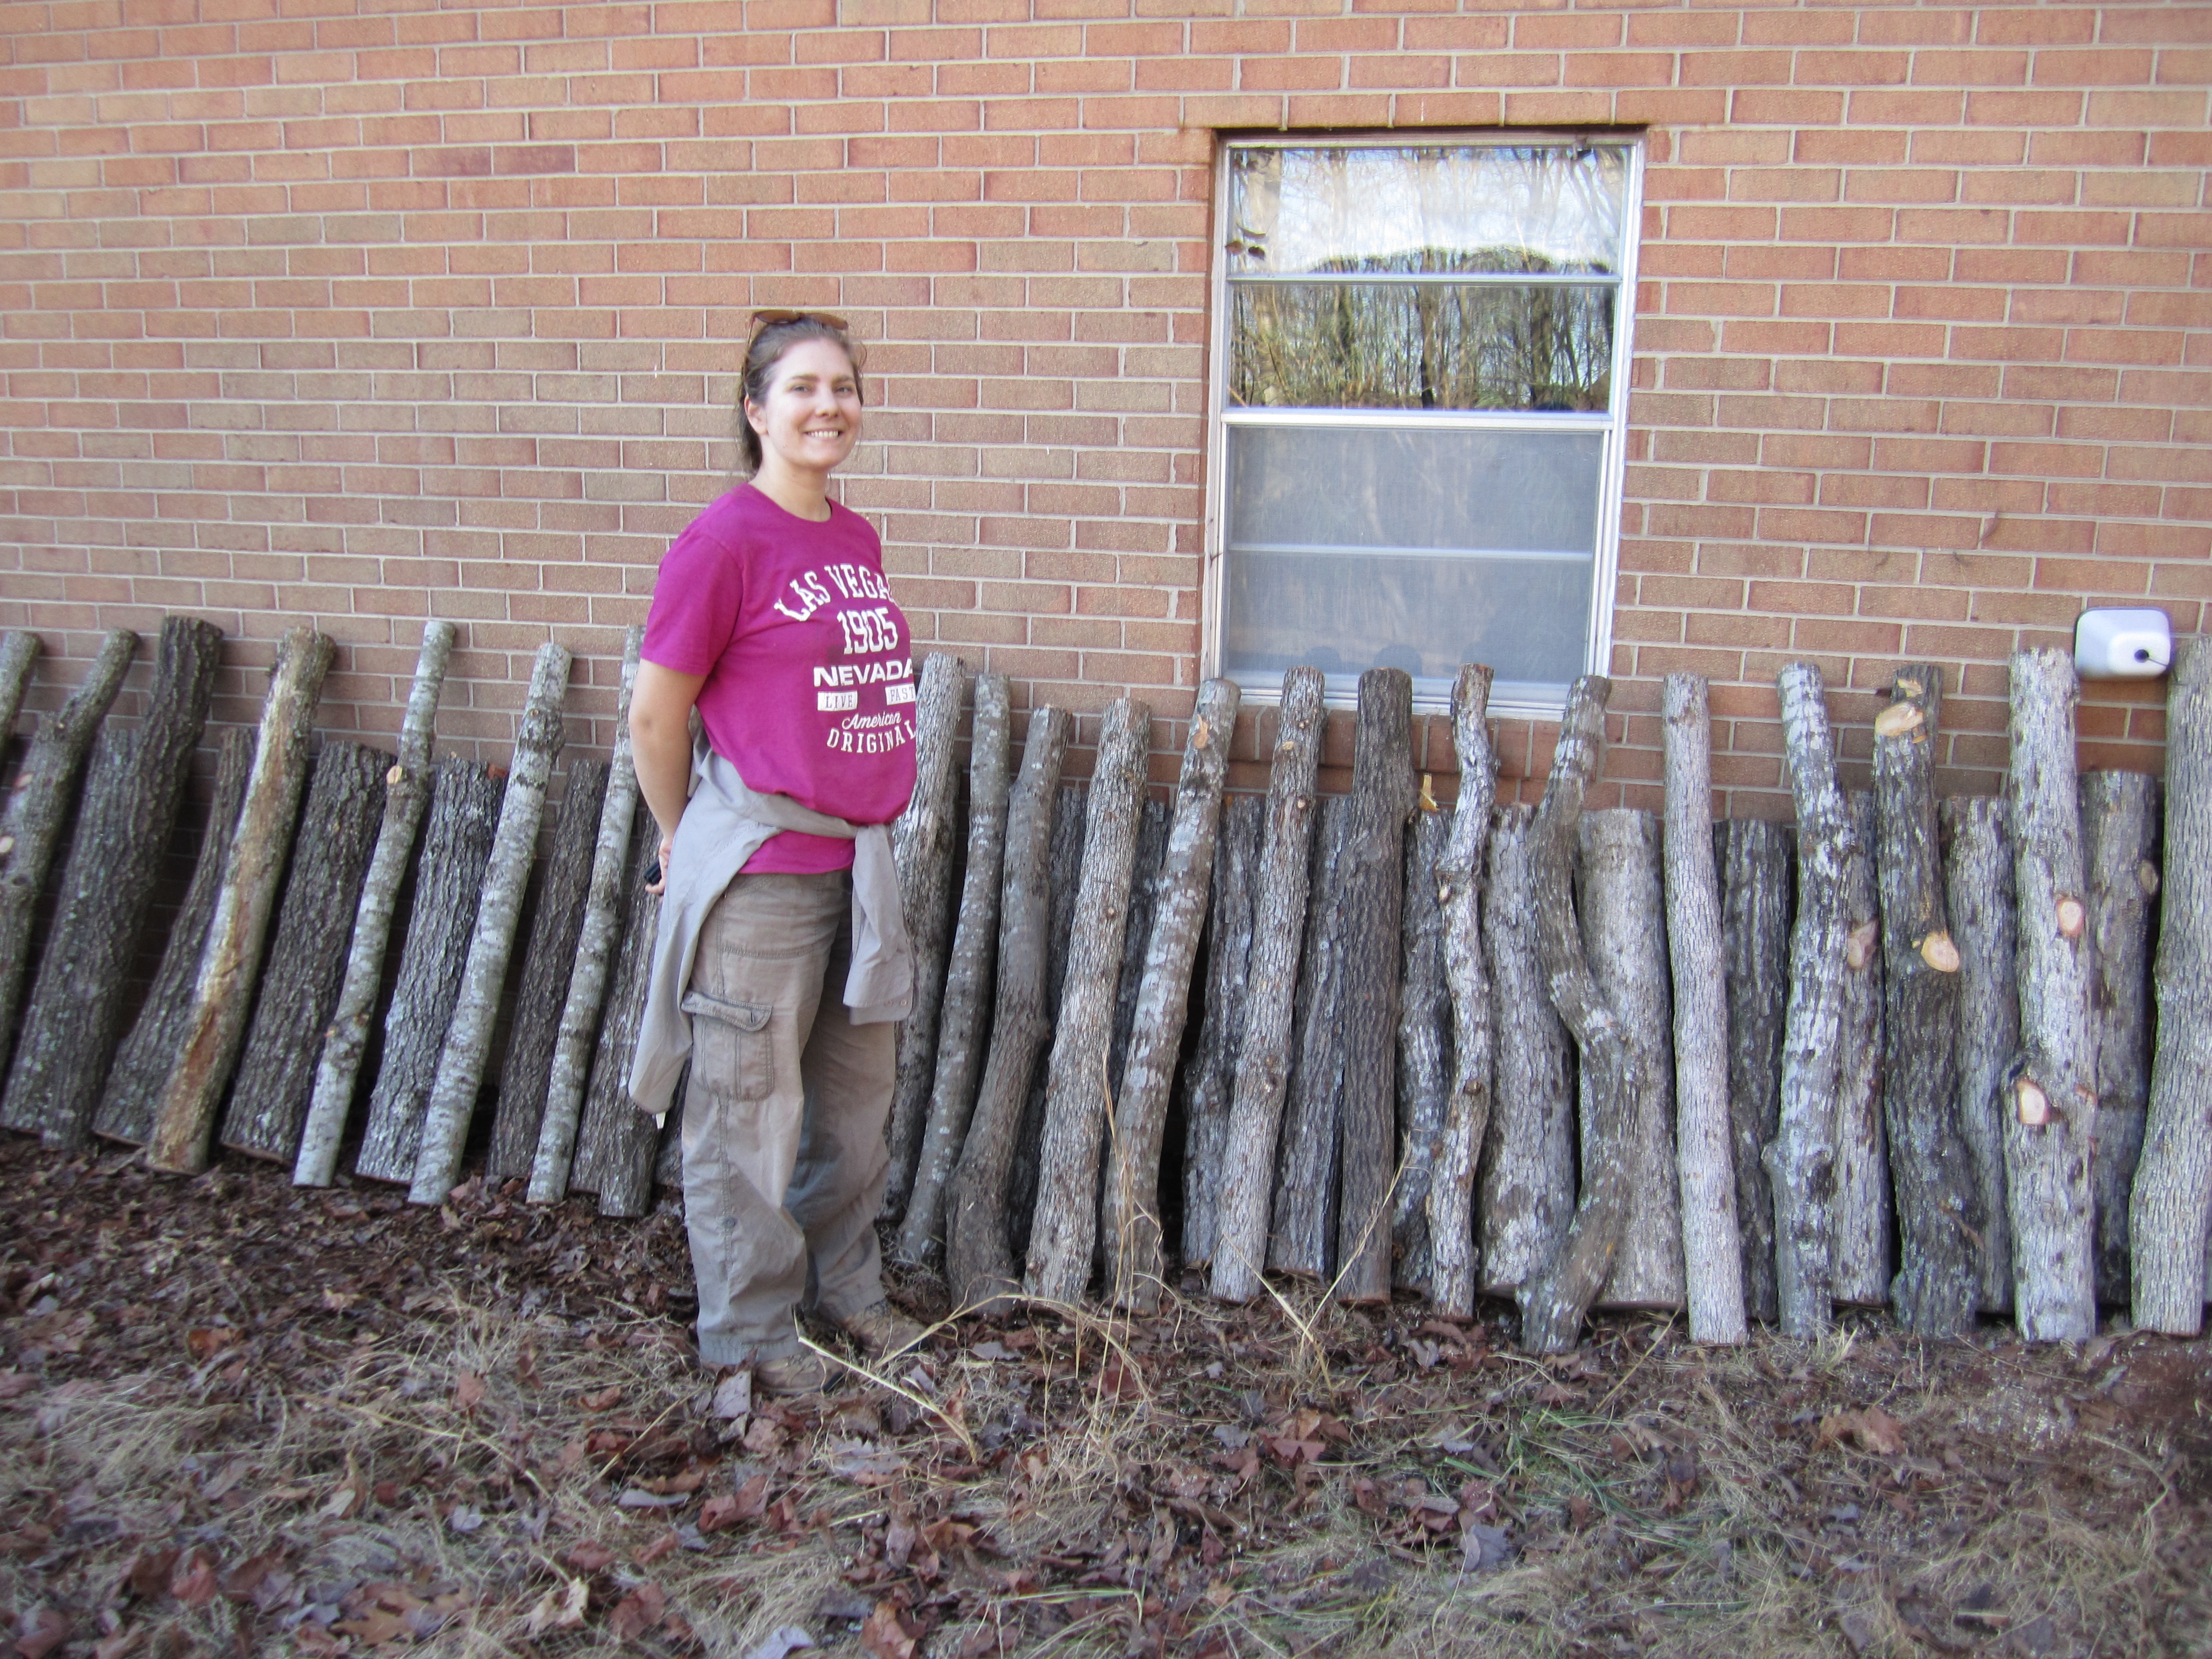
our drying oak logs (with emma)!
now that we’re done “cleaning up” the wood, the logs have been stacked against the back of the house to dry for about 3 weeks until the wood’s natural anti-fungal defenses have mostly broken down (this decay generally gets into full swing about 2 weeks after cutting).
and there the logs will sit until we inoculate them in 3 weeks. now it’s time for stage 2: ordering our spores and other related gear (wax, drill bits, etc)!
.:.
© 2024 KW Homestead
Theme by Anders Noren — Up ↑