First off, happy birthday Heidi!
Today felt like spring. I was excited and invigorated, so I decided to do some outdoor chores.
I pruned our dwarf apple trees, and started my apple propagation by cuttings experiment (more on that another day). While walking around the yard and enjoying the weather, I revisited an idea I had about digging a small garden pond near our raised beds.
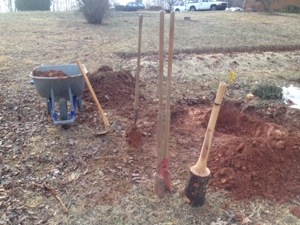
Some of the tools I used to dig our micro garden pond.
I’ve researched and Googled tiny ponds a few times, and I just felt like trying. I used a few different tools; a shovel, mattock, maul for tamping, and some post hole diggers, as well as a wheelbarrow. I moved from one tool to the next depending on what worked best at the time, for about 3 hours, and the end result is a nicely shaped, roughly 5 ft. diameter oval pond that is 3 feet at the deepest below ground level.
I’m not yet sure if I will impound any water with a dam, but I did separate the topsoil from the subsoil, which is primarily mineral rich clay.
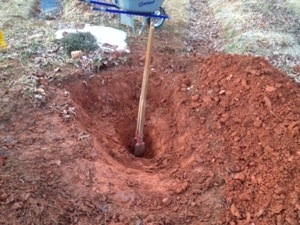
The beginnings of our new 5 ft. diameter and 3 ft. deep tiny pond.
There are a few options for the final layout of this small pond, and It has the potential to interact with all of our garden swales. I may even have it completely surround our yaupon holly onto an island. We’ll decide soon.
I learned a few things today, that hand digging a micro pond is not that difficult, and that you can accomplish significant water capture very quickly. Also, don’t overload your wheelbarrow in muddy conditions. It will get stuck and tear up the land, or worse fall over and spill it contents in the wrong place. This concept would apply to bigger earth-movers as well in any other permaculture mainframe installation.
I’ll keep you updated on the hand dug pond, and I recommend getting out there and playing in the mud. You can really, really learn a lot about your land when it’s up to your chest!