KW Homestead

Pasture Raised Poultry & Edible Landscaping Plants Since 2013

Tag: recipes (page 1 of 4)

How to Cook a Whole Chicken

The whole chicken is a wonderful and sometimes underrated portion of meat. It’s versatile and filled with all of those delicious bones that make your life a healthier one!

Join us for this brief video which features our favorite ways to cook a whole Red Ranger chicken, like oven roasted, made into a delicious soup, and more!

Better Than Bulletproof: Coffee Made With Creamy Duck Eggs

What if your morning coffee could give you 36% of your daily iron, 34% of your daily folate, and 168% of your daily B12?

Well, it can! Just add the yolks of 2 duck eggs and start your morning off right. All you need is your morning coffee, an immersion blender (or regular blender), and duck eggs.

Now, hold on a minute… You might be a little confused about the legitimacy and safety of adding raw eggs to coffee. Let’s explain…

First of all, adding raw egg to coffee has been around, in various cultures, for a super long time! The Scandinavians and the Vietnamese do it and have done it for generations upon generations.

Second, adding raw eggs to hot coffee doesn’t mean you’re actually consuming raw eggs. Blending the egg into the steaming hot cup of joe means that the coffee is cooking the eggs as it blends. So you’re really consuming cooked eggs with your coffee. No worries!

This is how we do it, and it’s super easy:

  1. Brew your coffee (or tea!), crack and separate the yolks of 2 eggs (you can totally do more!)
  2. Place the yolks in the deep cup that came with your immersion blender, or another deep cup or mug
  3. Pour your coffee on top
  4. Immersion blend to your heart’s content… You’re left with a foamy, creamy, and absolutely fantastic morning beverage. You can also add cinnamon, vanilla, or a bit of sugar.

Another amazing thing is… Did you miss breakfast? Well, if you did, don’t fret because you just drank 2 eggs! This is sure to get you going  in the morning and tide you over until you can find a second breakfast elsewhere. Absolutely yummy!

Asian Five Spice Duck Recipe

When it comes to cooking duck, as duck farmers it’s something that we should know something about. While we’re often roasting whole duck and getting crispy skin and moist meat, we don’t always branch out with our spice combination!

That’s why we we’re super excited to discover an amazing Asian 5-Spice Powder blend from our friend and fellow farmer, Stephen at Elam Gardens. It’s a blend of pepper (black and Sichuan), fennel, cloves, star anise, cinnamon, and allspice. You can sprinkle this delicious rub onto your duck and cook it the way you like best. Here’s what we’ve been into lately:

  • Preheat your oven to 375.
  • Score the skin of the bird everywhere except the legs. Be sure that your scores are deep enough to reach through the skin and into the fat but not so deep that you see the meat through your cut.
  • Sprinkle salt and Asian 5-Spice Powder both both sides of the bird.
  • Select a large and deep oven dish and either add a small metal rack or cut up veggies to lift the bird a half-inch or so off the bottom of the dish.
  • Add a quarter-inch of water to the pan.
  • Place the bird, breast side up, on the rack/veggies.
  • Cook on 375 for 2-2.5 hours, depending on bird size. Note that it’s hard to overlook duck, so if you like really crispy skin, you can get that without sacrificing the meat! Go for it!

Goose Egg Frittata Recipe

When you have lots of huge, huge goose eggs, what do you do with them? Well, make a frittata, of course!

Each goose egg equates to 3 or 4 chicken or duck eggs, so unless you’re making omelets for the extended family, baking with goose eggs is one of your best options.

This recipe is simple, delicious, and fits into the Paleo or Weston A. Price diet ideology. Here it is:

Ingredients

  • 6-8 goose eggs, broken and whisked together
  • 1-2 pounds of sweet potatoes, cubed
  • 1/2 pound of grass fed cheese, grated
  • 2 onions, diced
  • 2 green peppers, diced
  • basil
  • garlic powder
  • salt
  • red pepper flakes
  • lard or duck fat

Materials

  • large cast iron skillet or large sauté pan/pot
  • large casserole dish
  • whisk
  • fork
  • large mixing spoon
  • mixing bowls
  • sharp knife & cutting board

Directions

  • Heat your cast iron skillet on medium and add your lard or duck fat.
  • Begin sautéing the sweet potatoes and when they are about halfway cooked, add the diced onion and green pepper.

  • Add salt, garlic, red pepper flakes, and liberal amounts of dried basil. Stir this mixture often and continue cooking until the sweet potatoes are tender when poked with a fork.

  • In a large mixing bowl, crack the 6-8 goose eggs (the number your choose depends on the ratio of egg to other ingredients that you desire, and how much sweet potato you chose to use). Be sure that no shell ends up in the egg bowl… These shells are almost as think as a light ceramic dish, and could easily hurt you if you bit into one.

  • Poke each yolk with a fork and begin stirring. Once the mixture can be blended with a whisk, switch to the whisk.

  • Add the cooked sweet potato to the eggs and stir well with a large spoon.
  • Add the grated cheese and stir well.
  • Add more basil, garlic, and salt. The amount you add depends Up how much spice you like in your dish. I always add more than I expect will be needed, just to be sure the flavor is there, and it turns out great.
  • Mix everything together thoroughly and pour this mixture into a large, greased casserole dish.
  • Cook this dish in the oven on 375 until the top becomes a light golden color.
  • Enjoy!

How to Cook Duck Breast to Perfection!

Duck breast is one of the most decadent and scrumptious cuts of meat that we offer, and since it’s more often seen on Top Chef than in your average grocery, the idea of cooking a duck breast may seem a bit daunting.

We’re here to tell you that it’s actually SUPER EASY! So don’t turn away now… You’ve got this!

As it turns out, the easiest way to cook duck breast is also the absolute best: scored skin, hot cast iron skillet, skin side down, rendering that fat out, and flipping for a few sizzling minutes. Seasoning? It’s really up to you. We love garlic & thyme or Asian five spice.

Now the question is… Is one really enough?

Here’s the play-by-play… It couldn’t be easier:

Ingredients

  • duck breast(s)
  • salt
  • Asian five spice seasoning, or garlic & thyme, or any other seasoning you’re excited about right now

Materials

  • cast iron skillet
  • sharp knife
  • spatula

Directions

  • Thaw your duck breast.
  • Using your sharp knife, score the skin of the duck, cutting into the fat layer underneath the skin but not so far that you can see the underlying meat.
  • While you’re scoring and spicing, begin heating up your naked skillet on medium heat (no oil or butter or anything needed!).
  • Spice your duck breast by adding salt and whatever spice combination you’ve selected to the skin side.
  • When your pan sizzles when you sprinkle water drops on it, it’s ready!
  • Place the duck breast in the pan, skin side down.
  • Let your breast cook on medium heat until you reach the desired skin color… We like ours very brown and almost burned, which makes it really crispy. This part is up to you! If you’re not sure, think about how you like your bacon and shoot for that desired crispiness!
  • You’ll see the fat rendering out of the breast… Be sure to save this fat for cooking veggies or any other thing you want to taste super awesome!
  • Add a bit of your spice to the meat side.
  • When the skin has reached the desired crispiness, flip the breast and continue searing, how long depends on how well done you’d like your meat. Duck breast can be cooked med-rare, like steak, and we recommend a medium cook, still pinkish in the middle. Think about how you like your steak and shoot for that. You can always slice into the breast a little while it’s still cooking to check it and to to ensure you cook it to your desired temperature.
  • When your meat is done, remove it from the pan and let it rest on a plate for 5 minutes.
  • Serve and enjoy! If you’re really feeling wild, spoon a bit of the rendered fat back on top before eating!


Chicken Feet Broth: Your New Health Drink

Perhaps you’ve resolved to make 2018 the year of healthy, local, and fresh eating! Sometimes it’s tough to get started on the path to be your healthiest you. Starting small is the way to go, and there’s nothing easier than adding a delicious and warm beverage to your routine.

This is totally the time of year when everyone needs some really great broth in their house! Since the cold and flu season here and the weather is freakishly in the single digits, one of the best ways to ensure your family’s continued health and nutrition is through bone broth. Our birds make the best broth because they’re raised on pasture, free ranging around among the greenery! That means they’re getting tons of extra vitamins and minerals.

Using chicken feet for broth or soup is really one of the best ways to get loads of flavor, and to ensure you’re getting adequate nutrition, gelatin, and collagen–among other important micronutrients!

Why Should You Be Drinking Chicken Foot Broth?

Bone broth has been known for a long time to assist in joint health, gut and instestinal health, and immunity. Gelatin and collagen are pulled from the skin, cartilage, and joints of the bones or feet. Collagen builds and rebuilds cells and trace minerals nourish us from the inside out.

Feet are pretty much skin, cartilage, and ligament, so you get the picture… A swirling pot of “liquid luck.” As we enter the season when germs make their rounds, having chicken feet on hand can be a huge help in battling illness amoung your big and little family members!

Making Broth is Easy!

They may look scary, but since our chicken feet are peeled and ready to go straight in your soup pot, all you need to do is add a couple to each stock you make and you’re all set! Or, if you’re even more daring you can make an entire pot of broth with only a pack of feet. If this seems daunting to you check out this simple recipe on how to do just that. You won’t regret it! All you need is a soup pot, water, your chicken feet, and some optional herbs.


You’ll Love Hearts: The Health Benefits of This Important Organ Meat

You might be shocked by the idea of eating hearts, but never fear, they’re yummy and easy to cook! A delicious meal of stir fried or grilled hearts sure makes an exciting dish for your hot date. Wink, wink.

Average hearts bought in a grocery store don’t benefit you as much as you might think. Although they carry many of the same micro nutrients as our chicken and duck hearts, they also carry the toxins that the animal, which has been raised in a cage or inside and fed subpar feed, has accrued in its organs throughout its life span. So, while these hearts carry positive nutrients they also carry detrimental ingredients as well. But, KW Homestead’s chicken and duck hearts are only good for you! Because our chickens are raised on pasture and fed non GMO feed that is fresh, high-quality, and local, their organs (hearts included) are as clean as can be! This means that when you supplement your diet and your family’s diet with our chicken or duck hearts you can feel confident in what good stuff you’re getting!

Why Hearts?

Since it’s a muscle, hearts share many nutritional components with steak, roasts and ground beef, but they are way more tender and easy to cook to perfection. Not to mention the extra mincronutirents…

Hearts have higher amounts of protein, thiamine, folate, selenium, phosphorus, zinc, CoQ10 and several B vitamins. Eating hearts is a great way to rack up amino acids that can improve metabolism and compounds that aid the production of collagen and elastin, which fight wrinkles and aging. Research shows that the amazing CoQ10 plays several key roles in your body. One of its main functions is to help generate energy in your cells and it’s involved in making ATP, which is involved in energy transfer within your cells. Its other important role is to act as an antioxidant and to protect cells from oxidative damage. Talk about amazing hearts!

A Few Heart Recipes

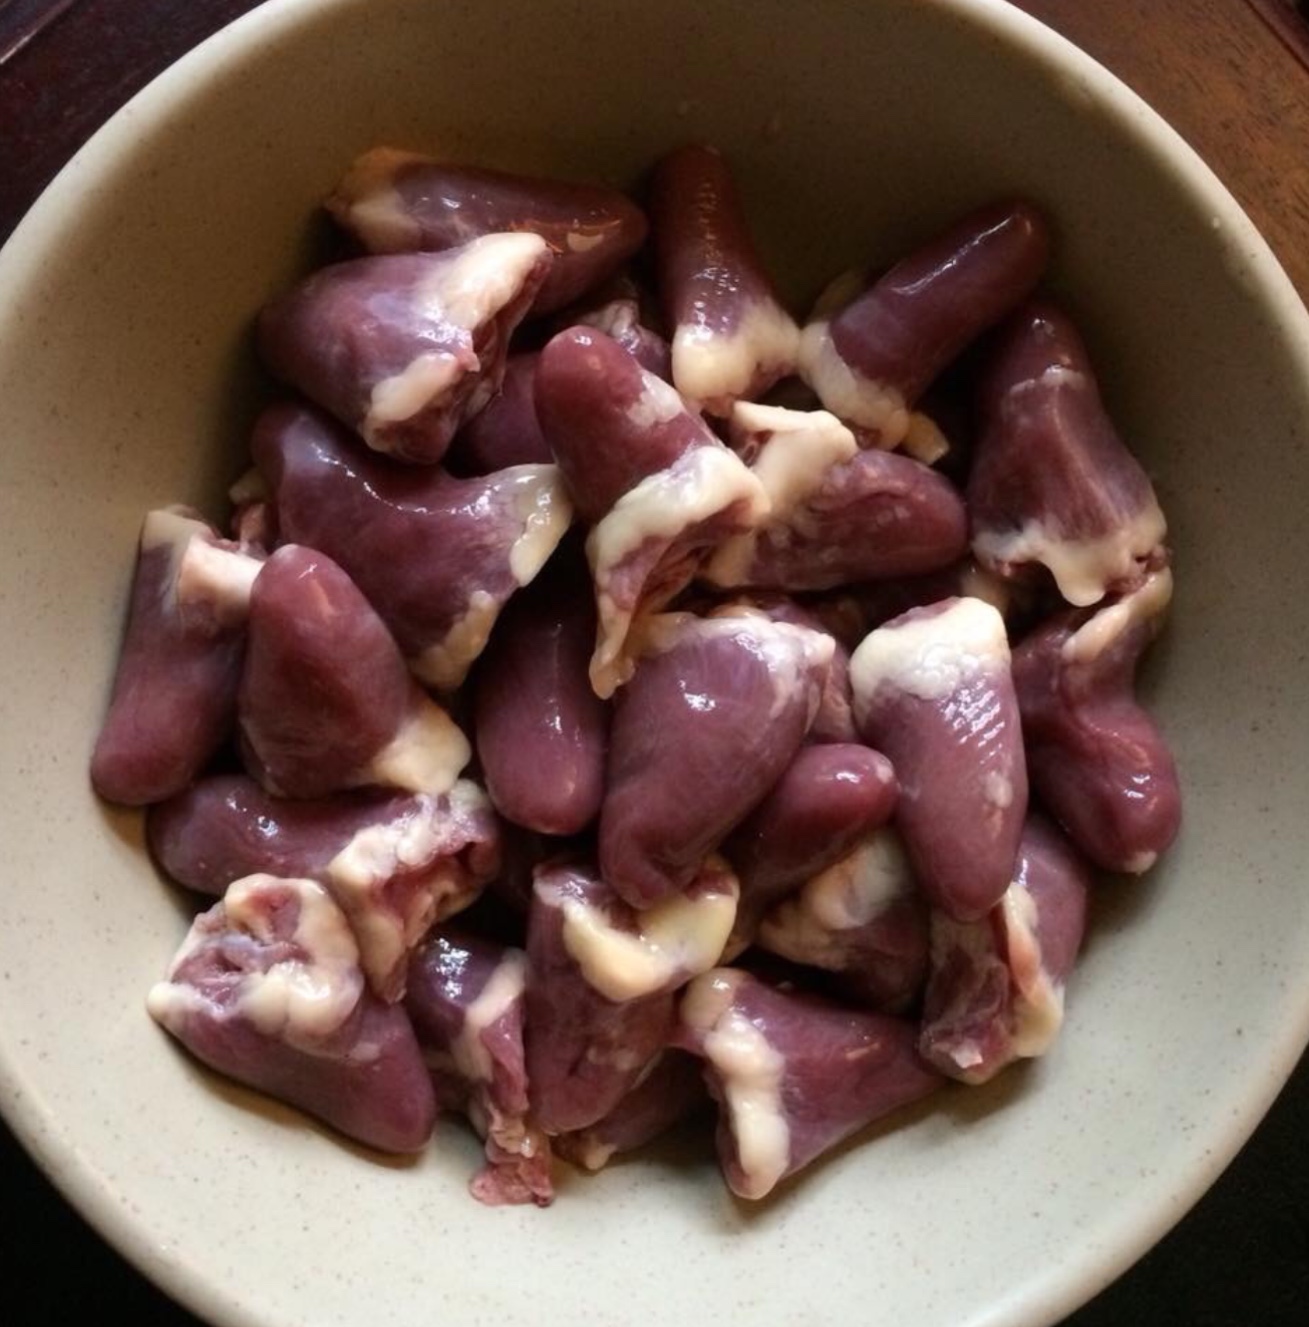
Hearts can be prepared for a meal super quickly, and make amazing stir frys. Our favorite way to cook them is this: slice them in half (long-wise) and marinate them in a bowl for 30 minutes with your favorite blend of Asian-inspired spices. Sauté them for about 10 minutes and remove. Add your go-to stir fry veggies, sauté until nearly done, and combine the mostly-cooked hearts. Continue cooking until tender and fully cooked. Yum!

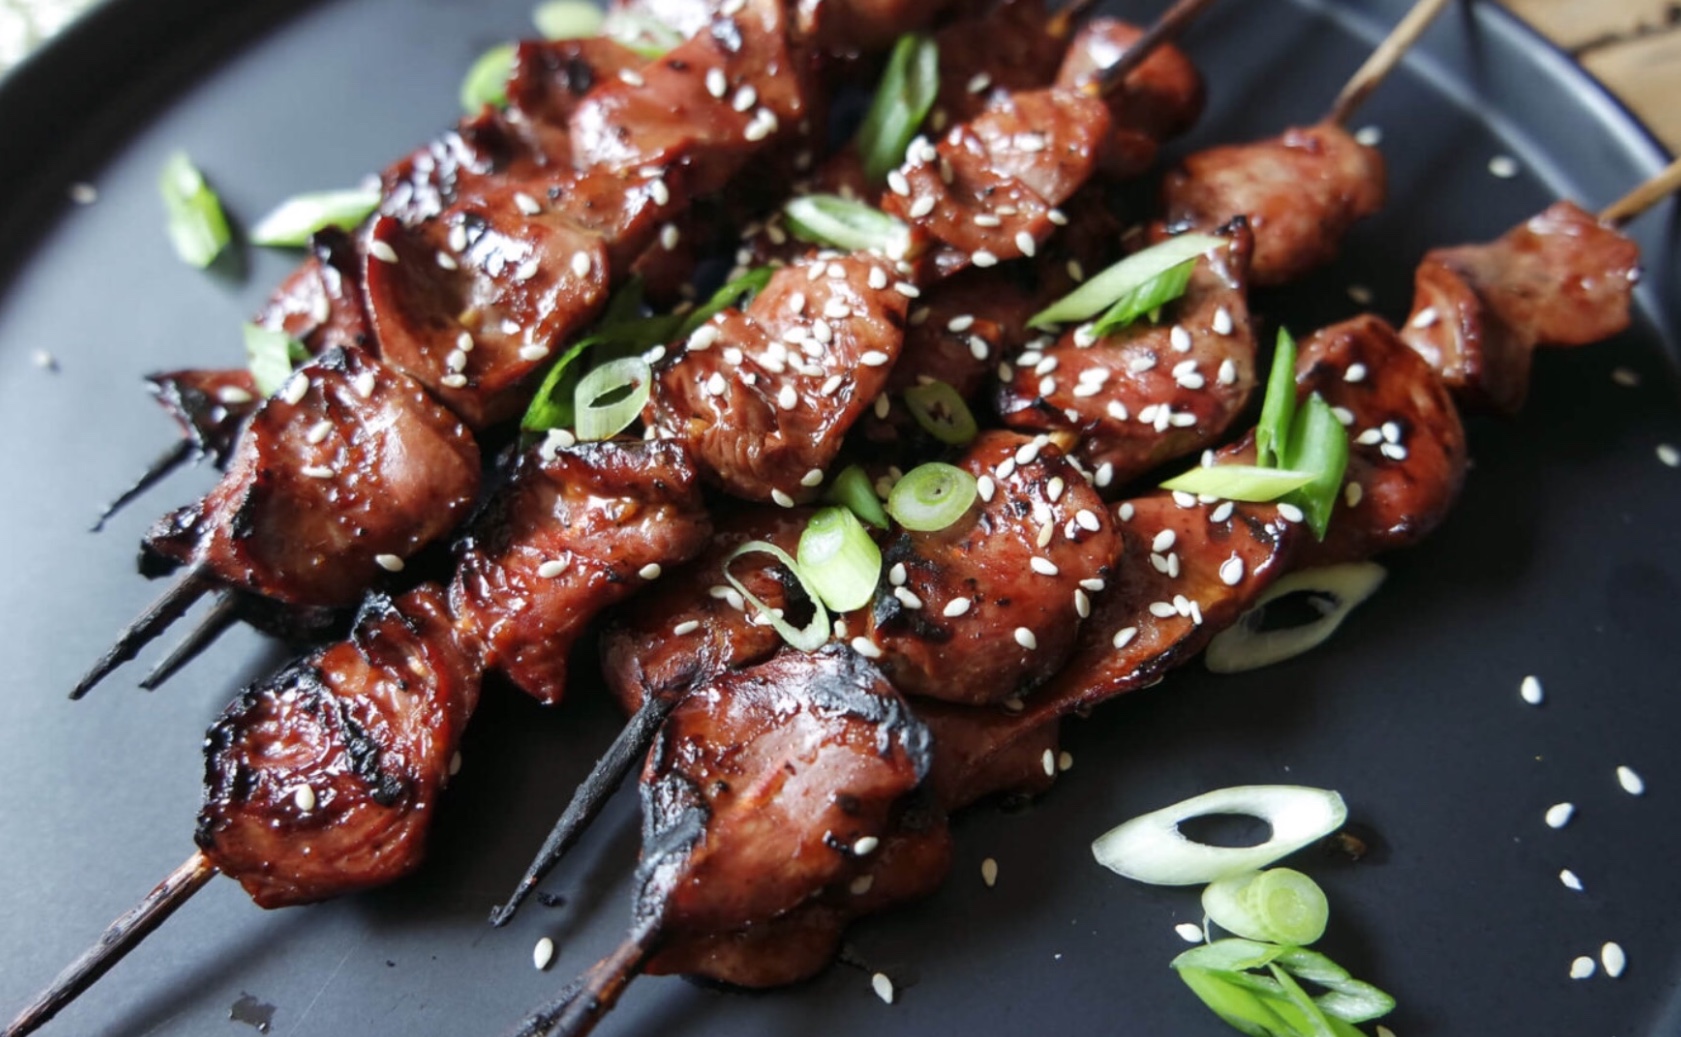
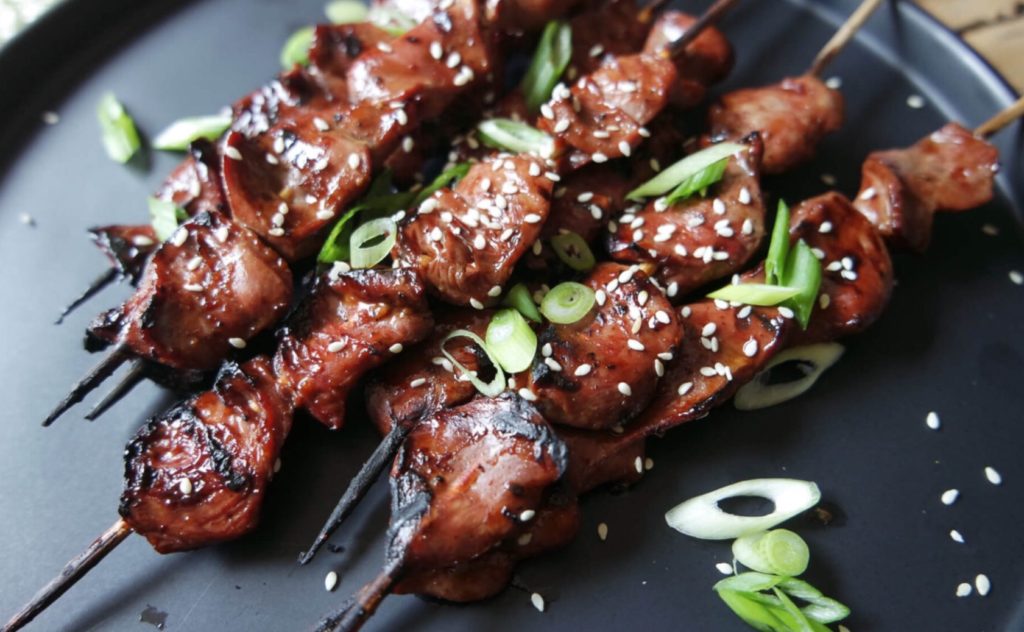
This heart yakitori recipe, though a little more complicated, makes for a lovely presentation. The chef who created this recipe says: “Let me give you a tip for dealing with a carnivore around Valentines Day—skip the teddy bear and the chocolates. If you really want to show you care, do it through the medium of meat!” We love that sentiment!


How Do You Cook Duck Eggs?

Oftentimes we are asked how duck eggs should be cooked. One of the great things about duck eggs, is that they can be cooked in all the same ways as classic chicken eggs. If you’re interested in seeing a nutritional profile comparing duck eggs and chicken eggs, visit this page on our website. Here are a few more tips:

Fried Duck Eggs

We usually fry our duck eggs over-easy, but duck eggs shine as fried eggs no matter how you cook them. The only difference in cooking duck eggs is that cooking them on medium heat is more effective than high heat (as folks often do with chicken eggs). Since duck eggs have a higher fat content, cooking them on high increases the risk that you might burn the eggs before they’re fully cooked. Another great thing about duck eggs is that the yolks hold together very well when flipping them, so you rarely get a busted yolk. Perfect!

Fried Duck Eggs

Fried Duck Eggs

Scrambled Duck Eggs/Duck Egg Omelettes

Jason particularly enjoys our scrambled duck eggs and omelets. Duck eggs are great for cooking in this way, especially since they hold up better than chicken eggs and retain more texture and flavor when cooked omelette-style. Duck eggs are significantly more flavorful than chicken eggs, and creamier in texture. They’re extra delicious when you add veggies and other yummies to your omelette.

A Lambsquarter, Purple Potato, and Duck Eggs Omelette!

A Lambsquarter, Purple Potato, and Duck Eggs Omelette!

Boiled/Deviled Duck Eggs

Boiled duck eggs are one of Emma’s favorite ways to eat our eggs. We boil them a bit longer than chicken eggs, but we know everyone has their own recipe for boiling eggs. We usually boil them for about 10 minutes and then leave them in the warm water with the pot’s lid on for about 10 more minutes. We always check an egg afterwards just to make sure they’re cooked to our preferences.

In case you love deviled eggs (like Emma does), you’re going to love deviled duck eggs even more! The natural creaminess of the eggs makes all the difference when you devil them! This is Emma’s mom’s recipe for curried, devil duck eggs… The BEST deviled eggs around!

Baking with Duck Eggs

Duck eggs are often touted as being the very best for baking, and it’s totally true! Since we only eat duck eggs these days (no chicken eggs for us), we’ve baked with duck eggs for a long time. The creaminess of duck eggs makes baking with them simply amazing! When you’re baking, you can substitute duck eggs for chicken eggs 1:1.

Duck Egg Drop Soup

This is perhaps the easiest and most unique way to enjoy duck eggs. We make a delicious broth with our chicken bones and make sure that the strained and ready-to-drink broth is very lightly simmering. Then we crack a few duck eggs into a bowl and whisk them so that when we slowly pour them into the simmering broth, they are easily stirred into small pieces with a fast-moving whisk. The whisked duck eggs cook in a matter of minutes and then we like to add peas and other yummy spices! Try this simple and easy recipe for a delicous treat.

Duck Egg Drop Soup!

Duck Egg Drop Soup!

There is always a way to enjoy nutritious and yummy duck eggs!


.:.

Farm Food Friday: Gluten, Flour, & Sugar Free Breakfast Pancakes

I usually skip the simpler carbohydrates if I can, like rice and flour, but that doesn’t make me any less hungry…

After some trial and error, Jason created a fantastic and simple pancake recipe, loaded with calories but low in sugar! What a great and filling breakfast! Plus, it’s fantastic with one of my very favorite foods: grass fed butter.

It’s so simple, you’ll be surprised! You can make these into classic pancakes, or you can take the easy route and bake the batter in the oven as a thicker cake. I enjoy the texture of the baked pancakes better.

Ingredients:

  • 6 medium/large sweet potatoes
  • 12 duck eggs (or chicken eggs, if you prefer)
  • 1 banana (a browner one is preferable)
  • Powdered ginger
  • Powdered cinnamon
  • Salt

IMG_0646

Materials:

  • Large mixing bowl
  • Potato masher
  • Whisk
  • Mixing spoon
  • 8×11″ oven pan

Directions:

  • Wash sweet potatoes
  • Bake whole sweet potatoes in the oven on 350 until soft
  • Once cool, peel sweet potatoes and place in the large mixing bowl
  • Peel banana and place with potatoes
  • Mash potatoes and banana until moderately smooth
  • Add 1/3 of eggs and mash/stir together until mixed evenly. Add second and third 1/3 of eggs when previous eggs are mixed in properly and do the same
  • Add a pinch of salt and ginger
  • Add a pinch (or more, if desired) of cinnamon
  • Mix thoroughly with whisk, spoon, and masher, attempting to make the mixture as smooth as possible.
  • Preheat oven to 350
  • Grease 8×11″ pan and pour in mixture
  • Smooth the top of the mixture
  • Bake on 350 for 1 hour and 15 minutes or until a knife can be removed cleanly from cake
  • Enjoy!

FullSizeRender

.:.


How to Cook Your Heritage Thanksgiving Turkey

Now that you’ve purchased your free range, non-GMO Heritage Thanksgiving Turkey, you’re probably wondering how to cook it! You may have noticed that your heritage bird looks very different than the average grocery store turkey. You are right to think that there is a different technique needed in cooking your heritage bird, but never fear! We have some recipe resources for you and your family to try this holiday season.

Heritage birds are smaller than an average grocery store turkey and they tend to cook more quickly. They have more dark meat, which is great for roasting the whole bird because it is less likely to dry out.

Heritage turkeys also taste different than your average Butterball turkey. They aren’t bland and actually taste like turkey. That’s because, well, they are turkeys. Heritage birds are closer to their wild ancestors and spend their free ranging days running around the land, building muscle for your Thanksgiving enjoyment. The flavor of the meat tends to pair well with earthy, aromatic spices like sage, rosemary, and thyme. This means you can get creative with recipes this holiday season!

turkey

A delicious, roasted turkey!

Here are a few recipes that your family might enjoy this Thanksgiving:

Here are a few of our tips for cooking your Heritage Turkey:

  • Make sure your bird is fully thawed before you cook it.
  • Take it out of the refrigerator and let it come up to room temperature for 30 minutes to an hour before you begin cooking it.
  • Don’t overcook your bird!
  • These birds have not been injected with whatever gross flavor concoction the conventional grocery store birds have been, so be sure to season appropriately (salt, pepper, garlic, whatever floats your gravy boat).
  • The USDA recommends cooking your bird until the internal temperature (the meat in the inner thigh) reaches 165 degrees. However, many chefs recommend cooking your Heritage Turkey until it reaches 140-150 degrees.
  • When you take your bird out of the oven, let it rest for at least 15-20 minutes before you carve it. This allows for all of the moisture and juices to seep back into the meat instead of being released as steam.
  • Don’t cook the stuffing inside the bird. Because heritage birds cook quicker, the stuffing might make the bird cook unevenly. You can still add aromatics like part of an onion, apple, or carrot to the cavity to add moisture and flavor.
  • If you are cooking it at a higher temperature, you might want to skip basting the bird. This is because constantly opening the oven door lowers the temperature and might make the bird cook unevenly.
  • Heritage Turkeys do not need to be brined (they have their own delicious flavor). Some chefs say that brining enhances the flavor and others say that it is unnecessary and simply extra work.
  • Don’t forget to save your bones! Simmer them in a crock pot with water for hours to make a stock or broth. These birds were raised naturally on pasture and their bones, tendons, and joints will make a delicious and nutritious broth!

For more information and tips about cooking your Heritage Turkey, check out these articles from Rodale’s Organic Life about How to Cook the Tastiest Bird Ever This Thanksgiving and The Magic of Fire: Traditional Foodways by William Rubel.

We wish you a Happy Thanksgiving, from our Family Homestead to your Family Table! If you are interested in sharing your Heritage Turkey recipes or pictures from this year’s Thanksgiving, send us an email at ourochreway@gmail.com so we can add it to our website!

Also, it’s not too early too early or too late to reserve your free range, non-GMO Heritage Thanksgiving Turkey for Thanksgiving 2016. Check out our Heritage Turkeys page for more information!

turkeys

Happy turkeys!

Older posts

© 2024 KW Homestead

Theme by Anders NorenUp ↑