KW Homestead

Pasture Raised Poultry & Edible Landscaping Plants Since 2013

Tag: chicks (page 2 of 2)

Chicken Nipple Waterer for Chicks with a Soda Bottle

Our chicks are growing fast, and as they get more and more energetic and active they end up messing up their water more frequently. They kick up their pine shavings and poop in their mason jar waterers which necessitates constant dumping, cleaning and changing on our part to ensure that they have access to clean water.

Chicken nipples (get your head out of the gutter!), use gravity and simple mechanics to keep their water clean and their bedding dry. We eventually want to transition our entire chicken operation to nipple waterers, but we decided to start first with the chicks.

IMG_0032-0.JPG

Installing chicken nipples is simple. We got a pack of 25 that screws into a pre-drilled hole in your container. Easy.

IMG_0039.JPG

We hope to use 5 gallon buckets outside, but decided to first try a 2 liter soda bottle or the chicks. 1 hole with a 5/16 bit in the cap, a quick tightening with a pair of pliers, and a few loops on a piece of rope and our soda bottle nipple Waterer was ready for action.

The nipples are red, which apparently attracts the eye of chickens, and within seconds of adjusting the Waterer to eye level the first few brave chicks were pecking at the nipple and drinking water. Success!

One quick note, it’s important to make sure that you avoid creating a vacuum inside of the waterer. With a bucket, just leave the lid a little bit cracked to break the vaccuum. Our solution with the soda bottles is to just poke a tiny hole in the base by where it hangs. This is enough to break the vacuum and ensure that the water flows freely out of the nipple when the birds peck it.

IMG_0033.JPG

Right now we have just the one nipple Waterer, in addition to the two mason jar waterers but I want to build at least two more. It seems that most people use 1 nipple for anywhere from 5-10 birds, so 2 or 3 should be fine for us.

I’ve seen some creative designs using pvc, barrels, and hoses, and I’m sure we’ll set up something pretty cool for our Banty tractor, the standards, and any other fowl we add next spring!

chicken birth anomalies, part 3: a chick who needed help hatching

despite having a really great hatching experience for our first batch of chicks, there were still some anomalies in our new population of chicks. of course we’ve had some chicks who took longer to hatch then others, or some chicks that appear to be smaller (a little more runty) than the others, but this is to be expected. no chick is the same, of course!

beyond these “average uniquenesses” among our chicks, three particular anomalies stand out from this experience:

  1. a chick born with part of her yolk sac unabsorbed
  2. a chick born with an underdeveloped leg
  3. a chick that actually needed help hatching

i want to describe these three different anomalies and how we’ve dealt with them/plan to deal with them. this post focuses on the third…

anomaly #3: 

the very last chick that was born in this bunch was born with my assistance. he was born over 3 days after the beginning of the hatch was supposed to begin, and it had been 24 hours since the next-to-last chick had been born naturally.

eggs

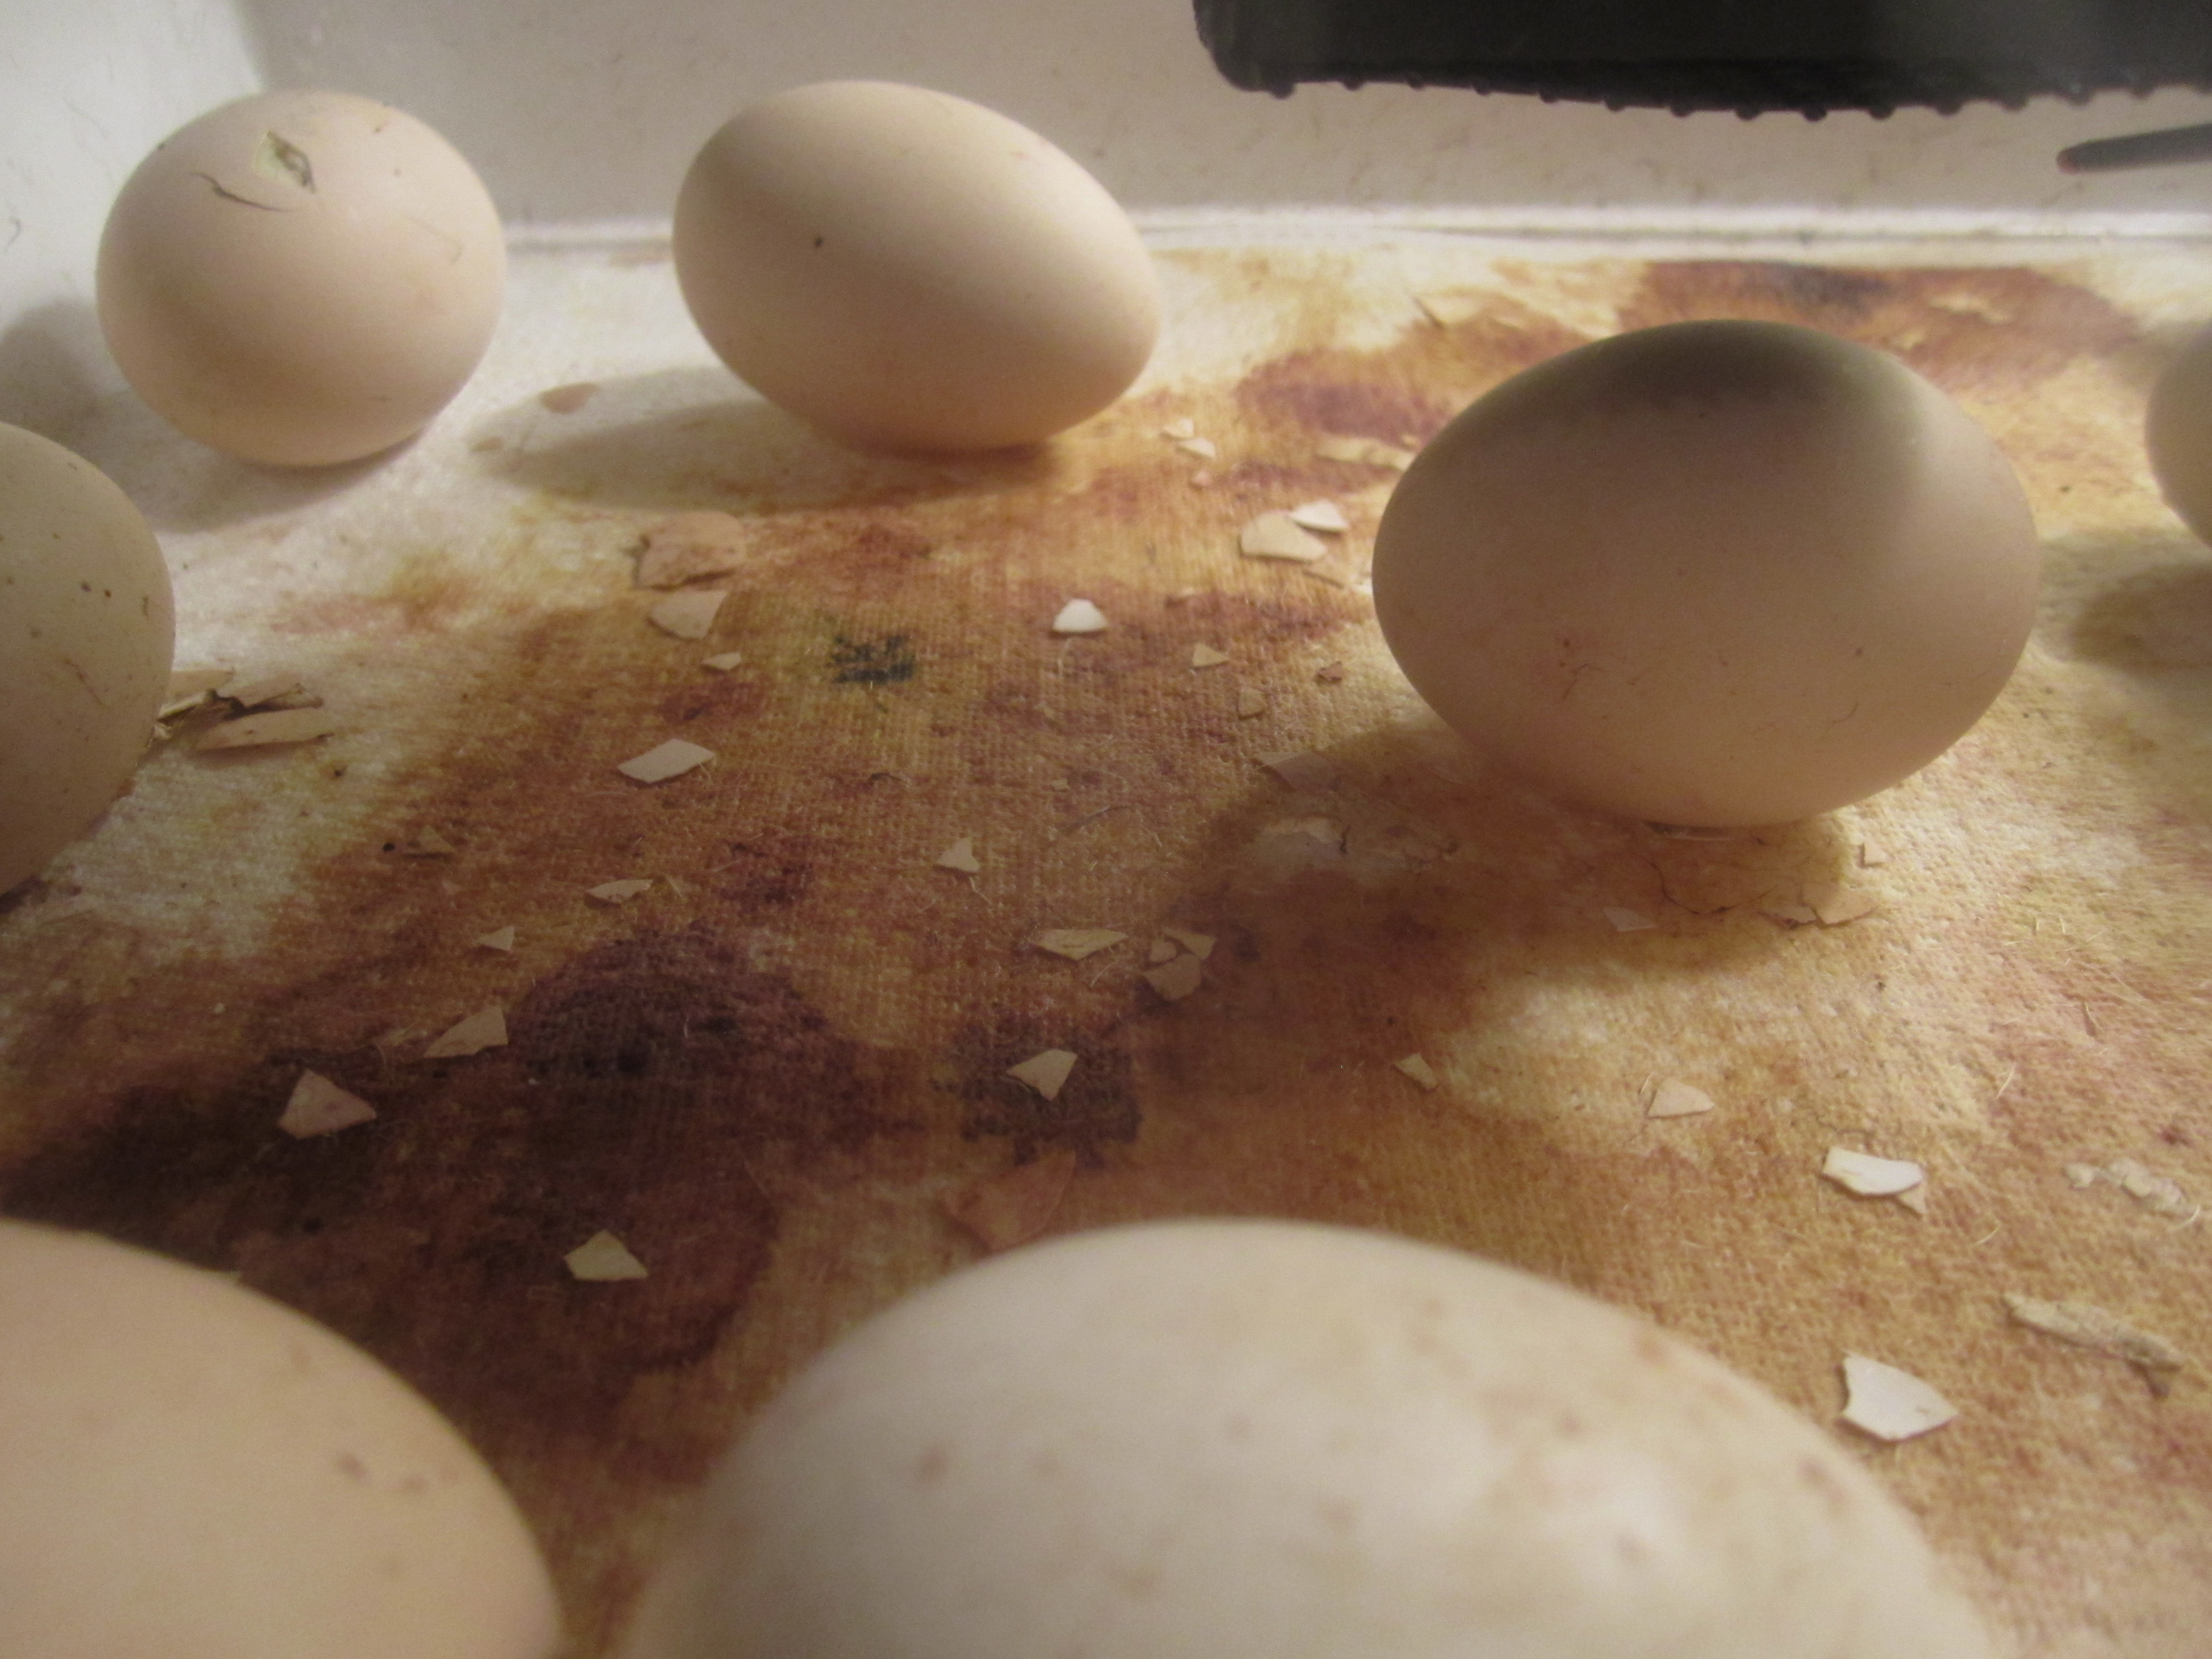
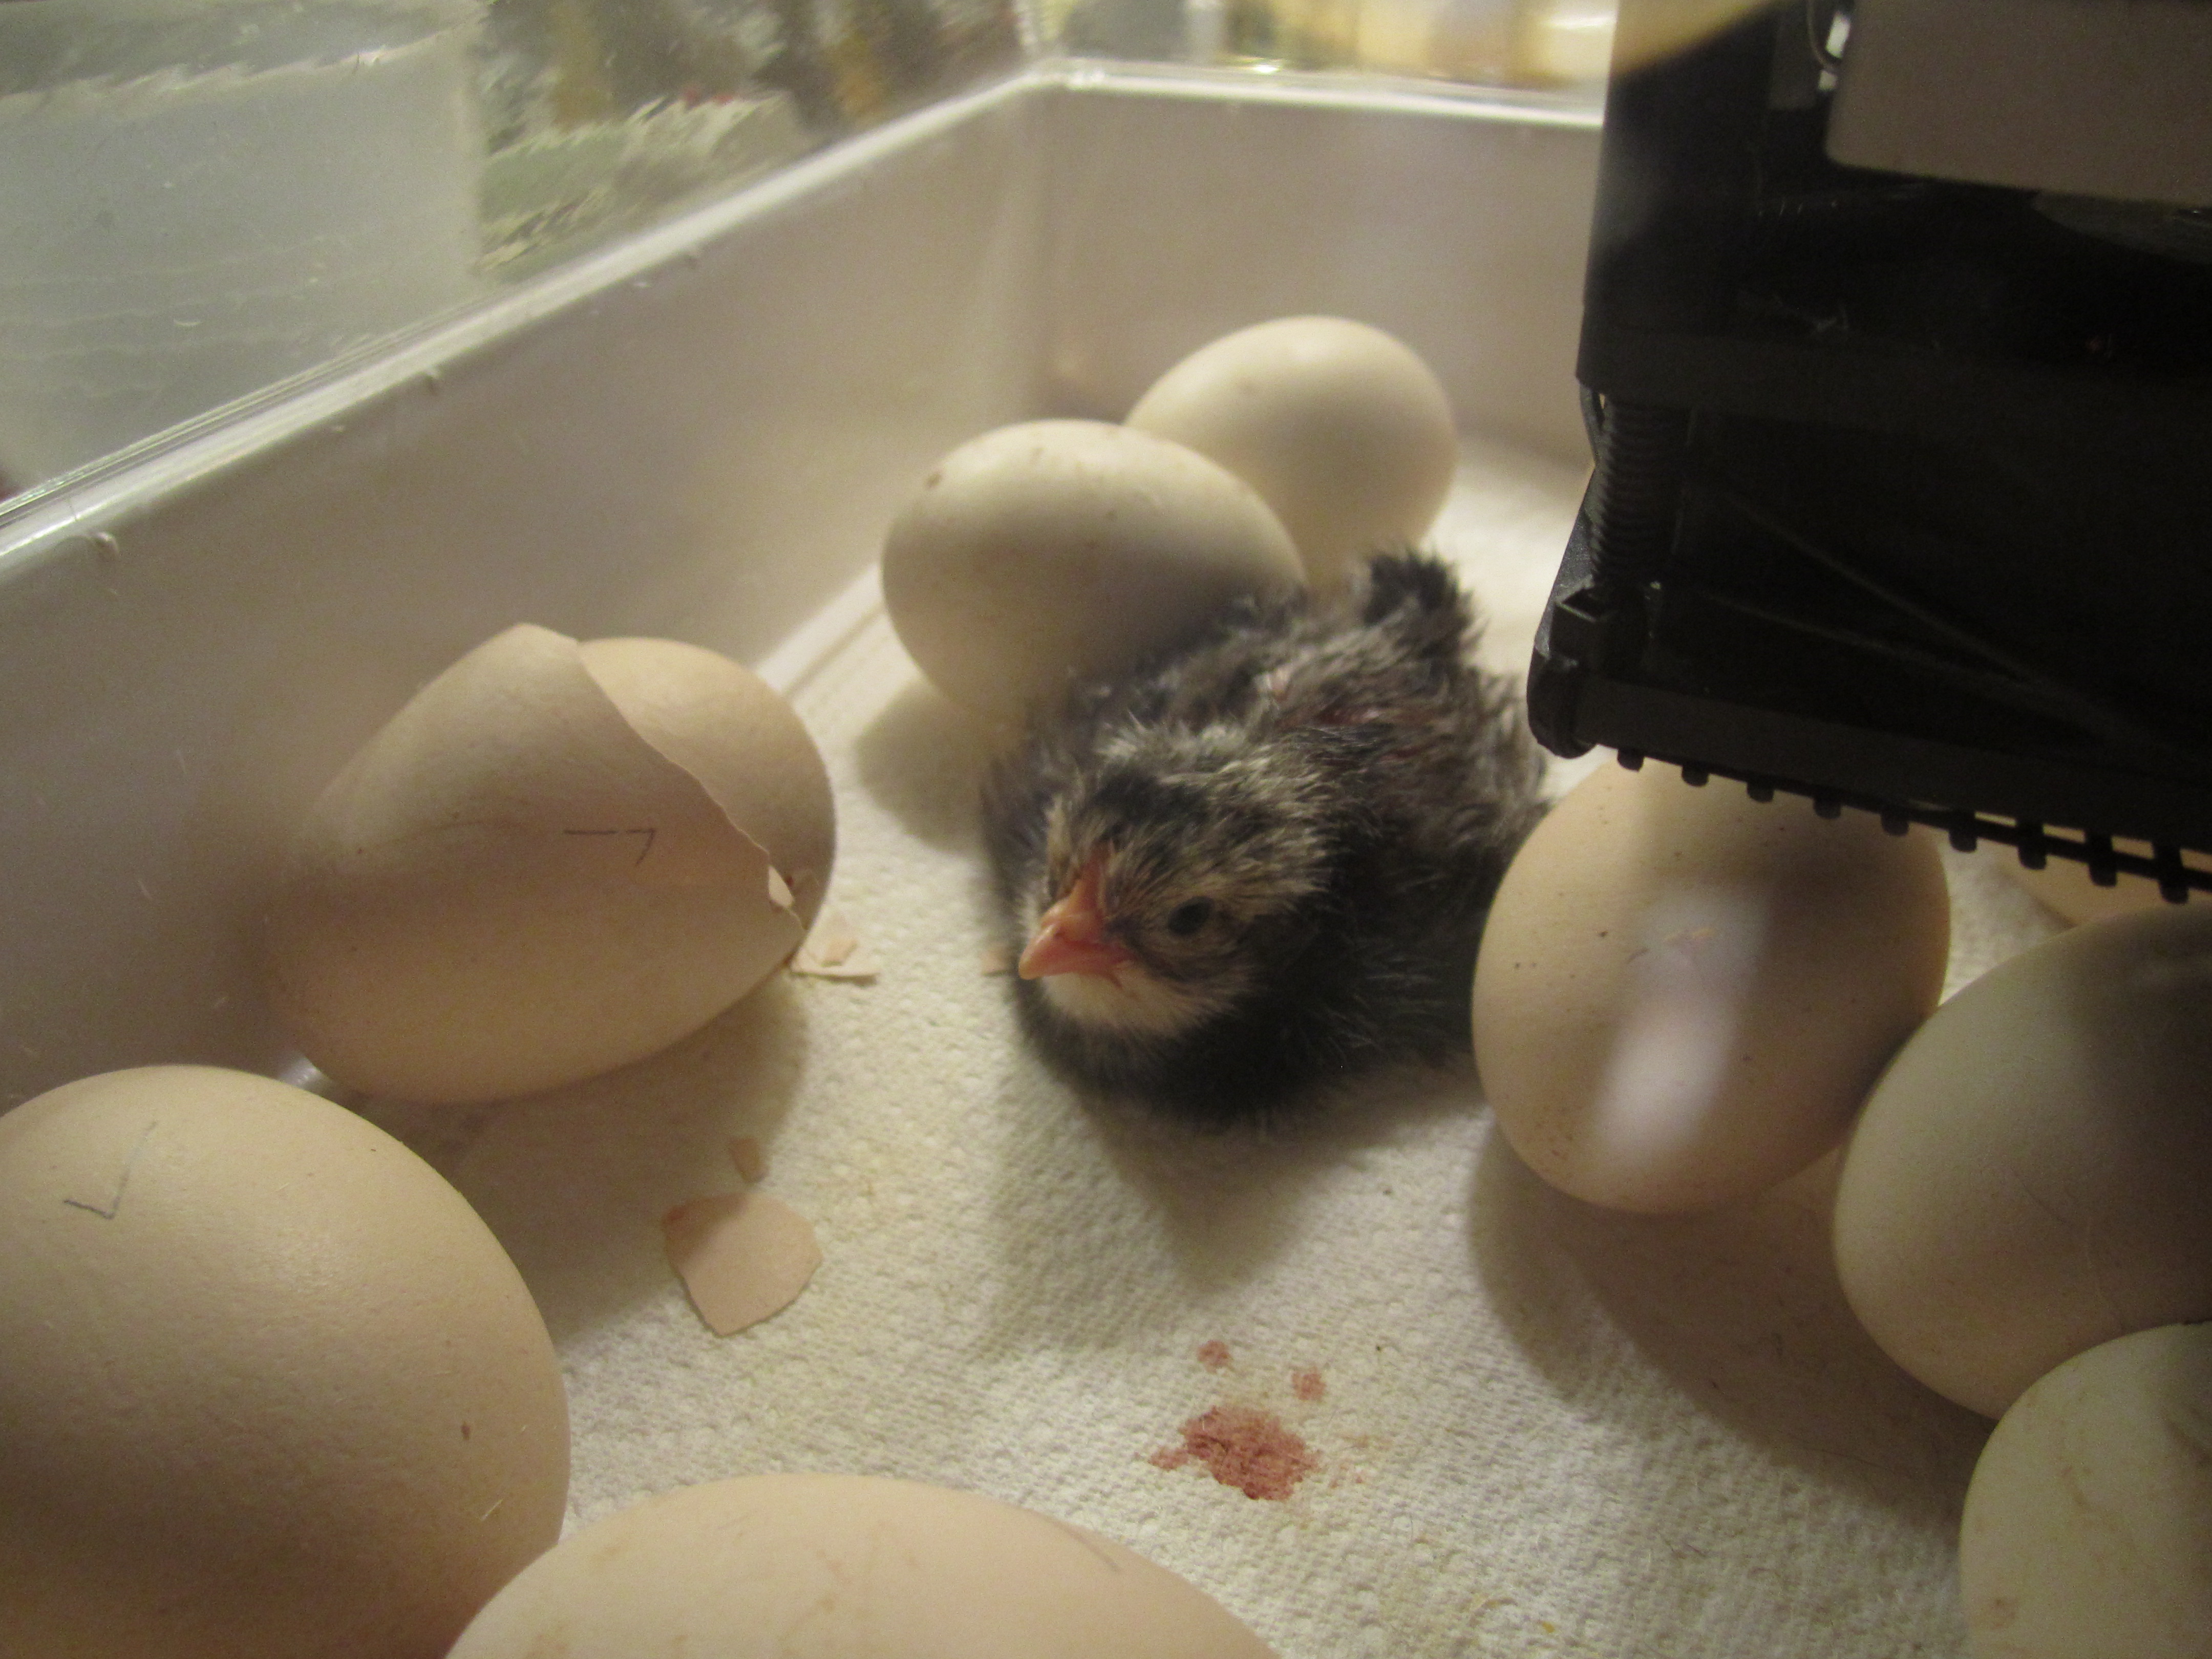
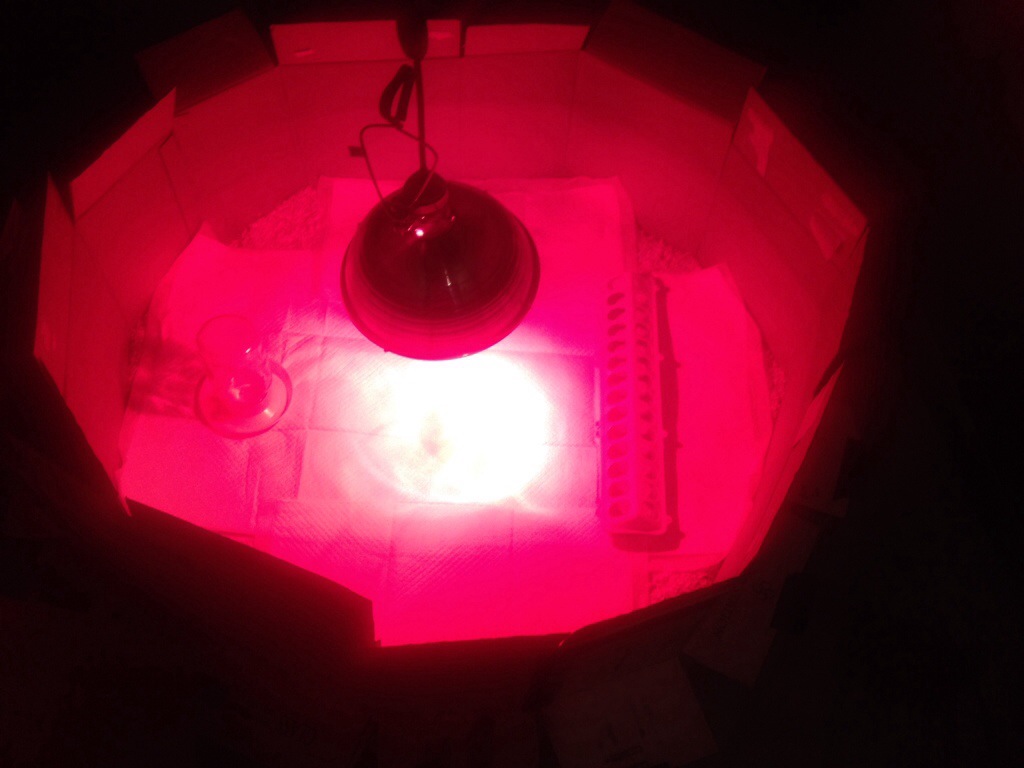
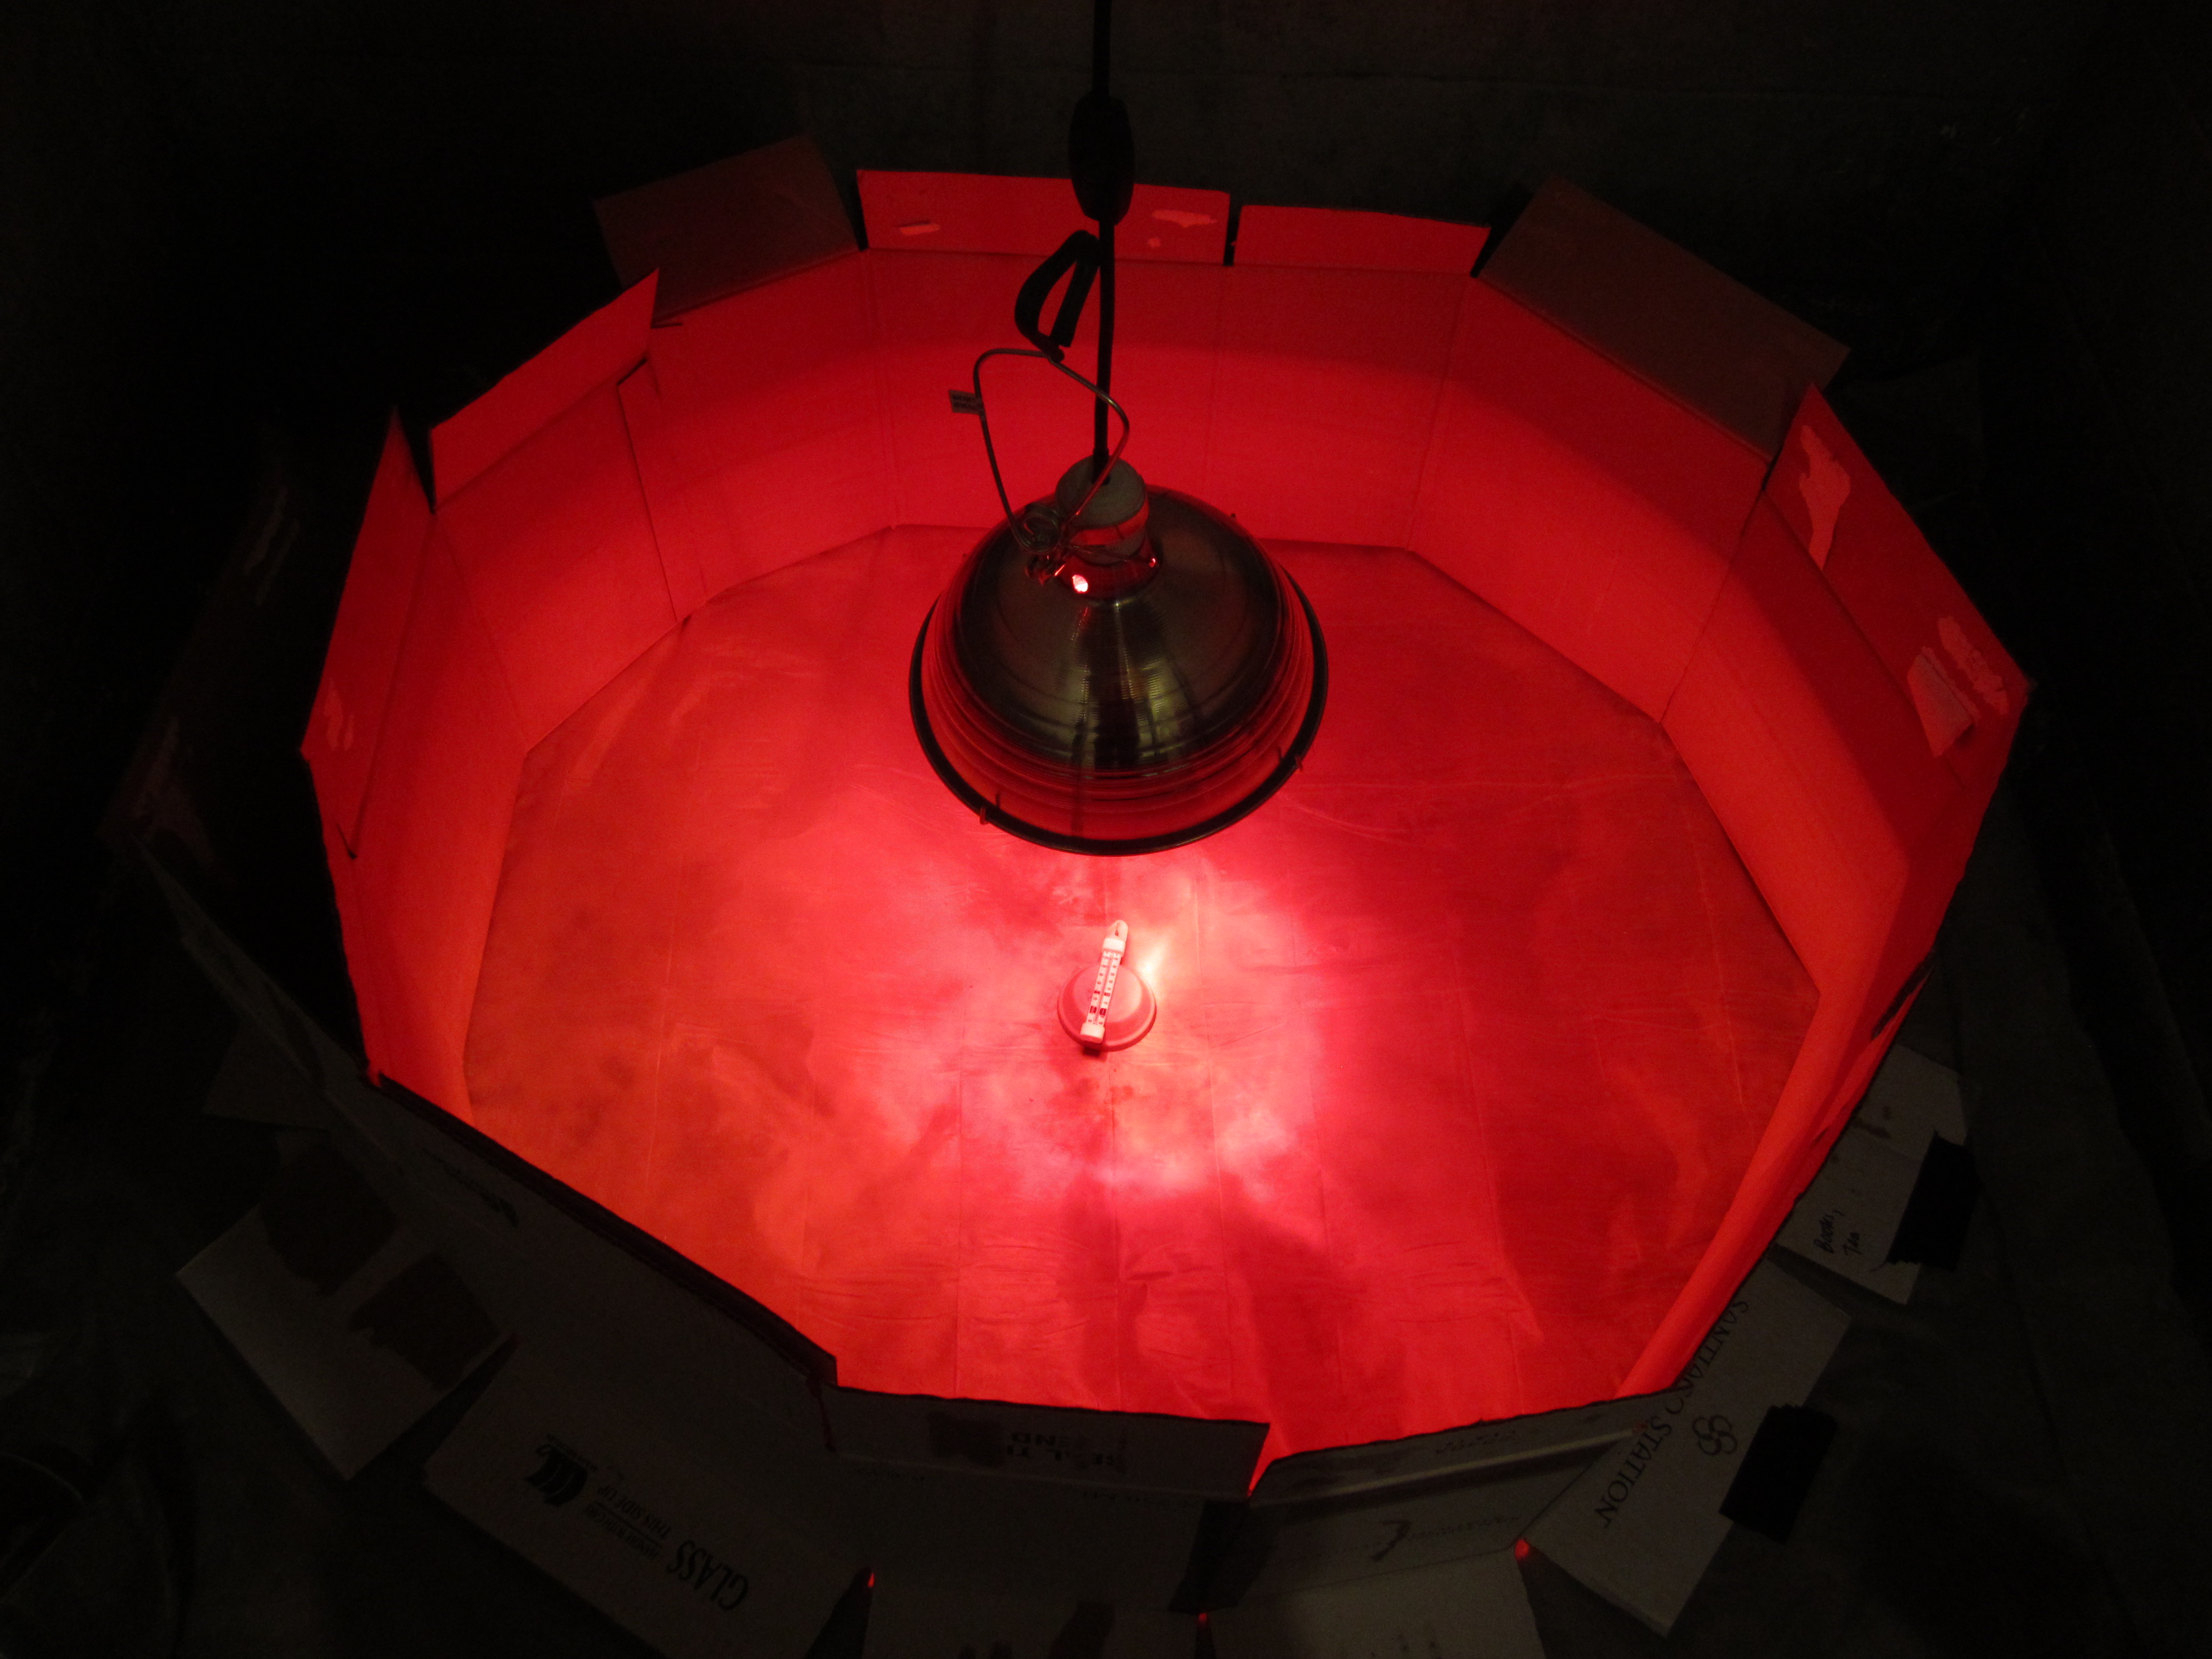
the inside of the incubator, looking rather empty near the end of the hatch.

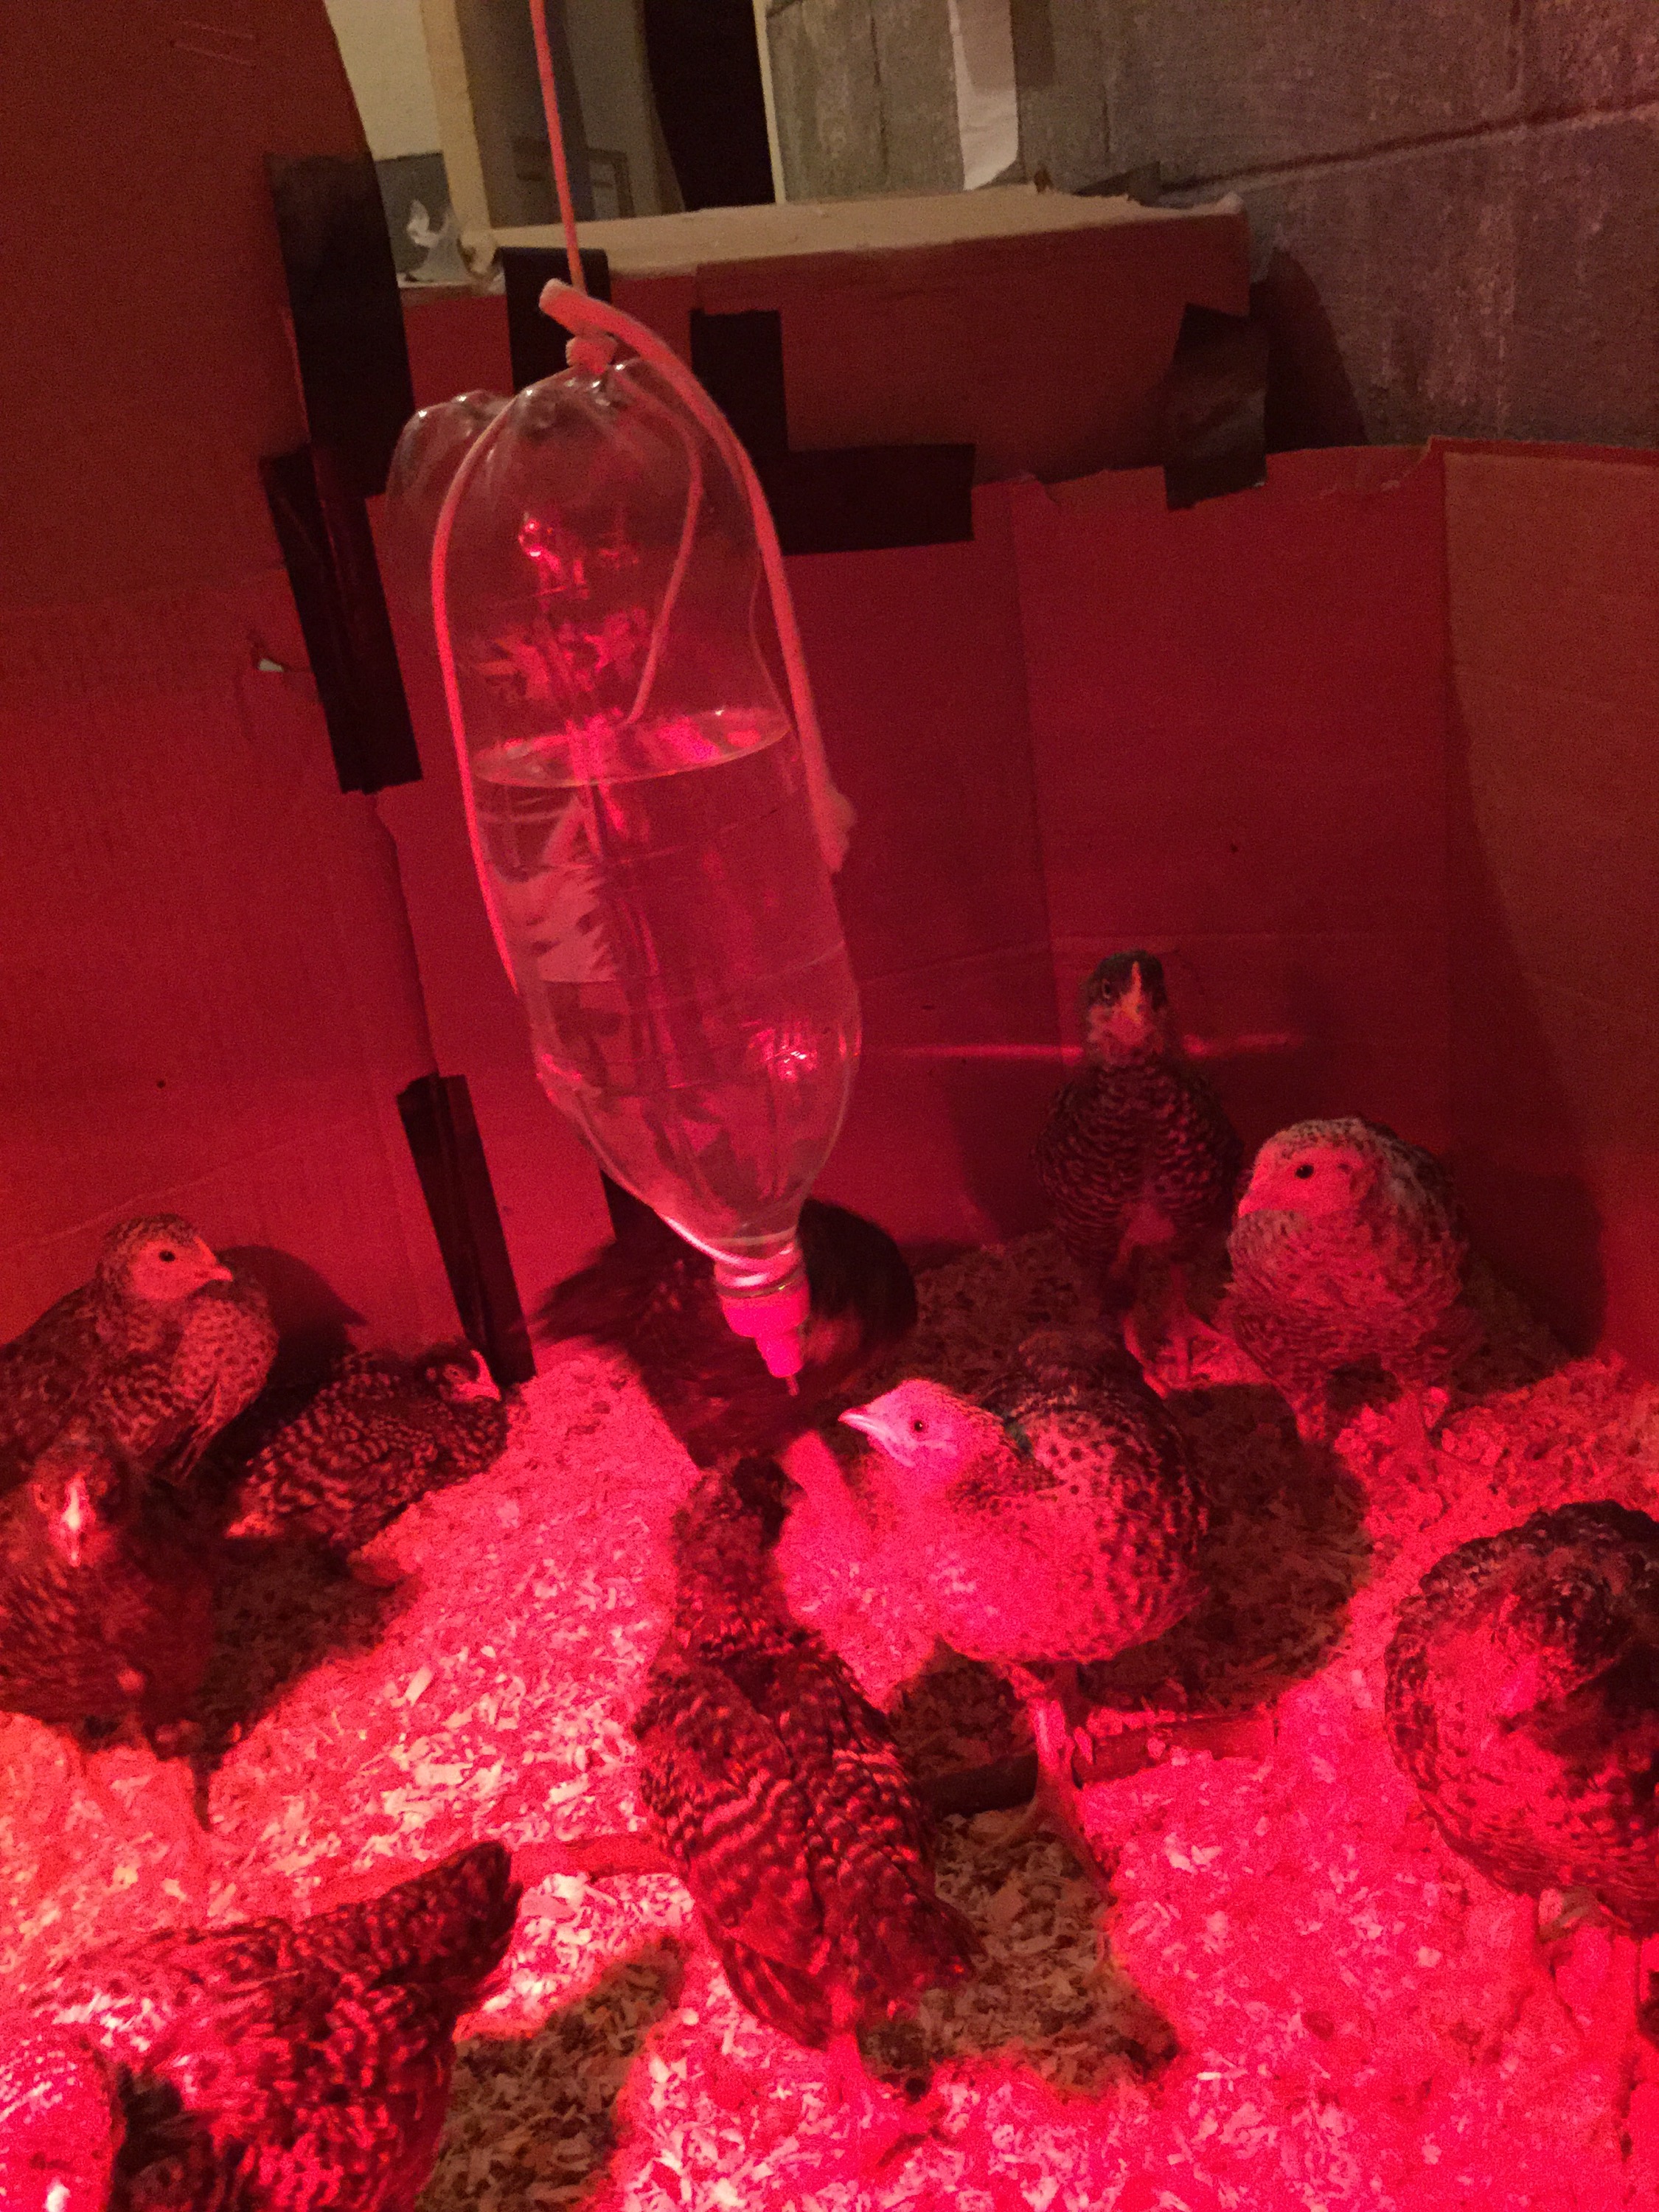
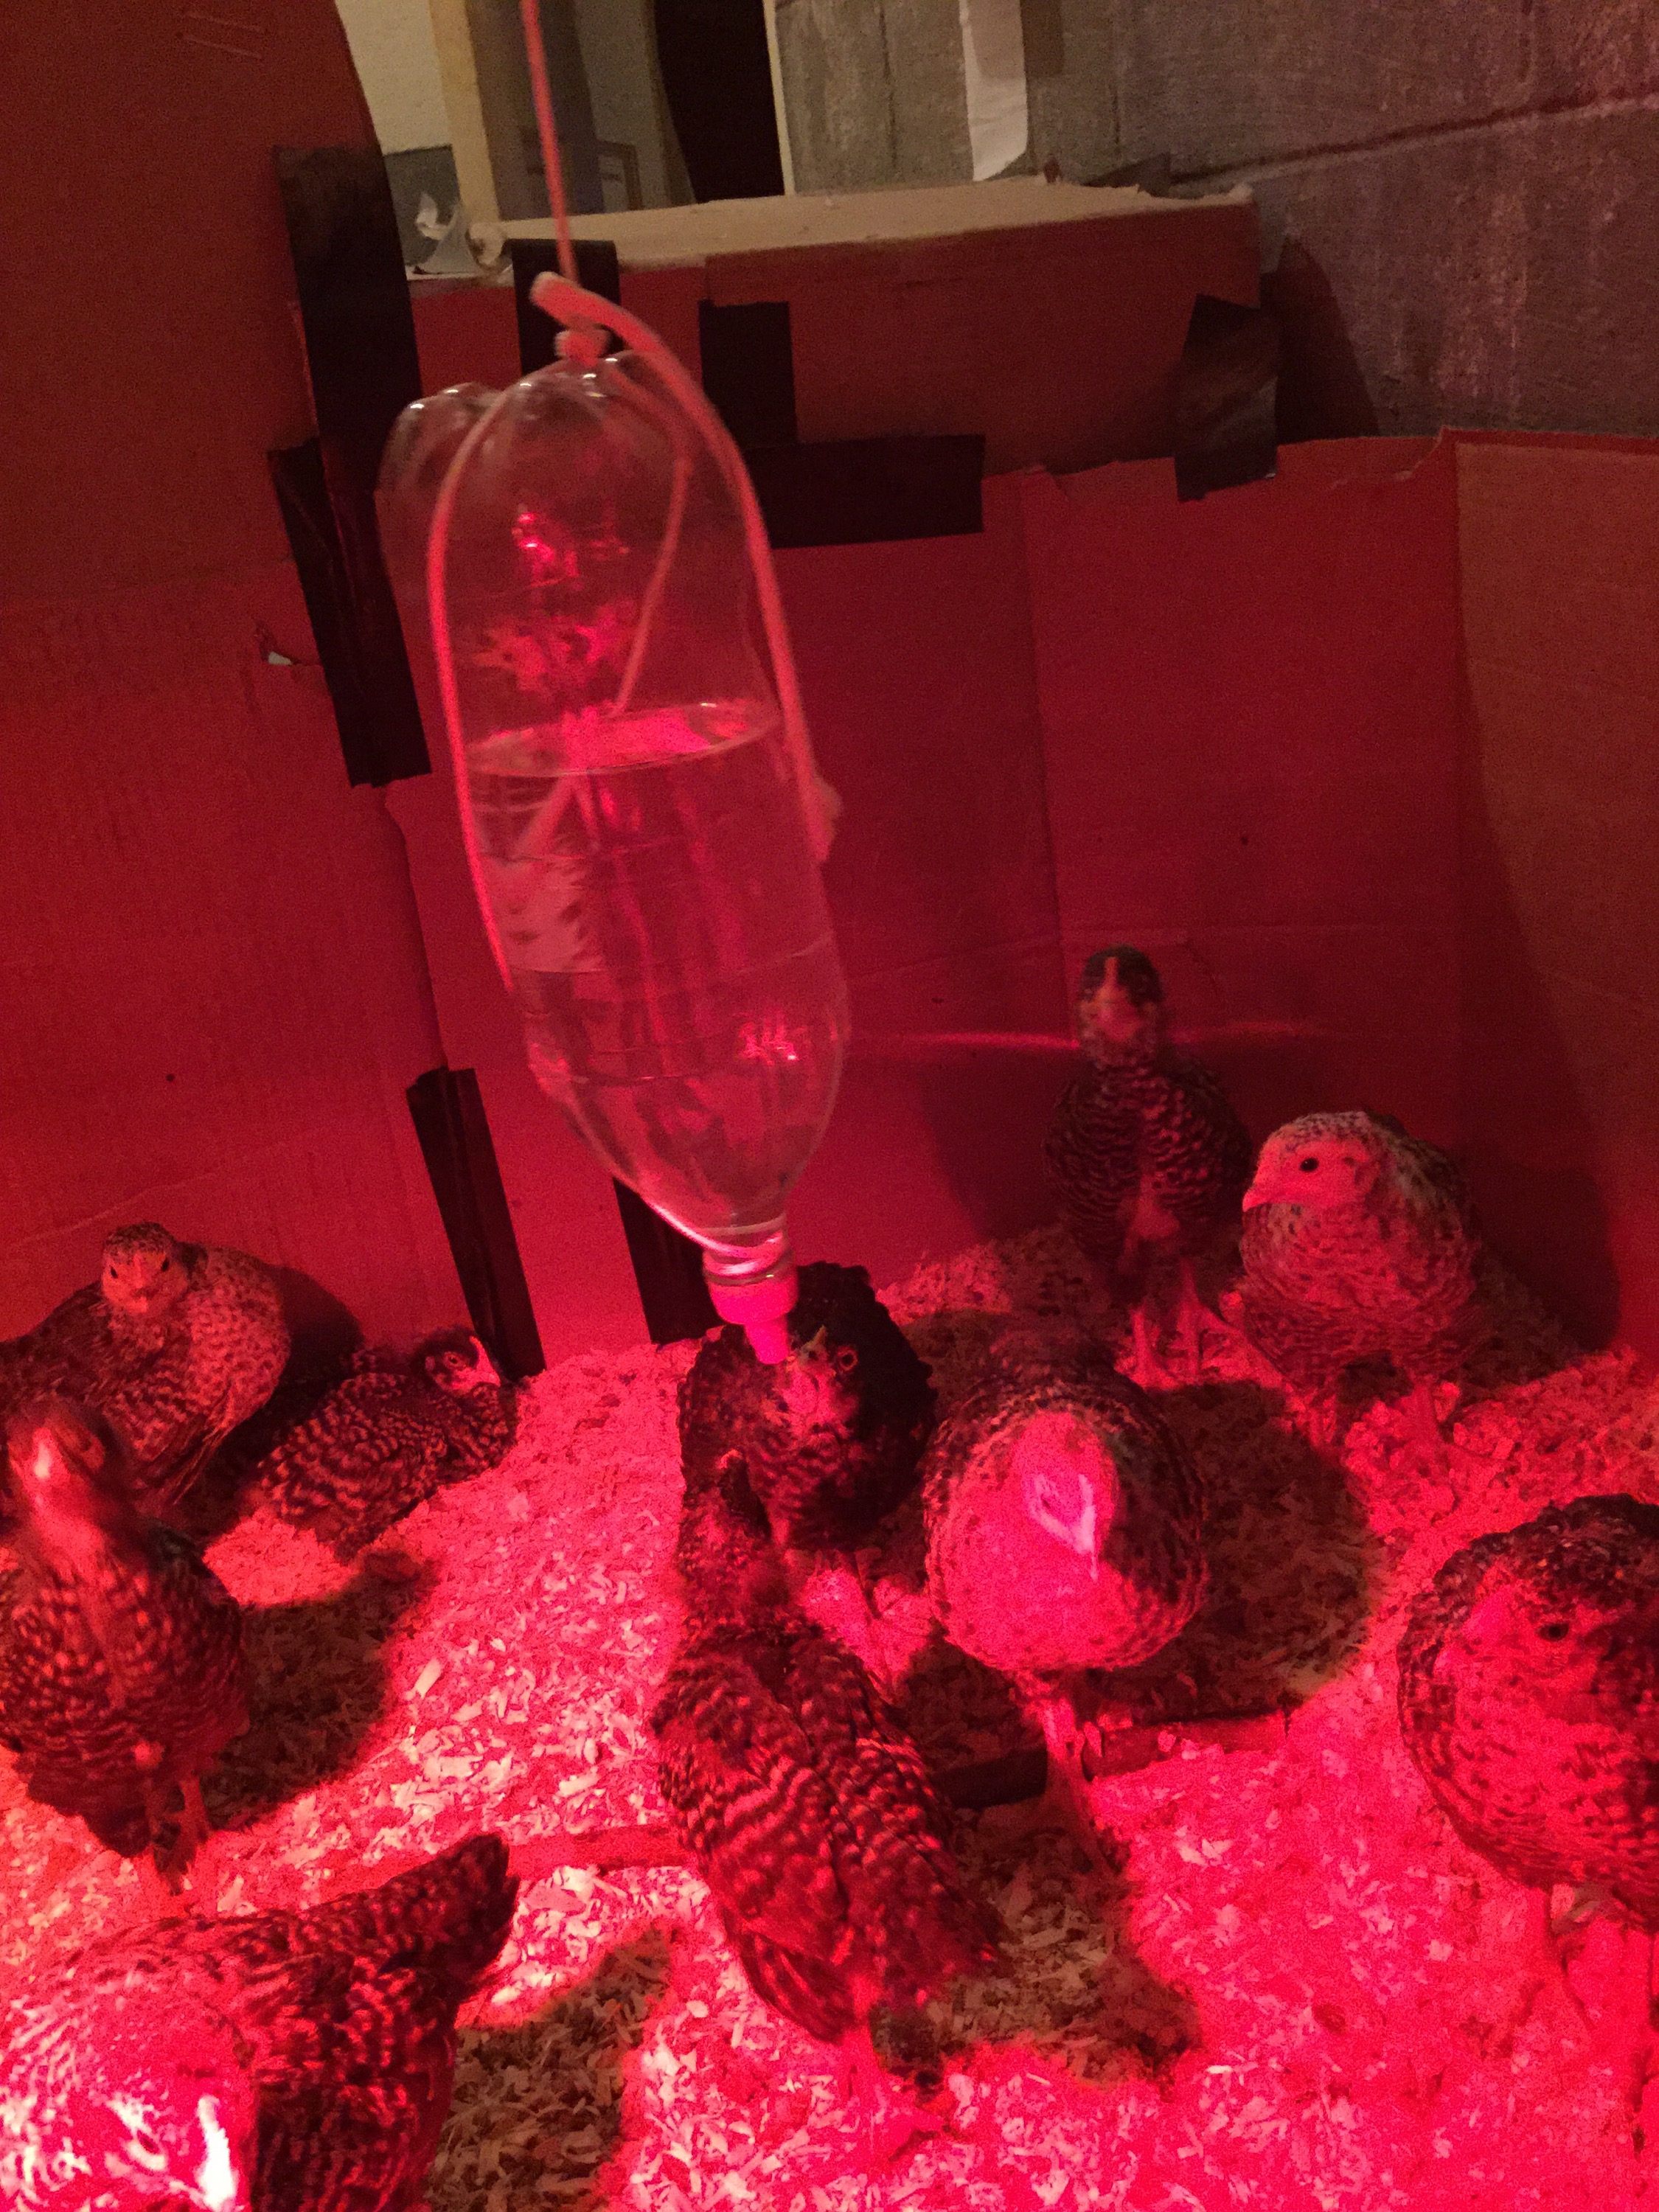
just a reminder, all of the other chicks were born naturally, by themselves, without any intervention from me at all. and this is the way it should be, since nature can almost always do “its thing” without any major issues. chicks need to be born based on their own timing. sometimes they need a little extra time to absorb all of the yolk sac into their abdomen (from which they are provided with enough nourishment for a few days and do not need food or water). other times they are still absorbing all of their blood (that was once coursing through the vessels inside of the egg). you should always try not to intervene, and only do so as a last resort.

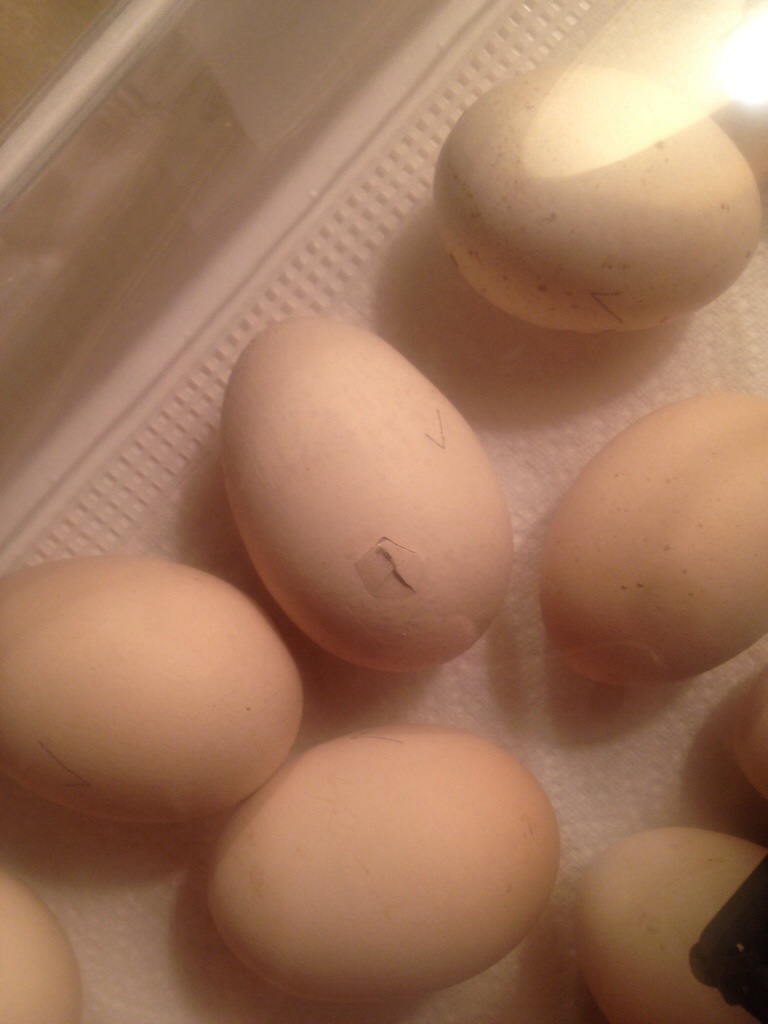
this is what happened with chick #22. he had pipped through his shell over 24 hours before, pipping all the way around the perimeter. in the previous hatches i witnessed, once this “perimeter pip” happened, it took about 30 minutes for the chick to come busting into the world. but chick #22 was still inside, 24 hours later. i checked him out a few times, moving his egg, and could still hear him peeping inside… a good sign! hoping that a poke or two might motivate him and get him going again, i was disappointed when it didn’t.

so i looked closer… the membrane directly inside the shell had dried out, and was not moist and flexible as it had been during the other hatches. since he was the last one in the incubator (besides 2 other eggs that we later determined had died during development and were not viable anymore), i wondered if him drying out had anything to do with all of the other chicks (and their moistness) being removed. the humidity reading on the incubator still said it was normal inside, but you never know what was happening inside his shell.

after doing some research, i learned that if a chick’s membrane dries out too much, it might get stuck to the chick and keep it from moving around in its shell and being able to break free. it was clear that this is what happened to chick #22.

broken egg shells

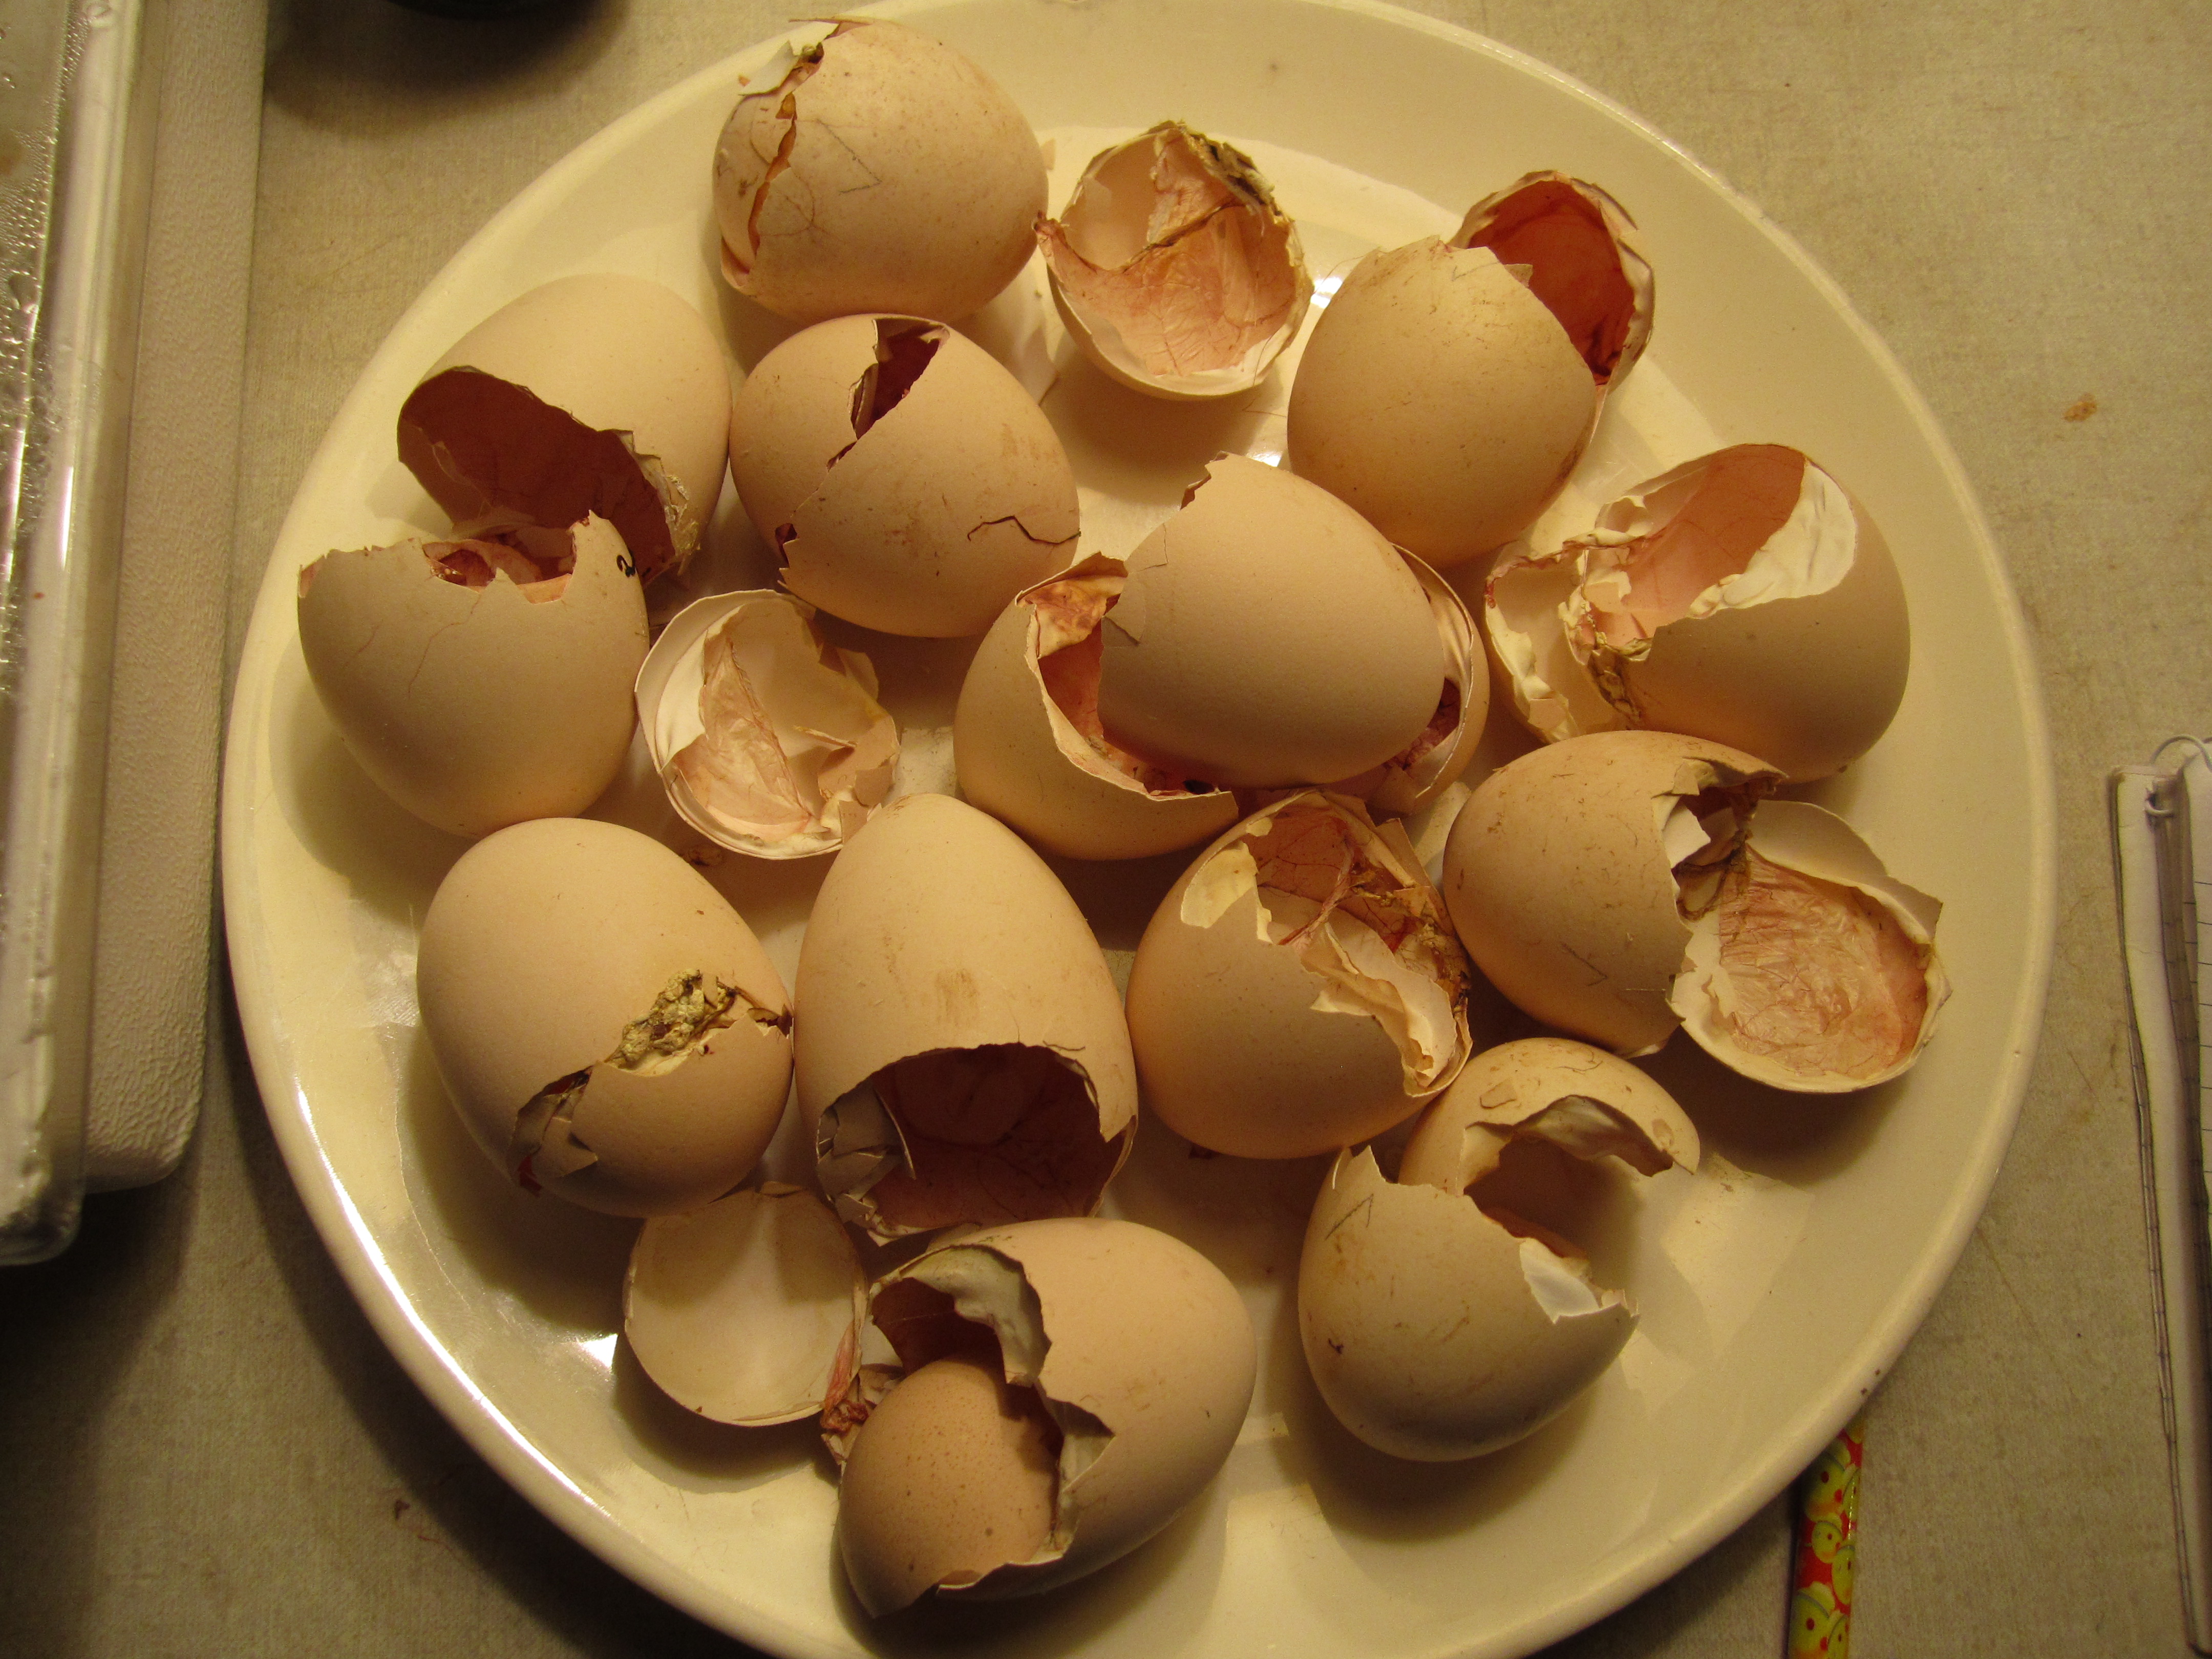
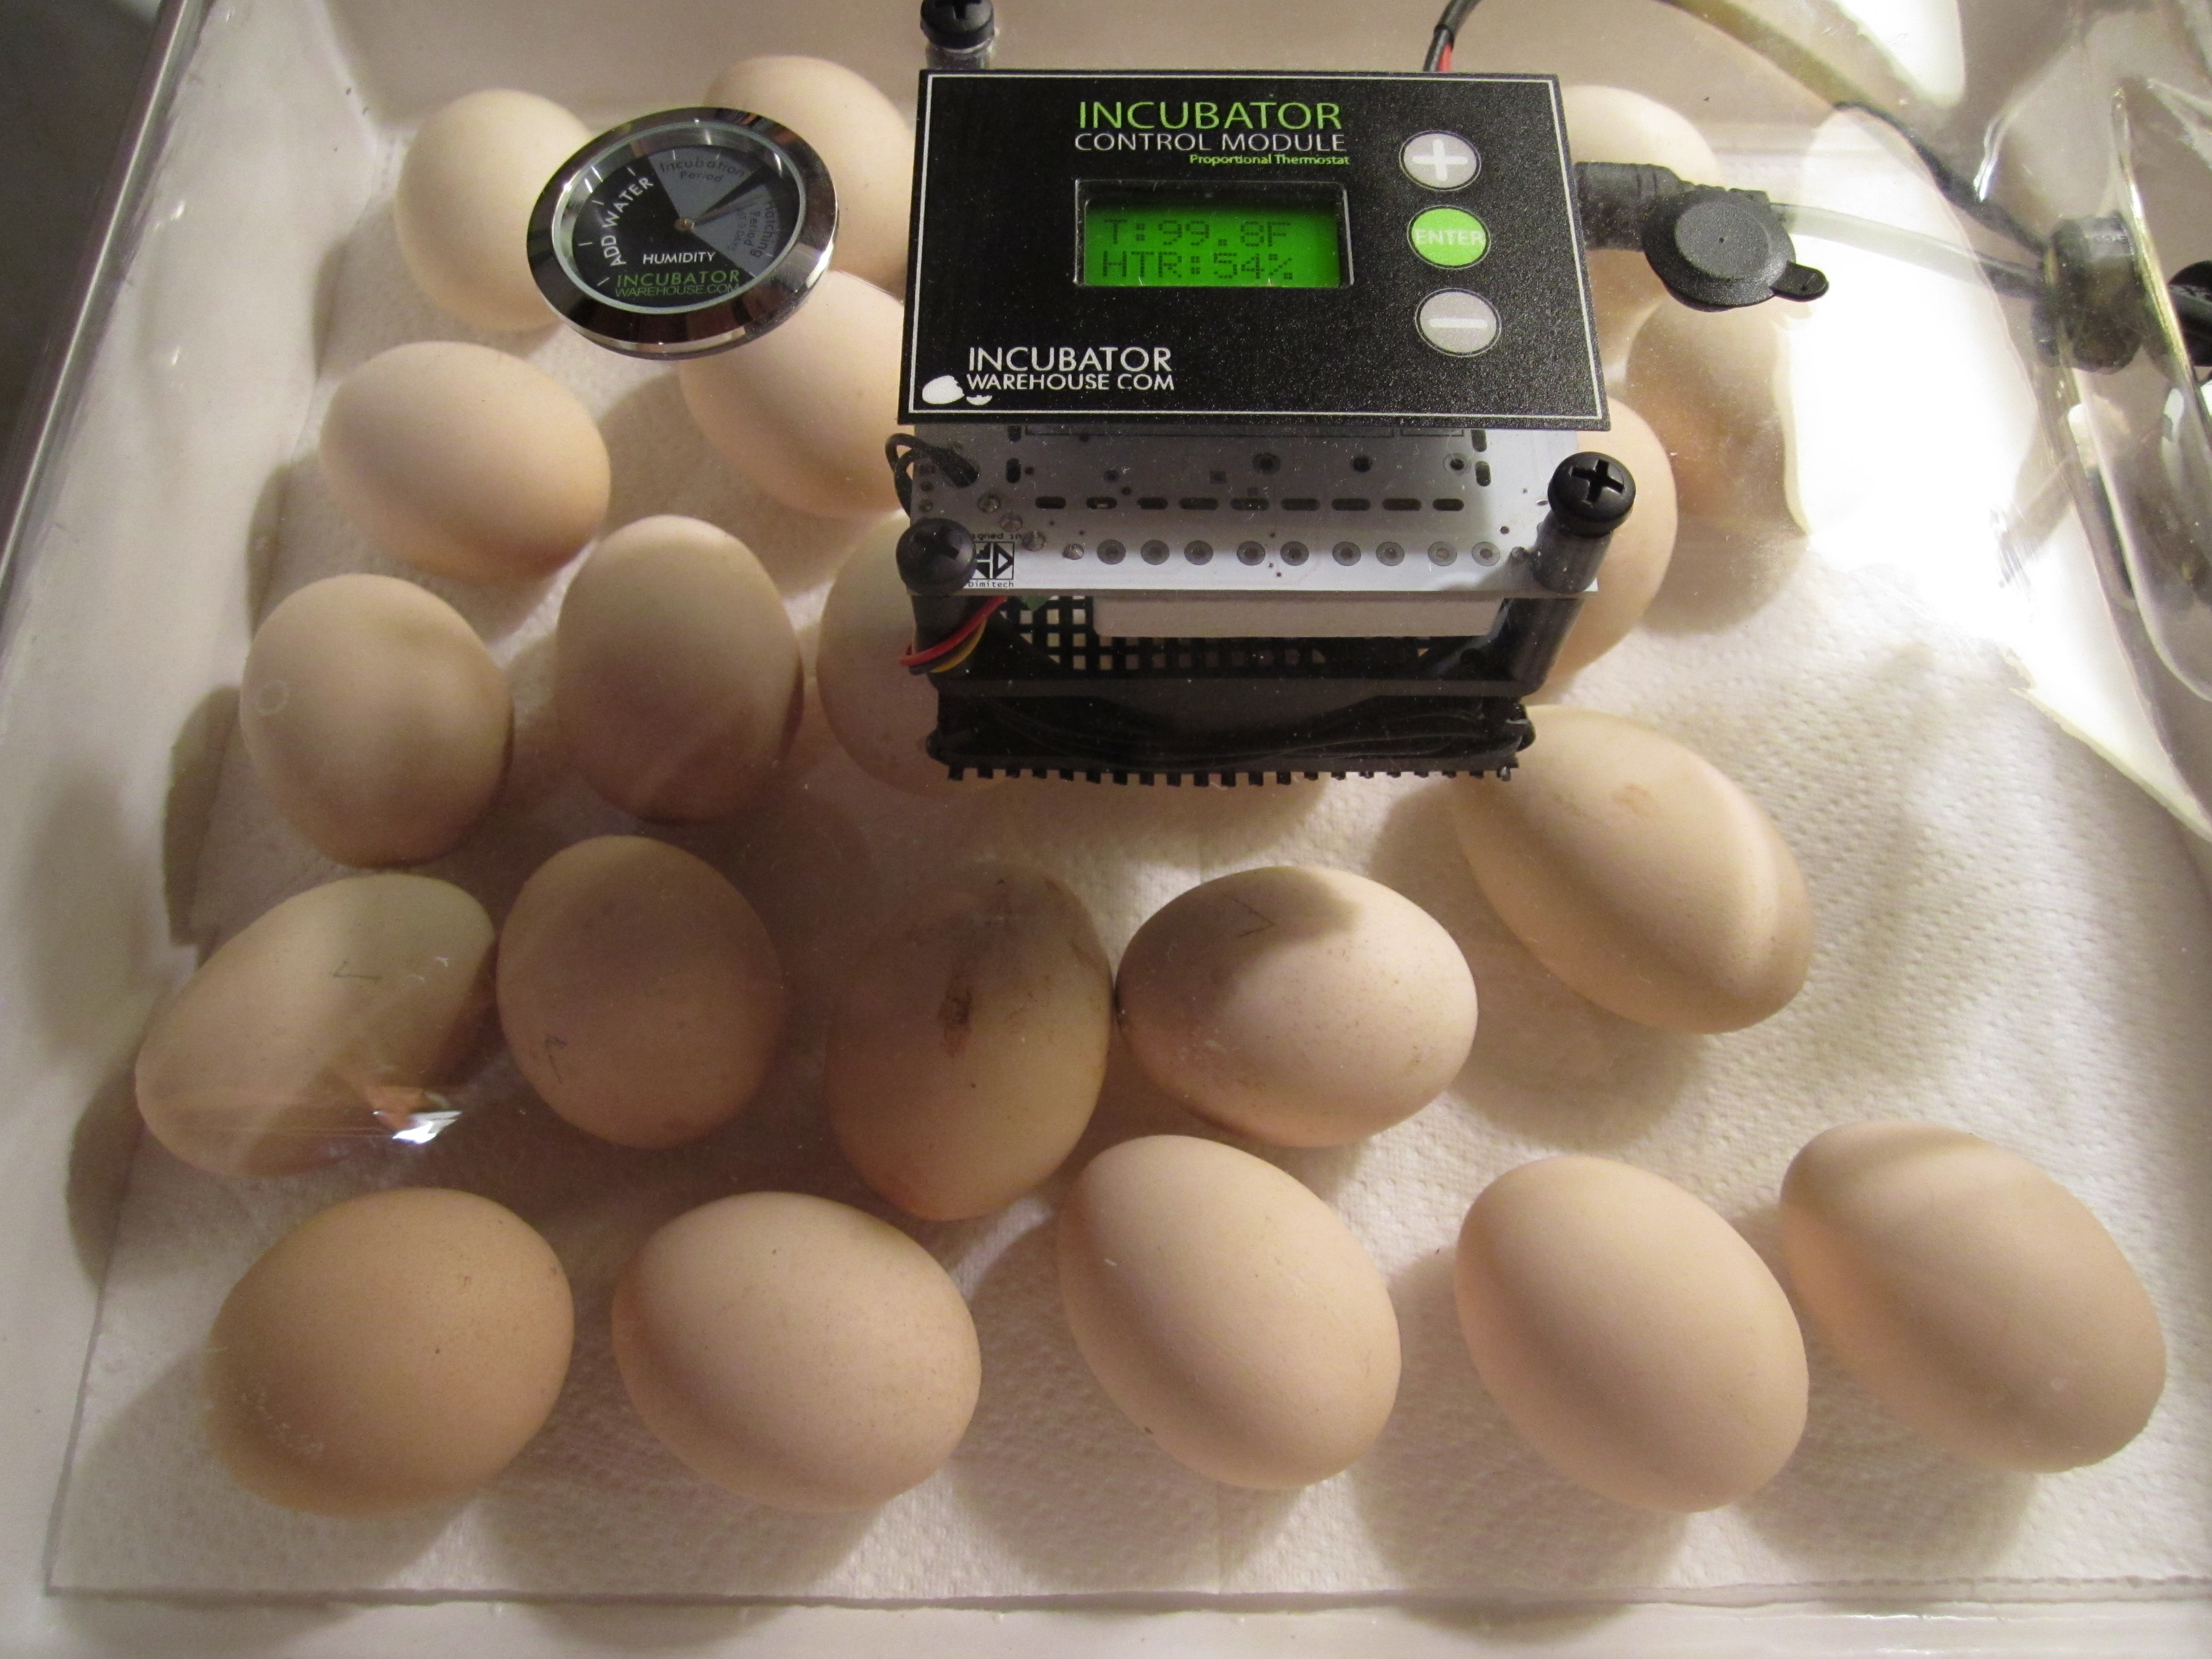
some of the hatched egg shells from the chicks before chick #22. see the membranes inside?

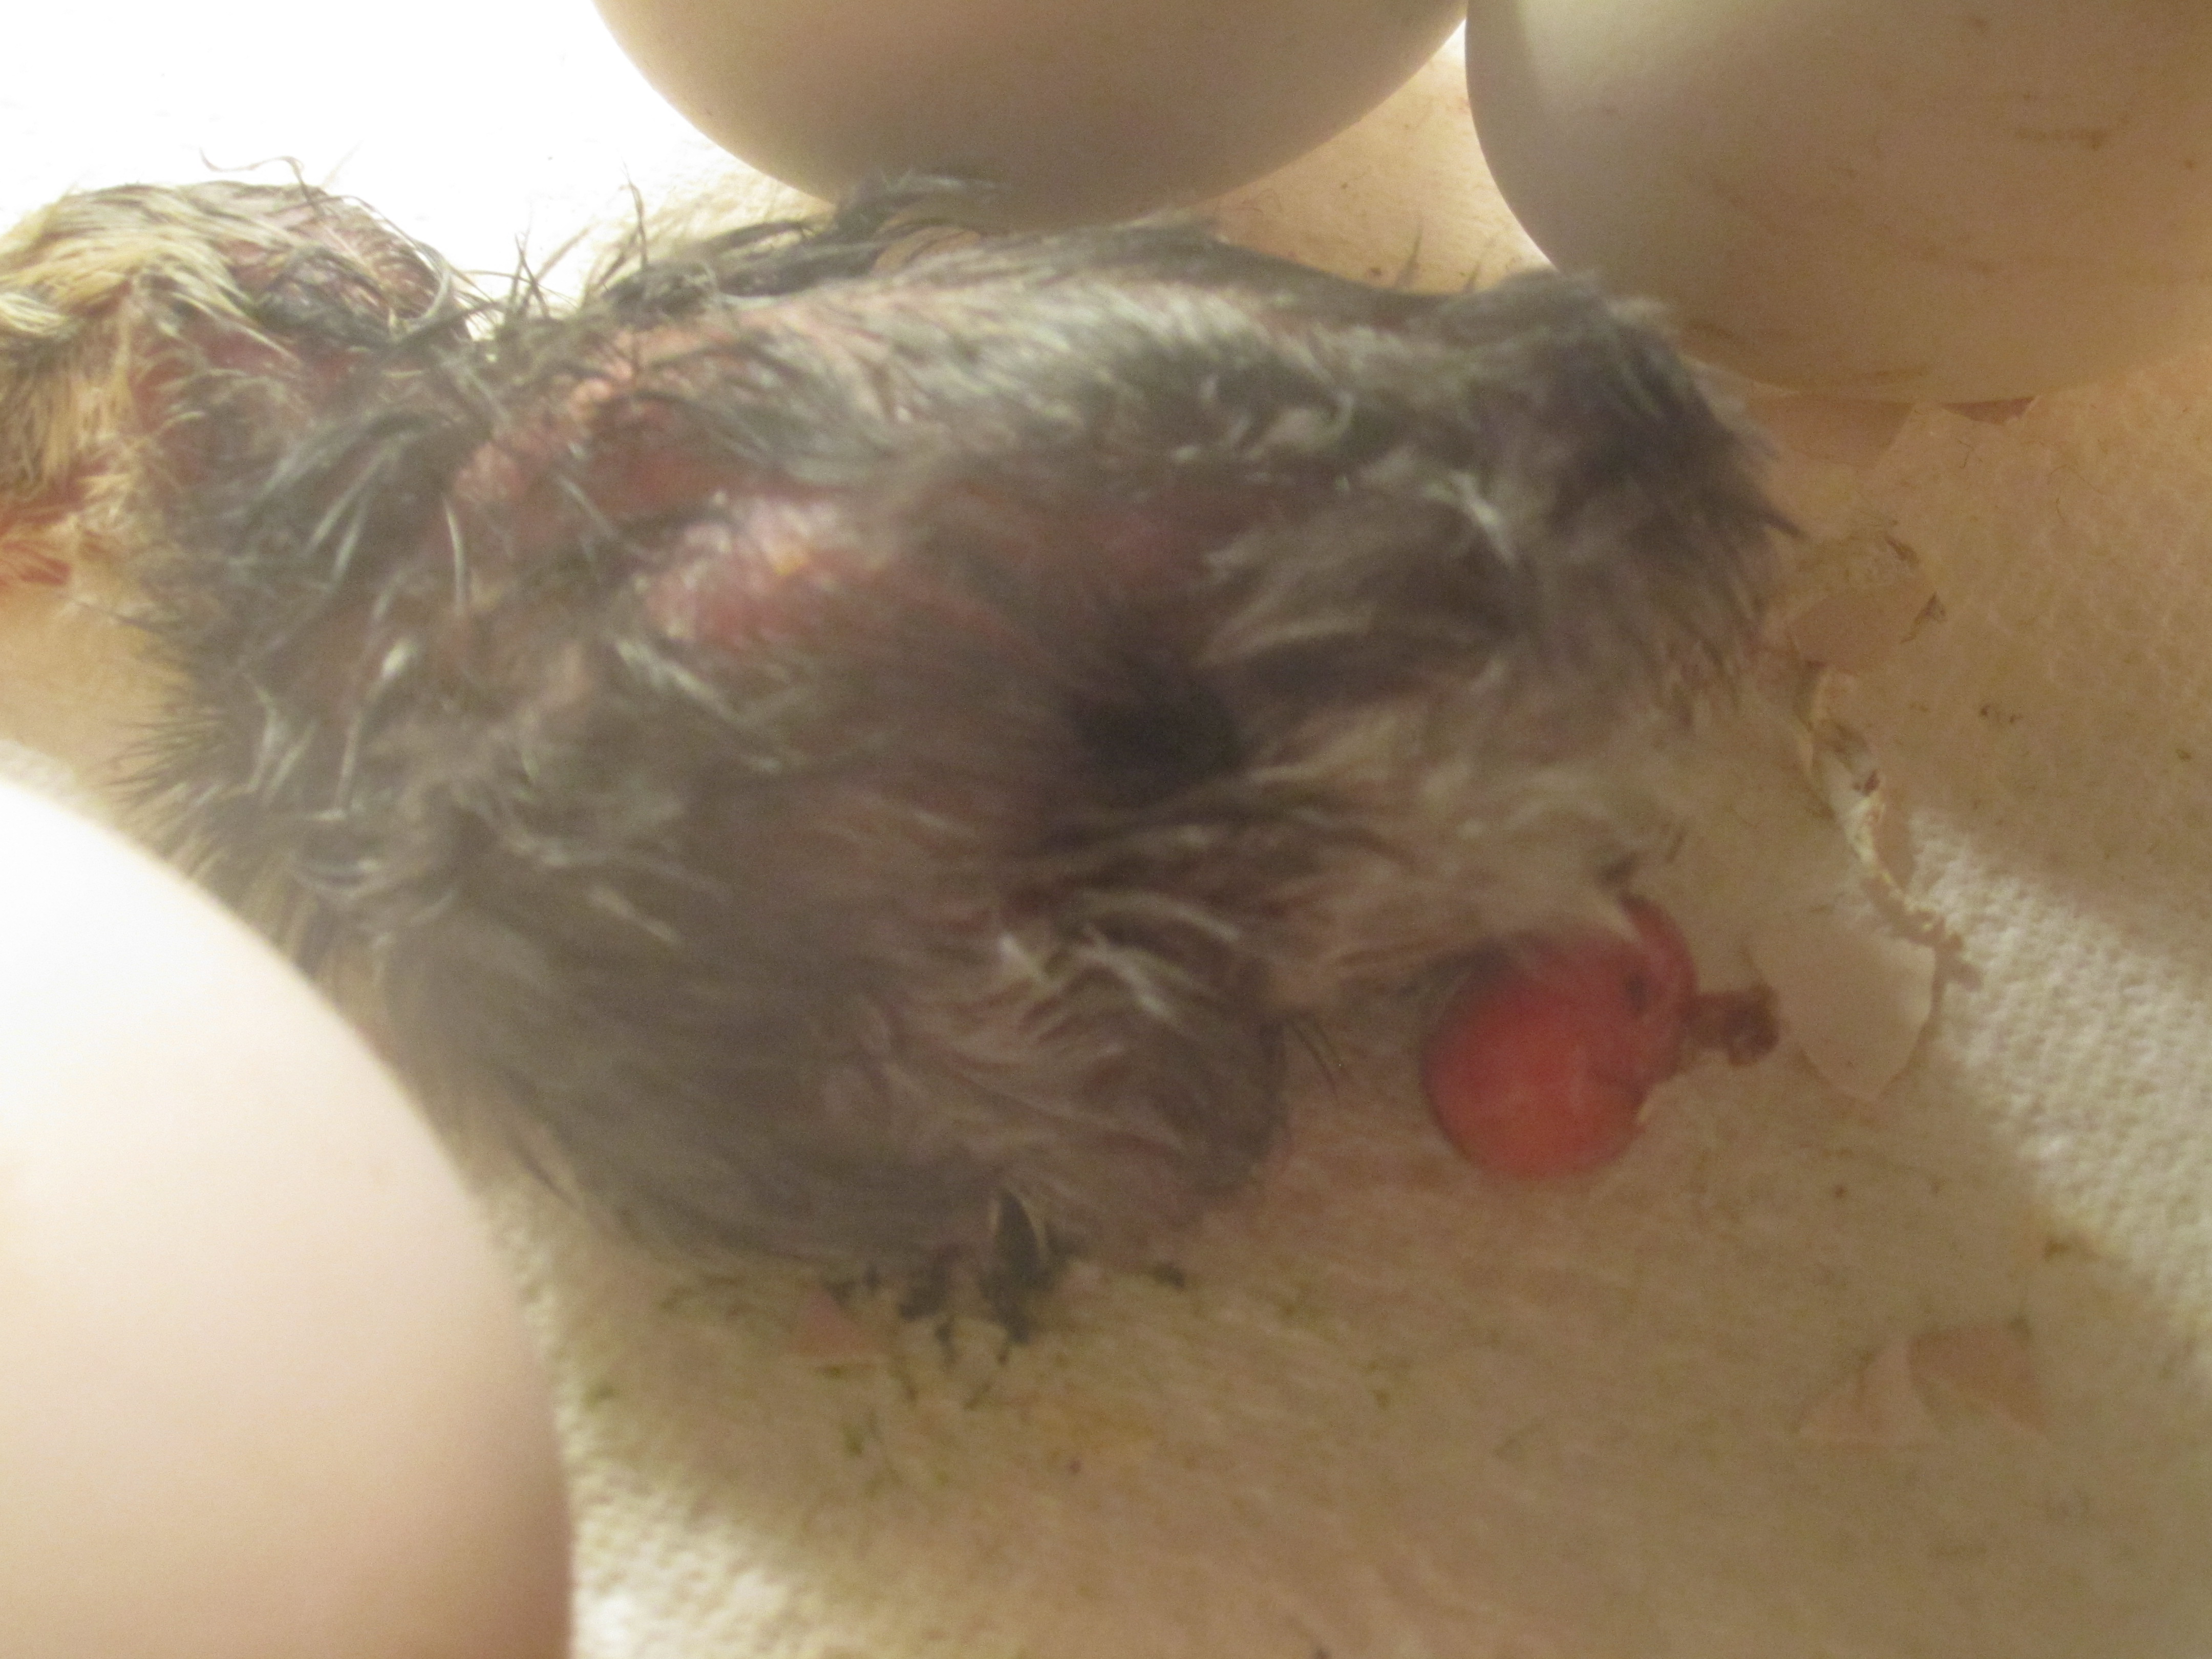
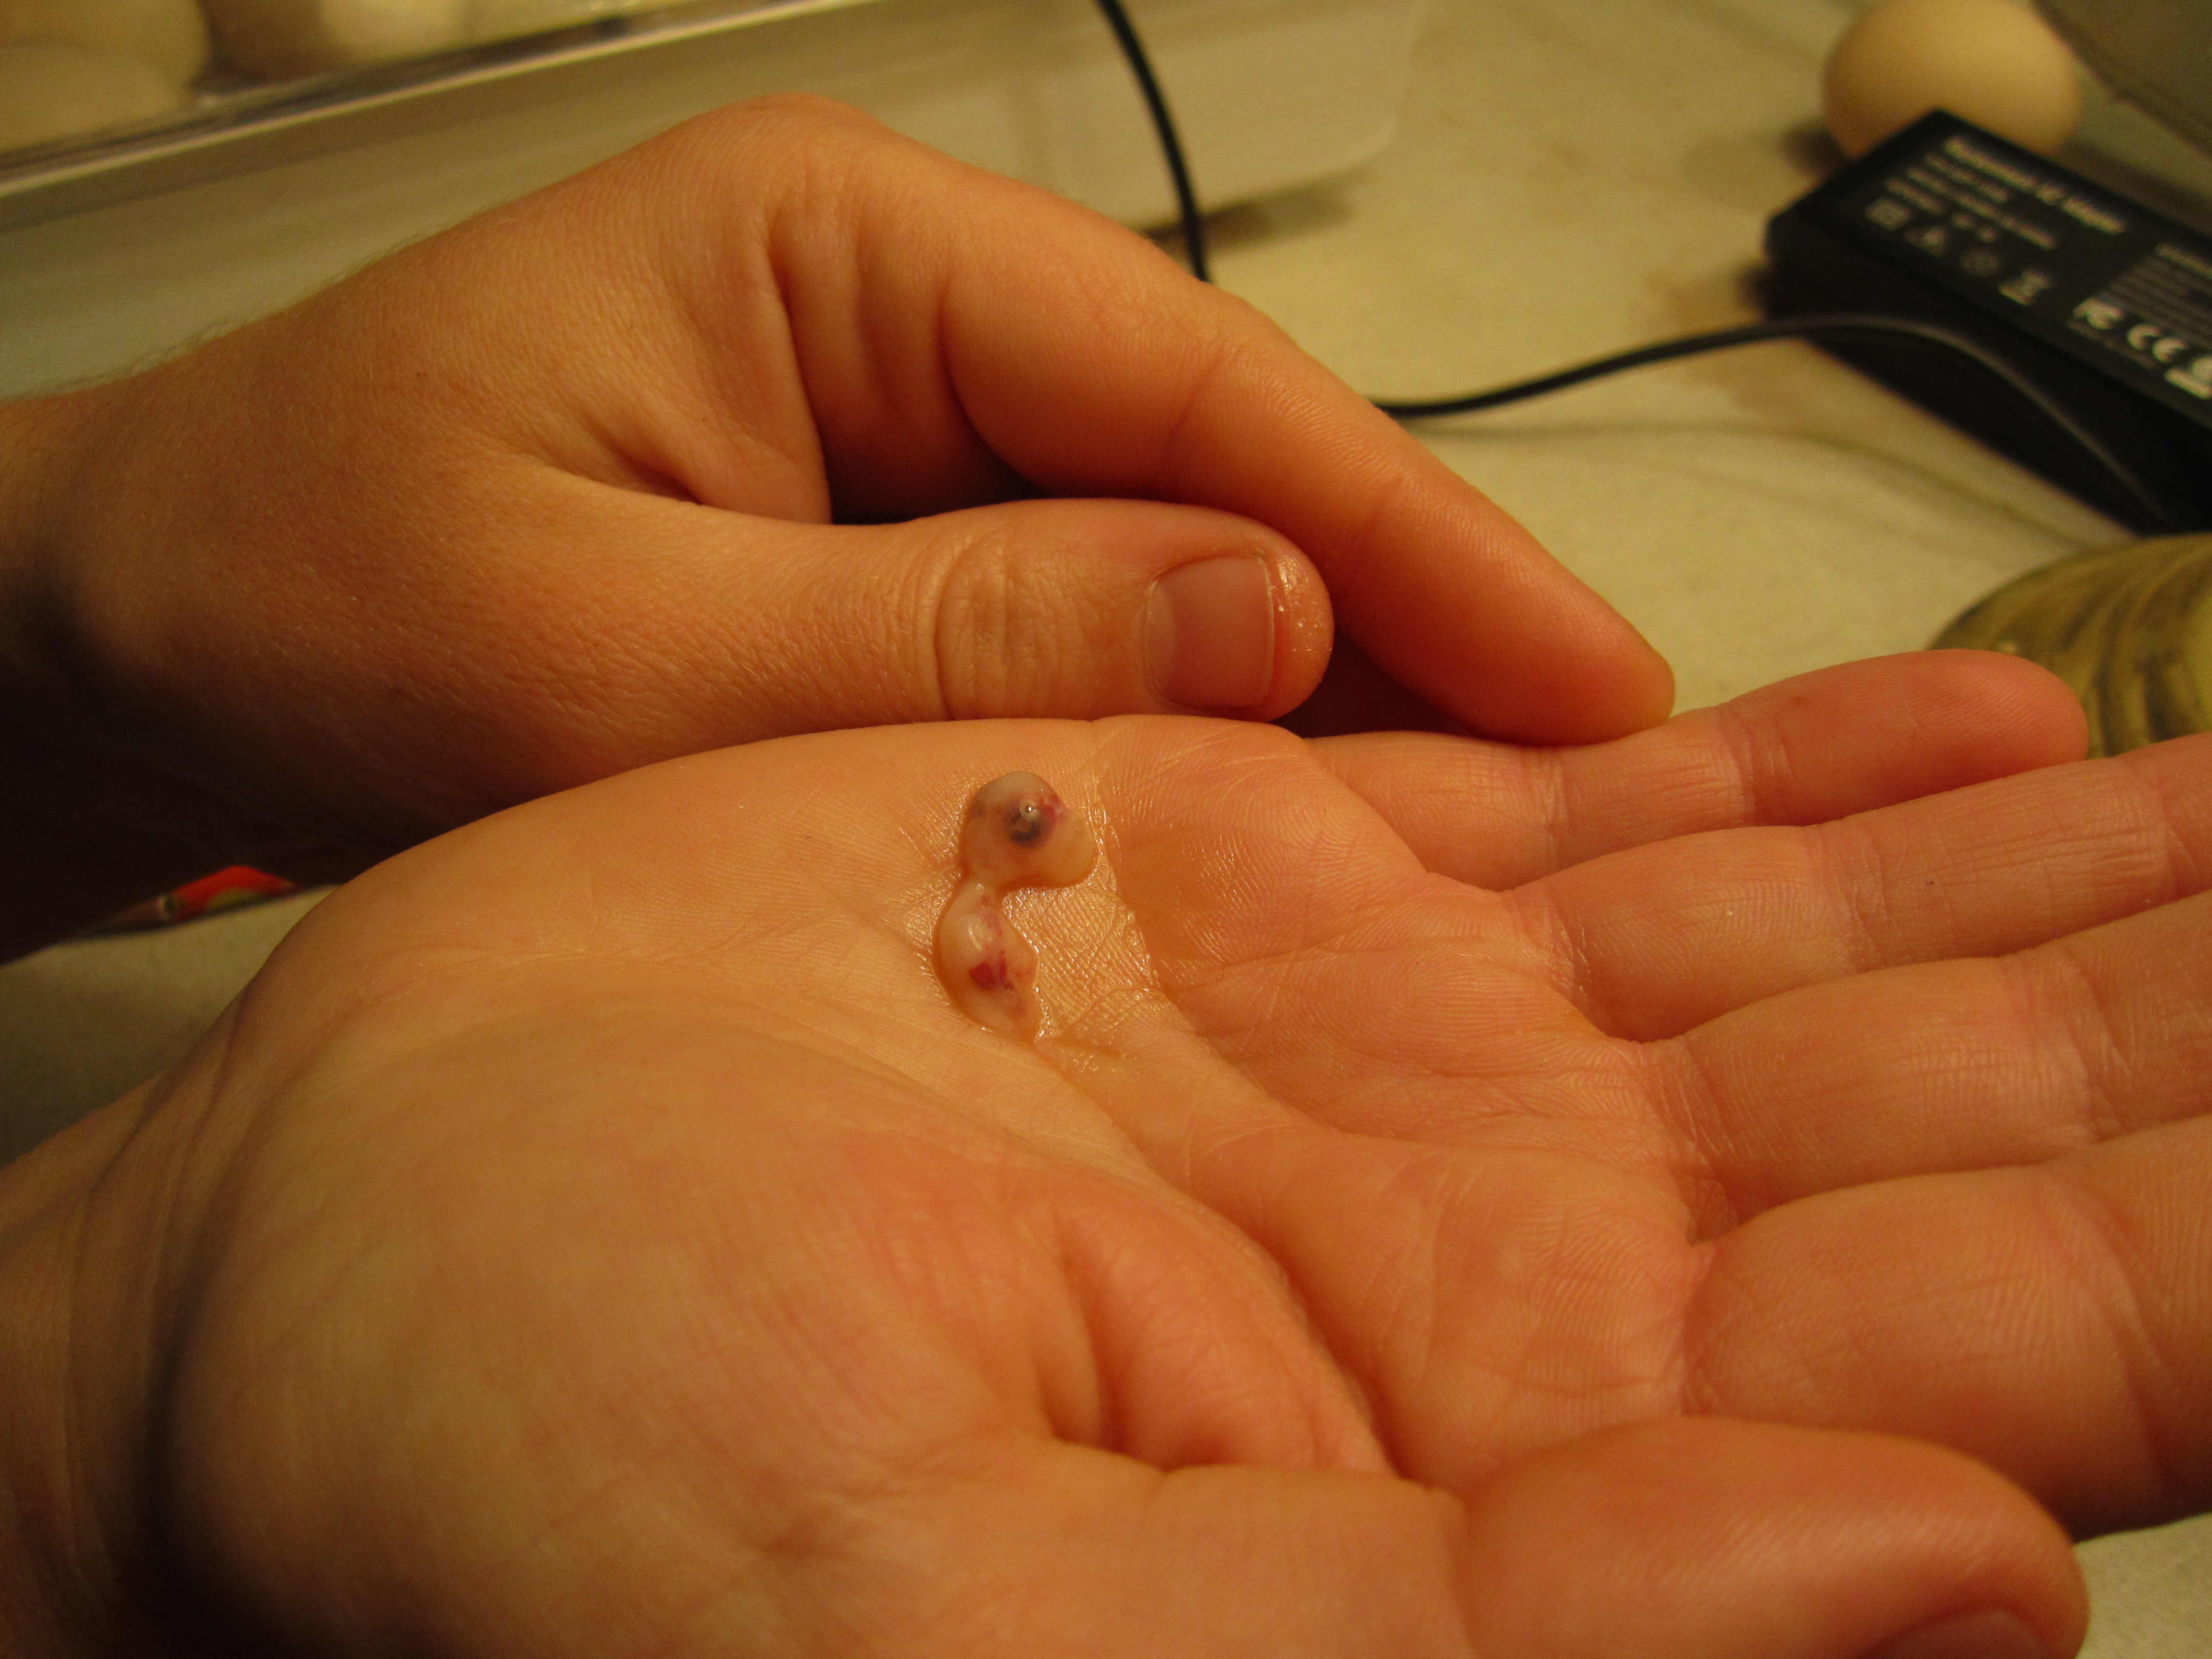
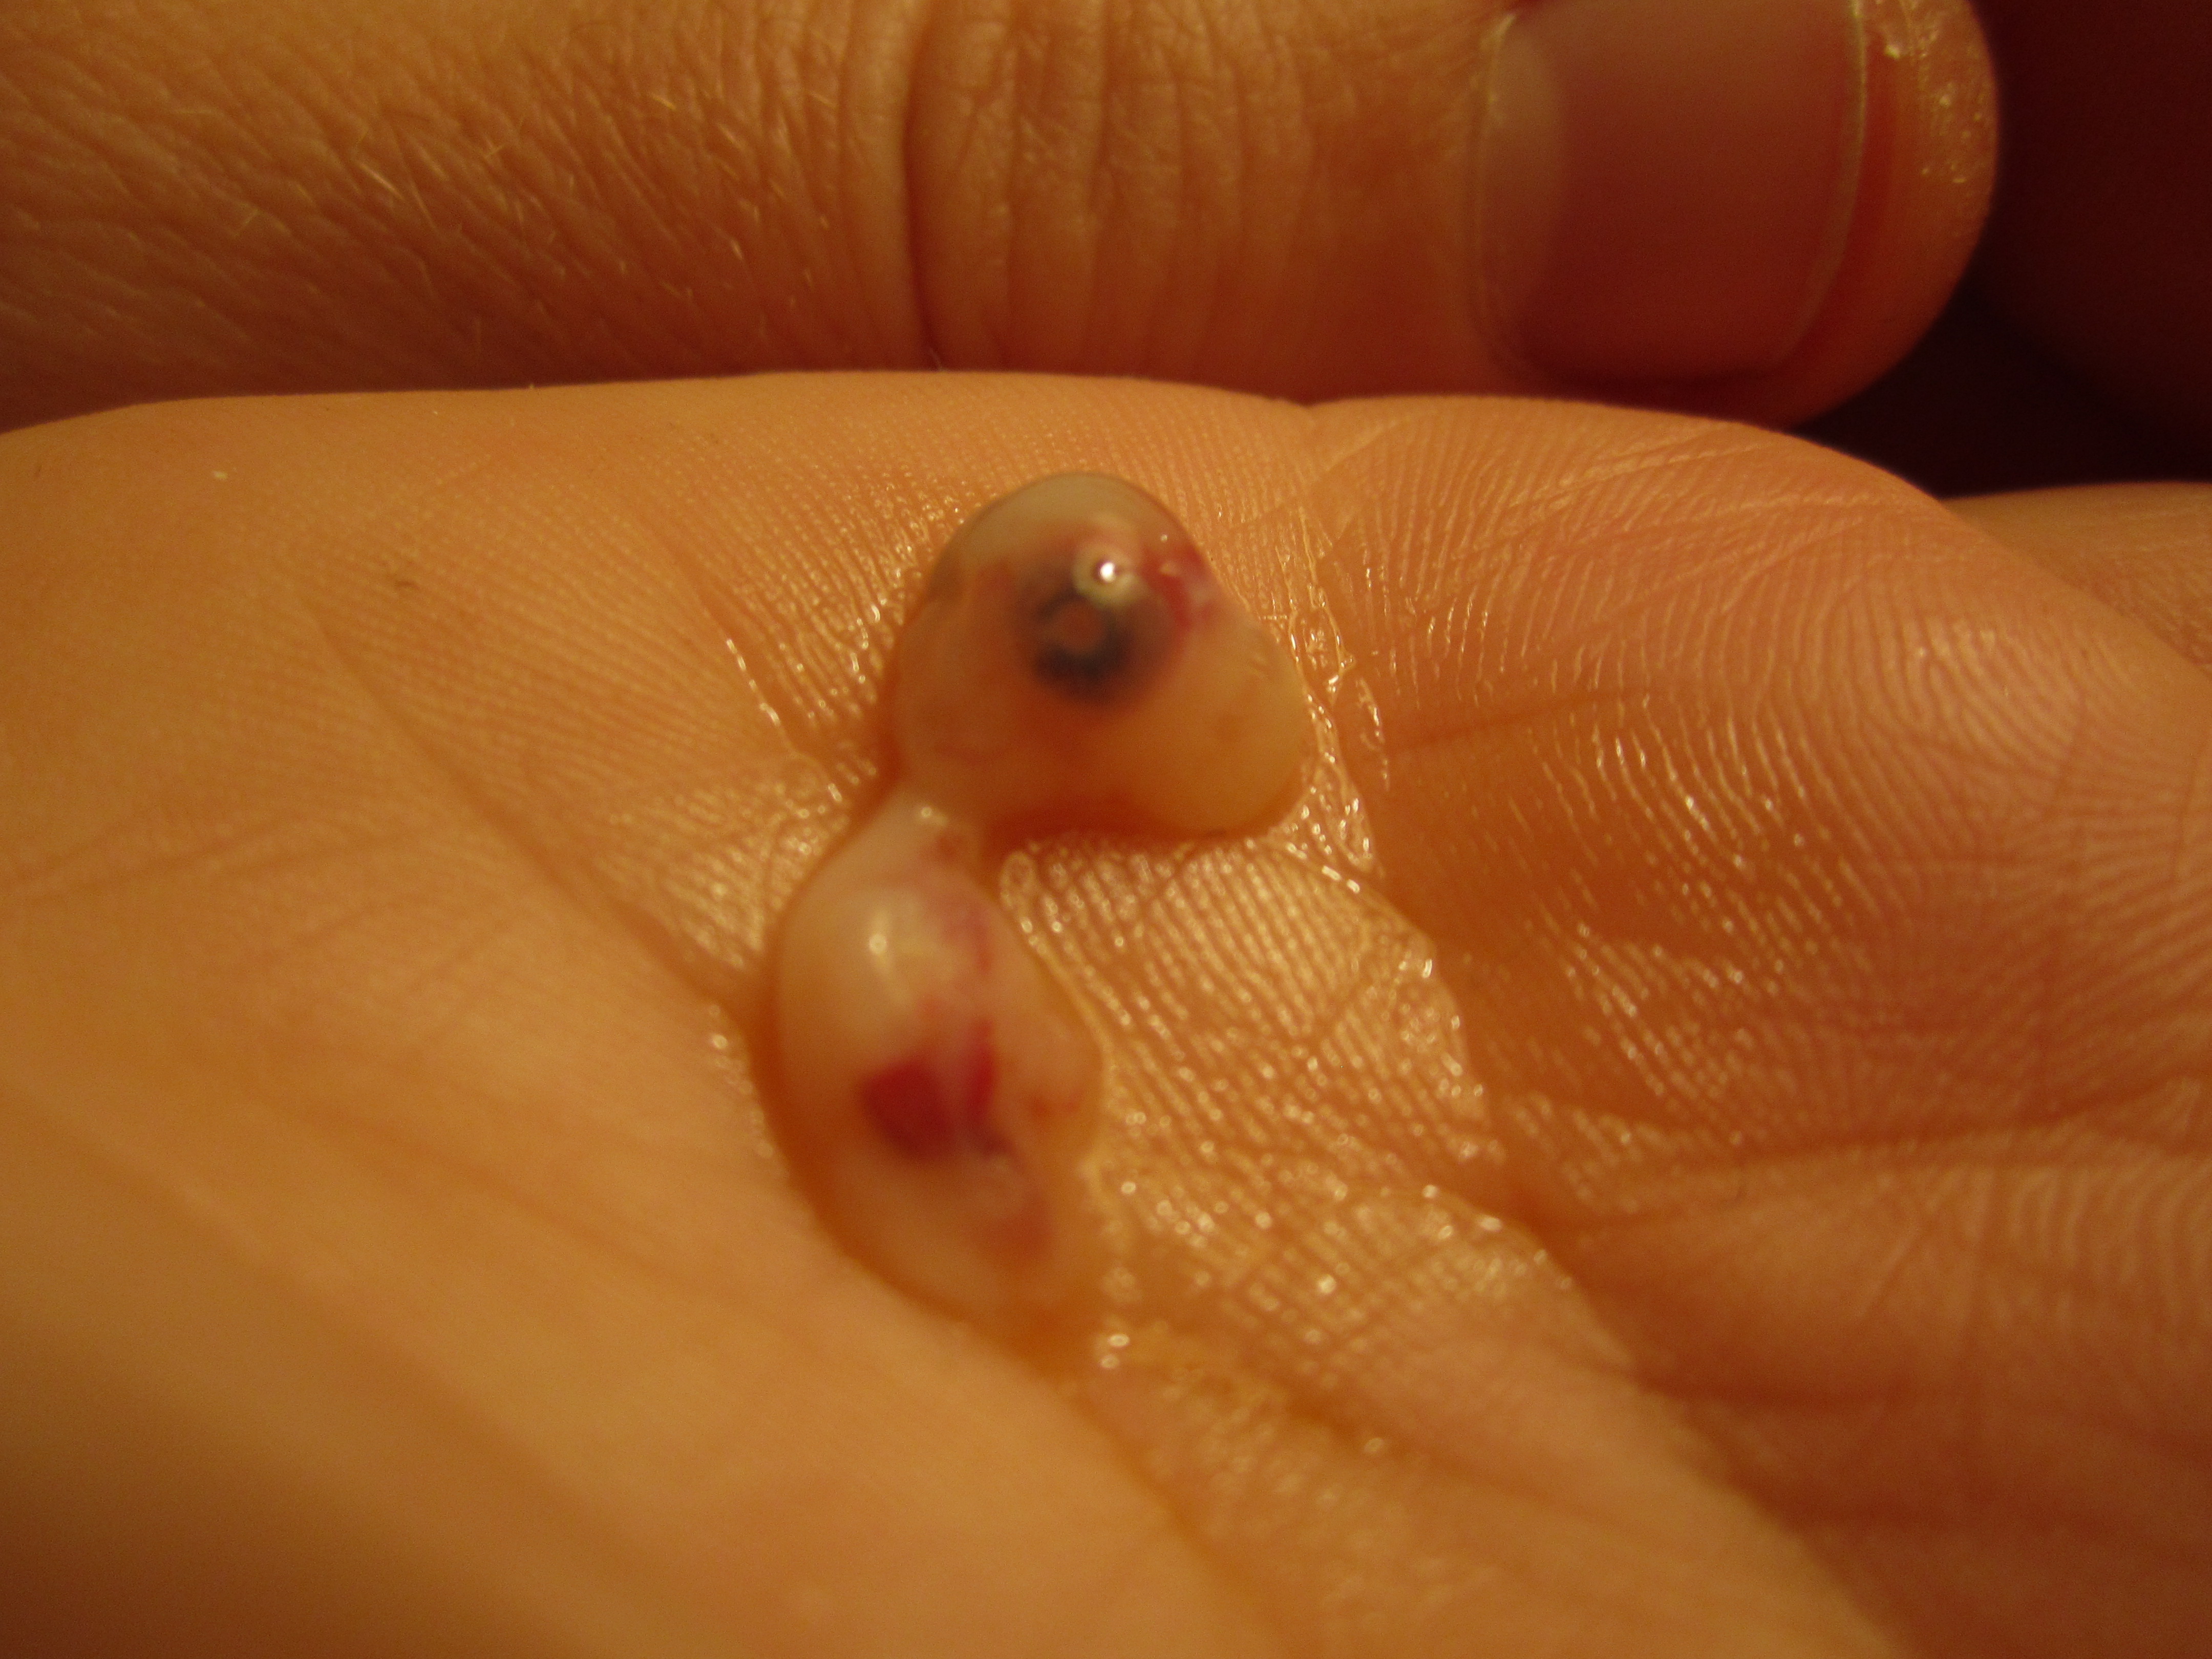
so, i washed my hands, got a knife and a damp cloth, and opened up the incubator. i worked fast so that the little dude wouldn’t get chilled. using my knife, i slipped the very tip into the opening of the shell and pulled outwards, gently. this pulled part of the shell away and allowed me to peel the rest of the shell pieces away with my hands alone. before i fully removed a shell piece, i had to see if it was “glued” to the little chick before i pulled it away–since chicks have very sensitive skin and i didn’t want to hurt him!

a few of the pieces were stuck to the chick, pinning his body and head in a certain position. as i worked, i could tell that i was saving the chick’s life, since he was way too stuck in there and would not have been able to peck or kick his way the rest of the way into life.

where shell pieces were glued to him, i used my damp cloth to wipe at the spot until they came free, and then moved on to the next spot. once he was free, i tried to dry him off a little bit, and then i closed the lid to the incubator and cranked up the temperature to 100 degrees to warm him up and dry him off. he seemed just fine in there, acting the way all the other chicks had acted after hatching. i left him in there until he had dried some, and then moved him to see the rest of his siblings under the heat lamp. thinking about how he had been in his shell (potentially using up 24 hours worth of his nutrient-dense yolk supply ),i didn’t want to risk keeping him in the incubator too long without food or water.

so that’s the story of how i got to be a chicken midwife, and man was it super fun! i’m not too cool to admit that i was way proud of myself afterwards! next up on my wish list… being a midwife to mammals!

.:.


chicken birth anomalies, part 2: an underdeveloped leg

despite having a really great hatching experience for our first batch of chicks, there were still some anomalies in our new population of chicks. of course we’ve had some chicks who took longer to hatch then others, or some chicks that appear to be smaller (a little more runty) than the others, but this is to be expected. no chick is the same, of course!

beyond these “average uniquenesses” among our chicks, three particular anomalies stand out from this experience:

  1. a chick born with part of her yolk sac unabsorbed
  2. a chick born with an underdeveloped leg
  3. a chick that actually needed help hatching

i want to describe these three different anomalies and how we’ve dealt with them/plan to deal with them. this post focuses on the second…

anomaly #2

when this chick was hatching  i didn’t notice anything different about it. it wasn’t until a day or two later, when the chicks stopped sleeping all the time and started moving around a lot more, that i realized that he didn’t move about like the others. he never used both legs and when he stood up, he usually fell/flopped over in order to move from place to place. i picked him up and realized that his right leg didn’t fully bend. although it looked like a normally developed leg, it seemed like he had something wrong with his bone that kept him from extending his leg past halfway. he could pull it all the way up under his body, but he could’t stretch it out fully.

after i realized that he needed some extra help, i went a little overboard and even designed a metal wire leg for him so that he could learn to walk… but i never used it. jason, rightfully so, convinced me that in the beginning of this life he needed to learn to cope with his disability if he was going to make it at all.

so we watched and waited. i picked him up every chance i got and made him drink water and tried to get him to eat. usually he would protest and not eat anything, but every now and again he would peck at the chick food. this concerned me until days later (he was still doing fine even though he was clumsy and rested a lot) i saw him stand up on one leg and hop/fall over to the food tray and prop himself up with a wing to eat! he’d figured it out after all!

i knew that if he could figure out how to eat, he could certainly figured out how to drink! he was tough, after all.

the video below shows him moving around his house… usually he hugs the wall and moves clockwise (with his bad leg side sticking out). although he moves this way most commonly, he still isn’t scared to move though the middle of the brooder for any reason.

he’s gotten better and better at hopping, and even though he is smaller than all the others (he gorges himself less and has to use more energy getting around), he seems very smart! he usually waits to eat until most of the the other chicks are resting so he has time and space to get what he needs. and… no other chicks are picking on him, even though his foot sticks out sideways. sometimes others will peck at it to see what it is, but never more than once or twice.

one thing that has changed since the first week-and-a-half: his leg no longer beds at all, even towards his body. the bones seems fused in one position… who really knows what happened?!

i’m really hoping he’s a rooster, so that i can have a one-legged rooster friend that rides around on my shoulder! i’ve even started writing a children’s book and he is one of the main characters’ sidekicks and best friends.

.:.

chicks growing up: chick videos at 1 & 3 days old, and 1 & 2 weeks old!

this post is a catch-up post to show you how much our chicks have grown over the last 2 1/2 weeks. how very exciting to see babies born and grow up (even if they’re bird babies.)!

this first video is of the day old chicks sleeping after being removed from the incubator:

this video shows the chicks becoming  a little more active, moving around, and exploring a little. they are about 3 days old in this video:

another video shows the chicks at a week old, when they became much more active. at this age we started to see individual personalities develop, and our chick with the funny leg was still going strong and learning how to fend for himself. yay!

this last video is of the crazy, almost-flying, jumping, pecking, and very-curious chicks at 2 weeks old. they are starting to look scruffy and crazy now because they’re adult feathers are slowly beginning to come in!

enjoy!

.:.

chicken birth anomalies, part 1: an unabsorbed yolk sac

despite having a really great hatching experience for our first batch of chicks, there were still some anomalies in our new population of chicks. of course we’ve had some chicks who took longer to hatch then others, or some chicks that appear to be smaller (a little more runty) than the others, but this is to be expected. no chick is the same, of course!

beyond these “average uniquenesses” among our chicks, three particular anomalies stand out from this experience:

  1. a chick born with part of her yolk sac unabsorbed
  2. a chick born with an underdeveloped leg
  3. a chick that actually needed help hatching

i want to describe these three different anomalies and how we’ve dealt with them/plan to deal with them. this post focuses on the first…

anomaly #1

the fourth chick that was born hatched with part of its yolk sac unabsorbed. i’ve mentioned this in previous posts about the chicks, but i’ll explain again… during the last few days of incubating, the chick begins to absorb the yolk sac that was external throughout the others stages of their development. they absorb it into their abdomen region and this allows them to last without food or water for a few days after they hatch. it also gives them the extra energy that they need to start pipping through their shells and busting into the world (a tiring task indeed). sometimes a chick’s timing if off and they hatch out before their bodies are actually ready. this happens way more often in artificially incubated eggs than eggs hatched under mother hens. another testament to nature always being better…

perhaps it was the temperature of the incubator or a temperature or humidity fluctuation that caused this one chick to think that it was the right time to be born, but part of the yolk was still dangling from its abdomen when it hatched.

unabsorbed yolk sac

part of the unabsorbed yolk sac

this chick acted totally fine and healthy after being born, but after doing some research we determined that it was best to keep her separate from the others until her dangley bits dried up and fell off. we did this for a day or two and gave her separate food and water.

the video above shows the chicks when they were about three days old, and you can see the little chicken in her own box under the heat lamp. if you look closely, you can see part of her yolk sac hanging underneath her.

after keeping her in her box for a few days, her yolk sac area was still not drying well and the areas was starting to smell very bloody. her sac was also beginning to partially dry against her stomach, and that whole area seemed sticky. she also seemed really “cheepy” (noisy and restless) and i became worried that she might get an infection in that area. i decided to apply some plaintain on her stomach and so i chewed up a batch and spit it on her stomach area.

we have no way of knowing if getting chilled, or refusing to eat and drink, or simply being sick was the reason why she died, but when i woke up the next morning i saw that she had died. later we put her in the wood stove so she could be cremated (this just seemed like a better idea in the winter than a burial).

another lesson learned from the animal world: not all things live. and although her death made me sad, i knew in my gut early on that she was probably going to die because of her birth defect. some things live and some things die, as always, and having 21 lively, goofball chicks running around as i write this, i am reminded that nature really has a great plan set up for living.

.:.

hatching chicken eggs: let nature take its course!

let me first start by saying that jason and i decided early on in the incubation process that chicken are chickens and we can’t be too worried about their growth and development as long as we were doing as much as we can to take care of them and protect them. sometimes incubated eggs die, and sometimes chicks die, and although it is sad, that is the cycle of life.

so as we began to incubate our 27 eggs, we were determined to do what was the best for the chicks when the time came: letting nature take its course. as with human babies, chicks know what time to emerge into the world and generally do a very good job of it once they’re ready (just like humans).

there is always variation in birth, both with humans and chicks, and i was reminded of this while i waited on many of the eggs to hatch. i thought… “this egg has pipped and then done nothing for 24 hours… what’s wrong?”

the answer was: nothing! nothing at all. the chicks were simply waiting to be ready to come into the world. sometimes this included absorbing all of the yolk sac into their abdomen (from which they are provided with enough nourishment for a few days and do not need food or water). other times it might mean that they are still absorbing all of their blood (that was once coursing through the vessels inside of the egg) so that they are born will all of their necessities!

when the chicks are born, they are flopping, gooey creatures that seem spastic and sleepy all at once. they break their own umbilical cord through their writhing and struggles, and generally all other birth residue will dry and/or flake off of them once they become the cute, fluffy boogers that we all know and love.

i wanted to write this post today to show you the variation in birth time and circumstance for our chicks so that you don’t worry if you hatch some chicks of your own!

first of all, i noticed that once the first pip happens, it might be anywhere from 2 to 48 hours before the chick emerges. it is important to be patient during this time and let them follow nature’s guide. i did notice however, that once the chick has pipped all around the circumference of the egg, making it ready to bust the top off, it usually takes about 15 or 20 minutes for the chick to break out. this was the case with all of our 22 hatched eggs, except 1 (i’ll explain the details of this in a future post).

the following is the breakdown of the births, beginning on the 21st day (when chicks are supposed to be due). i’d like to note that eggs were turned for the first 18 and a half days, and then left still afterwards. the incubator was kept at 99.5 degrees and the lid was only removed a few times for candling or adding water to increase humidity.

day 21

  • first at 9:39am
  • second at 4:26 pm
  • third at 6:49 pm
  • fourth at 7:50pm (born with a partially unabsorbed yolk sac and died a few days later)

overnight of day 21/early morning of day 22

  • fifth-tenth born

day 22

  • eleventh at 8:25 am
  • twelfth at 11:11 am
  • thirteenth at 4:41 pm
  • fourteenth at 4:51 pm

overnight of day 22/early morning of day 23

  • fifteenth-seventeenth born

day 23

  • eighteenth-twentieth born while we were at work
  • twenty-first at 9:15pm

day 24

  • twenty-second at 9:00pm via my intervention… more details about this intervention and how i knew to intervene in a future post!

i hope this shows how much variation there can be in a chick hatching, just like in human births!

stay tuned for more chick updates!

.:.

a chick is born: a complete birth video

i debated about what to post about today, and since so much has been happening lately in chicken-ville, i certainly have a lot of experiences i could write about. and then i realized how worn out i am from constantly checking on the chicks (although i know they should be fine without my constant vigilance)!

chick

baby #1, drying and looking fluffier!

i have so many topic ideas for future posts about my experience with the hatching eggs and the new baby chicks, and we are only on day 4 for one of the babies and day 2 or 3 for most of them! some future posts that i will be writing about the great (and tiring) time we’ve had:

for today i’ll leave you with this 10 minute video that shows the best part of the hatching process. this is the video of our first chick being born!

.:.

waiting for chicks: the first pip!

today around 11 am the first egg in the incubator started getting busy! this first chick pipped (poked a hole through) his egg and has begun his emergence into the world… though still, 12 hours later, he hasn’t made any more progress. this is normal so now we just have to wait!i also saw the egg wiggle many times and i even heard him chirping in there once! wow!

pipped egg

the first egg is pipped!

today we finished the final preparations for the chick’s house, and added pine shavings to the floor of the pen and covered that with dog pee pads. this is because the first few days the chicks need a textured material to walk on that isn’t their pine shavings (since they don’t learn what is food and what is bedding until the first few days have passed). we also added their food dish and one of their waterers. it’s all ready to go!

chick house

ready for chicks!

now we just have to wait as patiently as we can (yeah, right!)…

incubator

.:.

countdown to chicks: building their first house

our incubating eggs are almost done and the chick hatch is scheduled for so soon… saturday! i  originally thought it was sunday, but i forgot to count the first day that the eggs started incubating as day 1 (which you are supposed to do if you started the eggs in the incubator before noon of that day).

needless to say, we’re getting really excited around here, even though we haven’t really checked out the eggs since my day 15 incubating chicks update.

today i removed the turning tray from the incubator and cut the turning motor off. i also added more water to the device so that the humidity will be higher when the chicks are hatching in a few days. this keeps them from getting stuck to their shell as they’re busting into the world! now that the eggs are on paper towels and without the turning try, the chicks will have more room to break free when the time comes.

eggs

almost time!

once i moved them back into the incubator after removing the tray, a couple of the eggs started to move, as if to say “hey, i ‘ll see you soon (and quit moving me around!)”

i also set up their first little home that will be theirs for the first weeks of their life. i used opened wine boxes, taped end to end. these were just the right height if i left the flaps on the bottom folded out to help support the rest of the cardboard. i taped more wine boxes together than i needed, which means that when i need to expand their home to give them more space as they grow, i can simply untape one portion of the cardboard circle and make the circle bigger, then retape it into another circular shape. rounded edges are important because chicks can get stuck in corners if other chicks are pressing against them, and they can be smothered and die.

you can see in the pictures below that in addition to folding out the bottom flaps of cardboard, i also taped them to a sheet of plastic underneath (in this case, an old shower curtain) to keep the circle from buckling or becoming malformed. this sheet of plastic should also help with cleanup once the chickens move outside later in the year. in the next day or two, we’ll be adding wood shavings to the floor of the little pen/house to absorb the poop and spilled water and to make the chicks more comfortable.

chick house

our quick and easy chick house!


heat lamp

the heat lamp really gets the space nice and toasty. the thermometer reads 96 degrees! perfect for day 1!

the red lamp is a heat lamp, and will keep areas of the house 95 degrees, the ideal starting temperature for little baby chickens. each week we’ll raise the lamp so that the temperature directly below the lamp drops by 5 degrees each week. this allows for the chicks to acclimate to cooler temperatures over time. in the meantime, the light will warm them and the red tint helps them from picking at each other (which can cause open sores and lead to a sick or dead chick).

their water and food dishes will be in the house near the warm, center area and we’ll leave the regular overhead light bulb on in their space so that they thrive and feel safer.

so exciting!  only 3 days to go!

.:.

chicken egg incubation update–day 15

a brief warning for you here… some images in this post are of an unborn chicken embryo, which stopped growing inside its egg after a few days into the incubation period.

.:.

recently i candled the eggs again to double check my candling work from last week and the progress was amazing! during the process this time, you could really see the blood vessels and the larger, wiggling chicken inside a few of the eggs. once again, amazing!

i also decided to check the other 5 eggs that i wasn’t sure were fertilized, still thriving, or alive.

unknown egg #1:  the first one was definitely fertilized and alive, and i was surprised and excited to add another potential chicken to our list for the hatch this sunday. so that puts our count at 23 chicks!

unknown egg #2:  the next egg i checked was definitely no longer growing, and i could see the tell-tale red ring around the inside of the egg that means the egg was at one point fertilized but the embryo died within the first few days. this egg was pretty much transparent except for the red ring, and i removed this one to crack it open later and check out the contents.

unknown egg #3:  this egg was just the same as egg #2 and i removed this one also.

unknown egg #4:  this egg had no visible embryo and even though i turned it on all sides, i couldn’t see anything alive inside. there was a very dark section and a very visible air bubble, but the dark patch was different than the dark patches in the fertile and growing eggs and i couldn’t see any blood vessels or other signs of life. so i decided to take this egg out too so that it wouldn’t bust and contaminate the others as time went on.

unknown egg #5:  i was still unsure about this egg, so i left it in inside the incubator just in case.

as of now, there are 24 eggs in the incubator and i’m sure (or as sure as a beginner can be) that 23 of them are growing nicely.

the other 3 eggs that i removed became a science experiment…

failure to thrive egg #1:  when i cracked this one open i only saw the red ring of small blood vessels around the inside of the egg. there were no other substances inside besides the red ring and the light yellow liquid that was the yolk and white mixed together. that means this one was fertilized too (24 out of 27 points for rex).

failure to thrive egg #2:  this egg had the same red ring as the previous one, but it also had a couple thick spots of dark red that could have been the beginnings of the the embryo. it seemed to me that this egg lived longer before failing to thrive. (25 out of 27 points for rex.)

failure to thrive egg #3:  this last egg at first appeared to be the same as the second egg but when i poured the contents out into the bowl with the other yellow liquid, i heard a little plop.  i looked in the bowl and found a tiny, but unmistakable embryo that hadn’t even begun to from its limbs yet,which meant that the egg died sometime around 3 or 4 days into the incubation process. (26 out of 27 points for rex!!!)

egg

tiny chicken embryo


egg

you can see its eyes but it has not yet formed limbs. to me, it looks somewhat like a seahorse!

jason and i have dealt with a chick that was born that died, and chicks that were busted out of their shell by careless hens just a few days before hatching, so this process isn’t new to me… and since the embryo was barely developed i don’t feel sad about the situation, just in awe of it. i am hoping that all of the eggs that are in the incubator now will thrive and hatch well… and i can give thanks for that!!!

i also found a great video on YouTube that shows the growth of the embryo from the beginning until the day i hatches… you can watch the video and think of our embryo-chicks, who are at 15 days today!

.:.

Newer posts

© 2024 KW Homestead

Theme by Anders NorenUp ↑