our wedding was last weekend (wow! we can’t believe it’s already over!), and so much of what we accomplished was due to our re-usage of many things that we already had at our home. we were determined to get through or wedding without spending too much, and i think we were successful!
we had 2 parts to our wedding: a pre-reception here at our house that led right into the ceremony and a true reception at a separate location about 20 minutes from our house. we served snacks and beverages at our house before the ceremony, and wanted to have cocktail tables set around the yard near the garden beds for people to put their drinks on. we also decided that we wanted to put pictures of jason and i as kids on each table to encourage folks to move around the garden and see the different crops and areas of the yard.
first of all, we needed a table to use for serving the snacks, but we did not want to buy another folding table and the three folding tables that my parents were letting us borrow were already to be for the reception food and dessert tables. i remembered that a door that we took down from our upstairs hallway was being stored, unused in the basement. 4 high bar stools later and that same table laid down flat on top of the stools, we had a table! a sturdy, free table! add some bolts of fabric borrowed from my mom, this pieced-together table looked very presentable and very “us.”
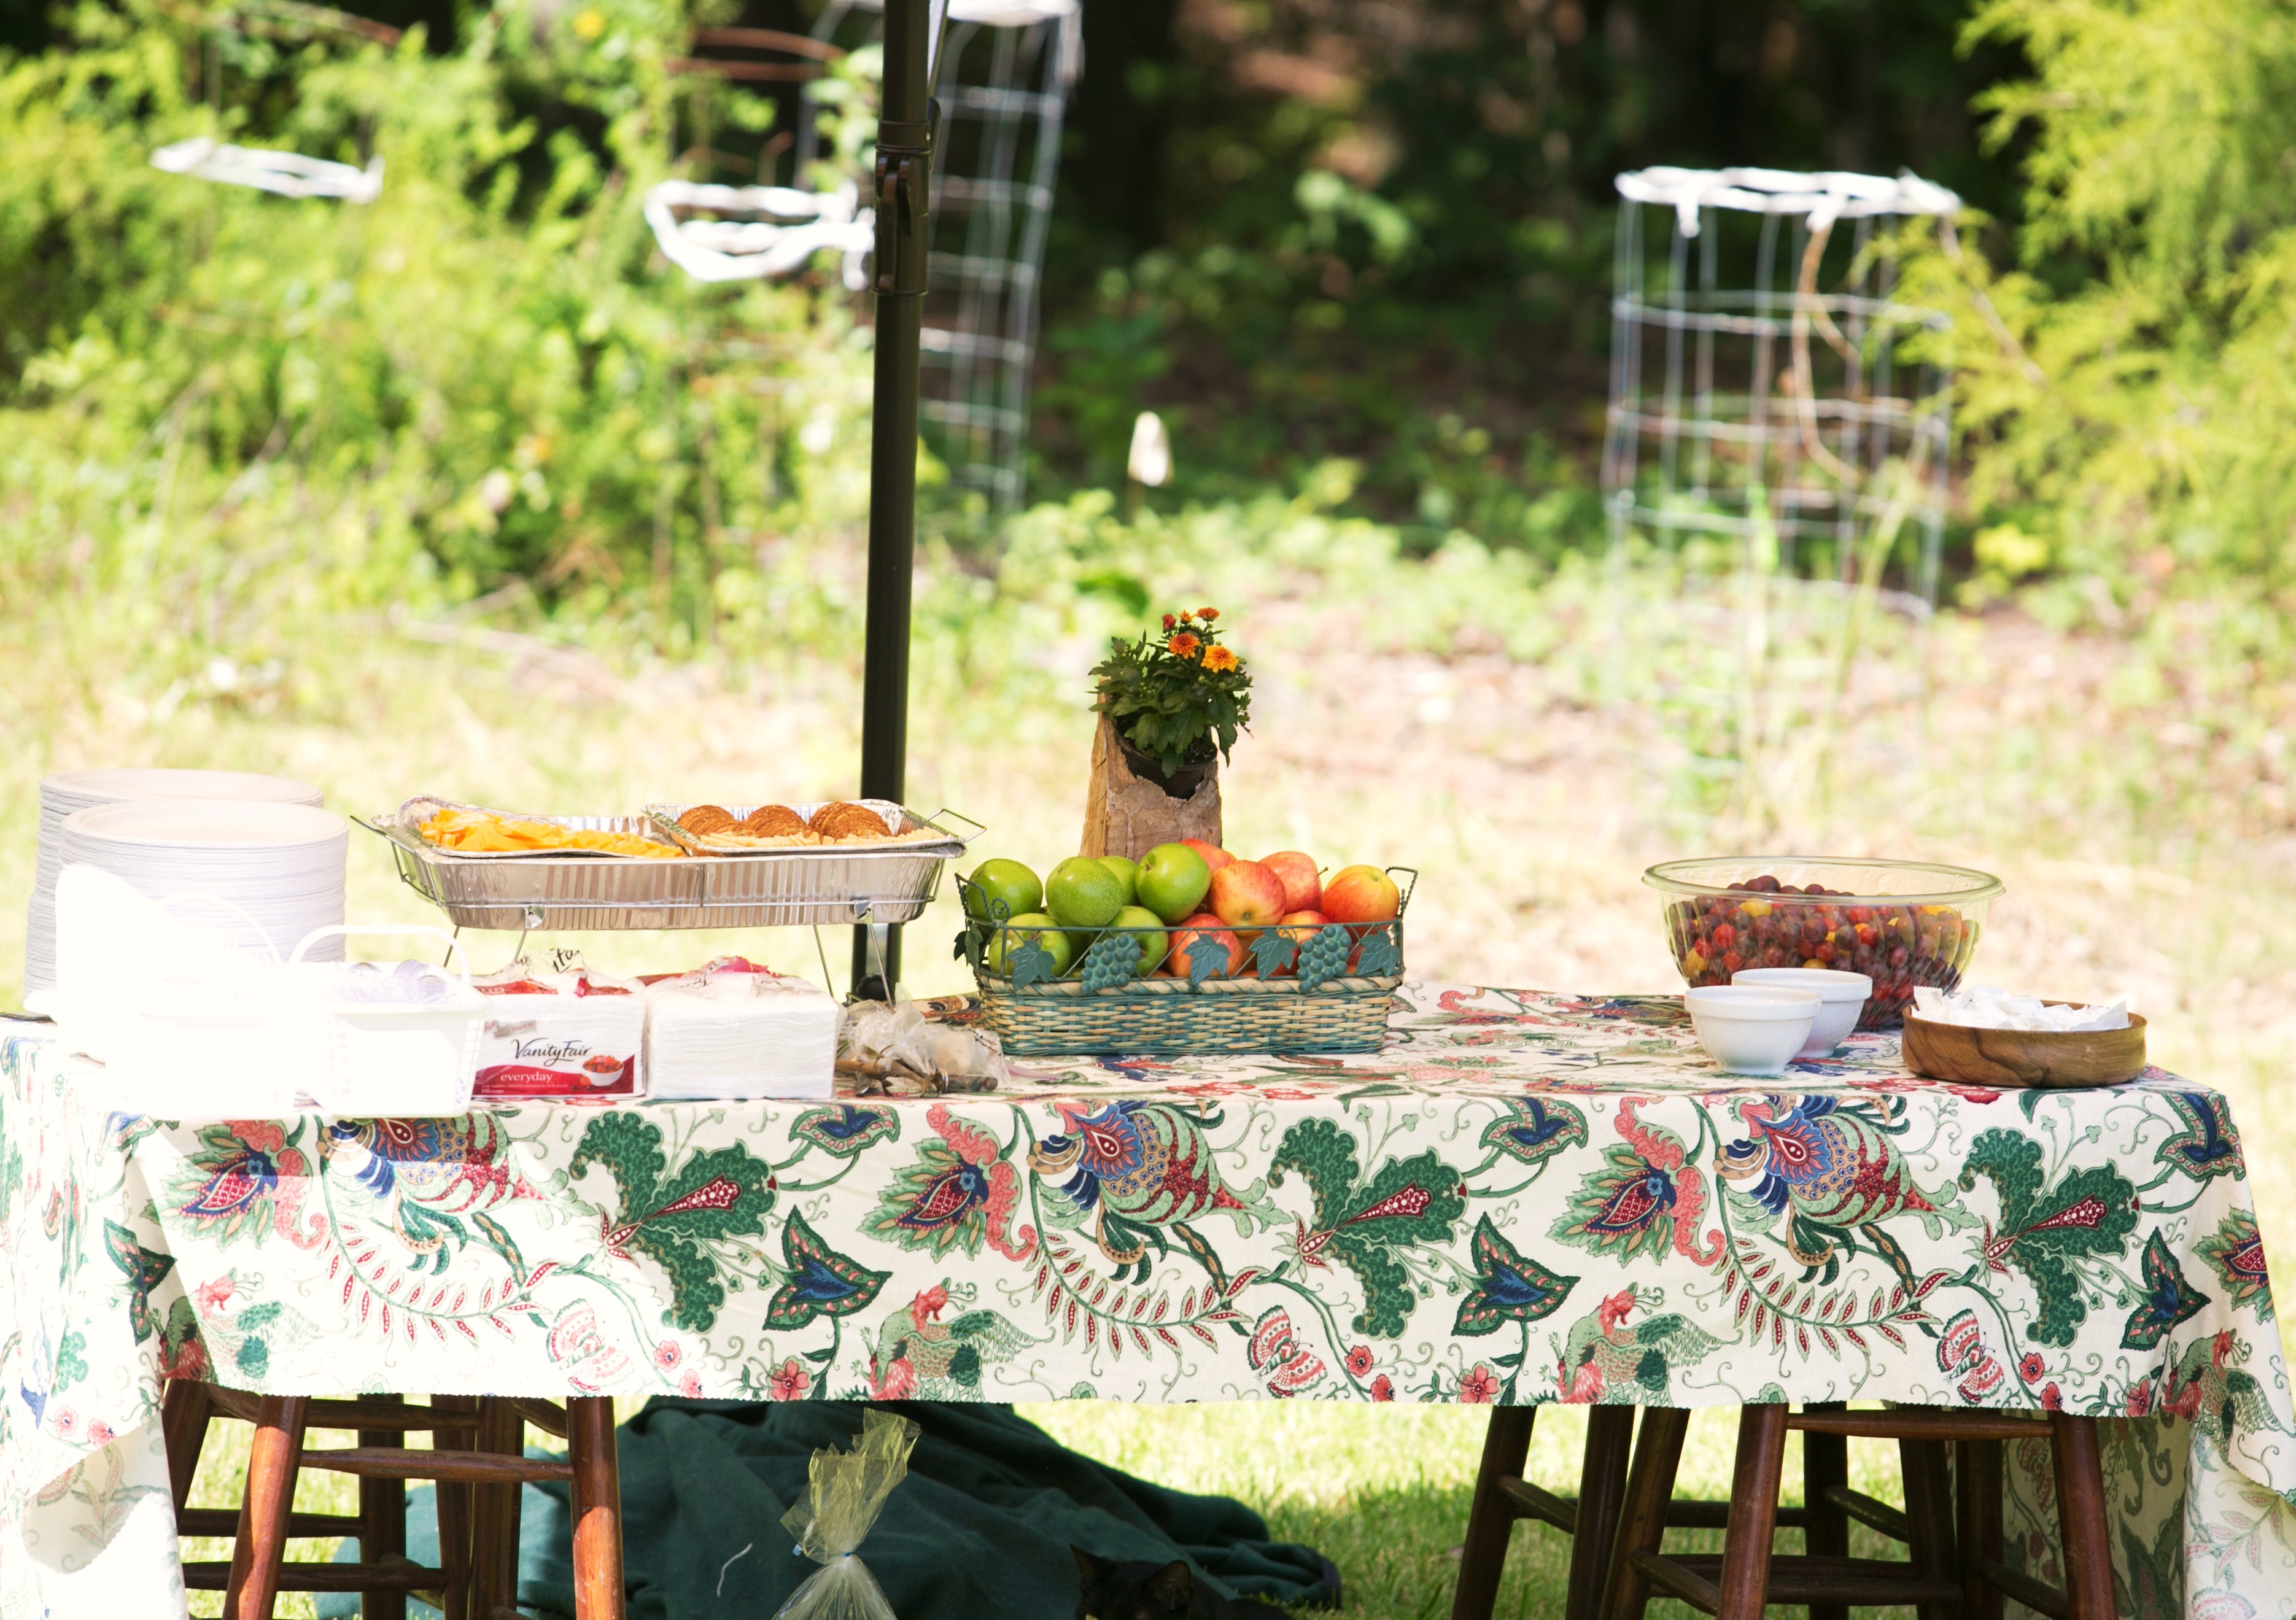
photo by Jenny Tenney Photography
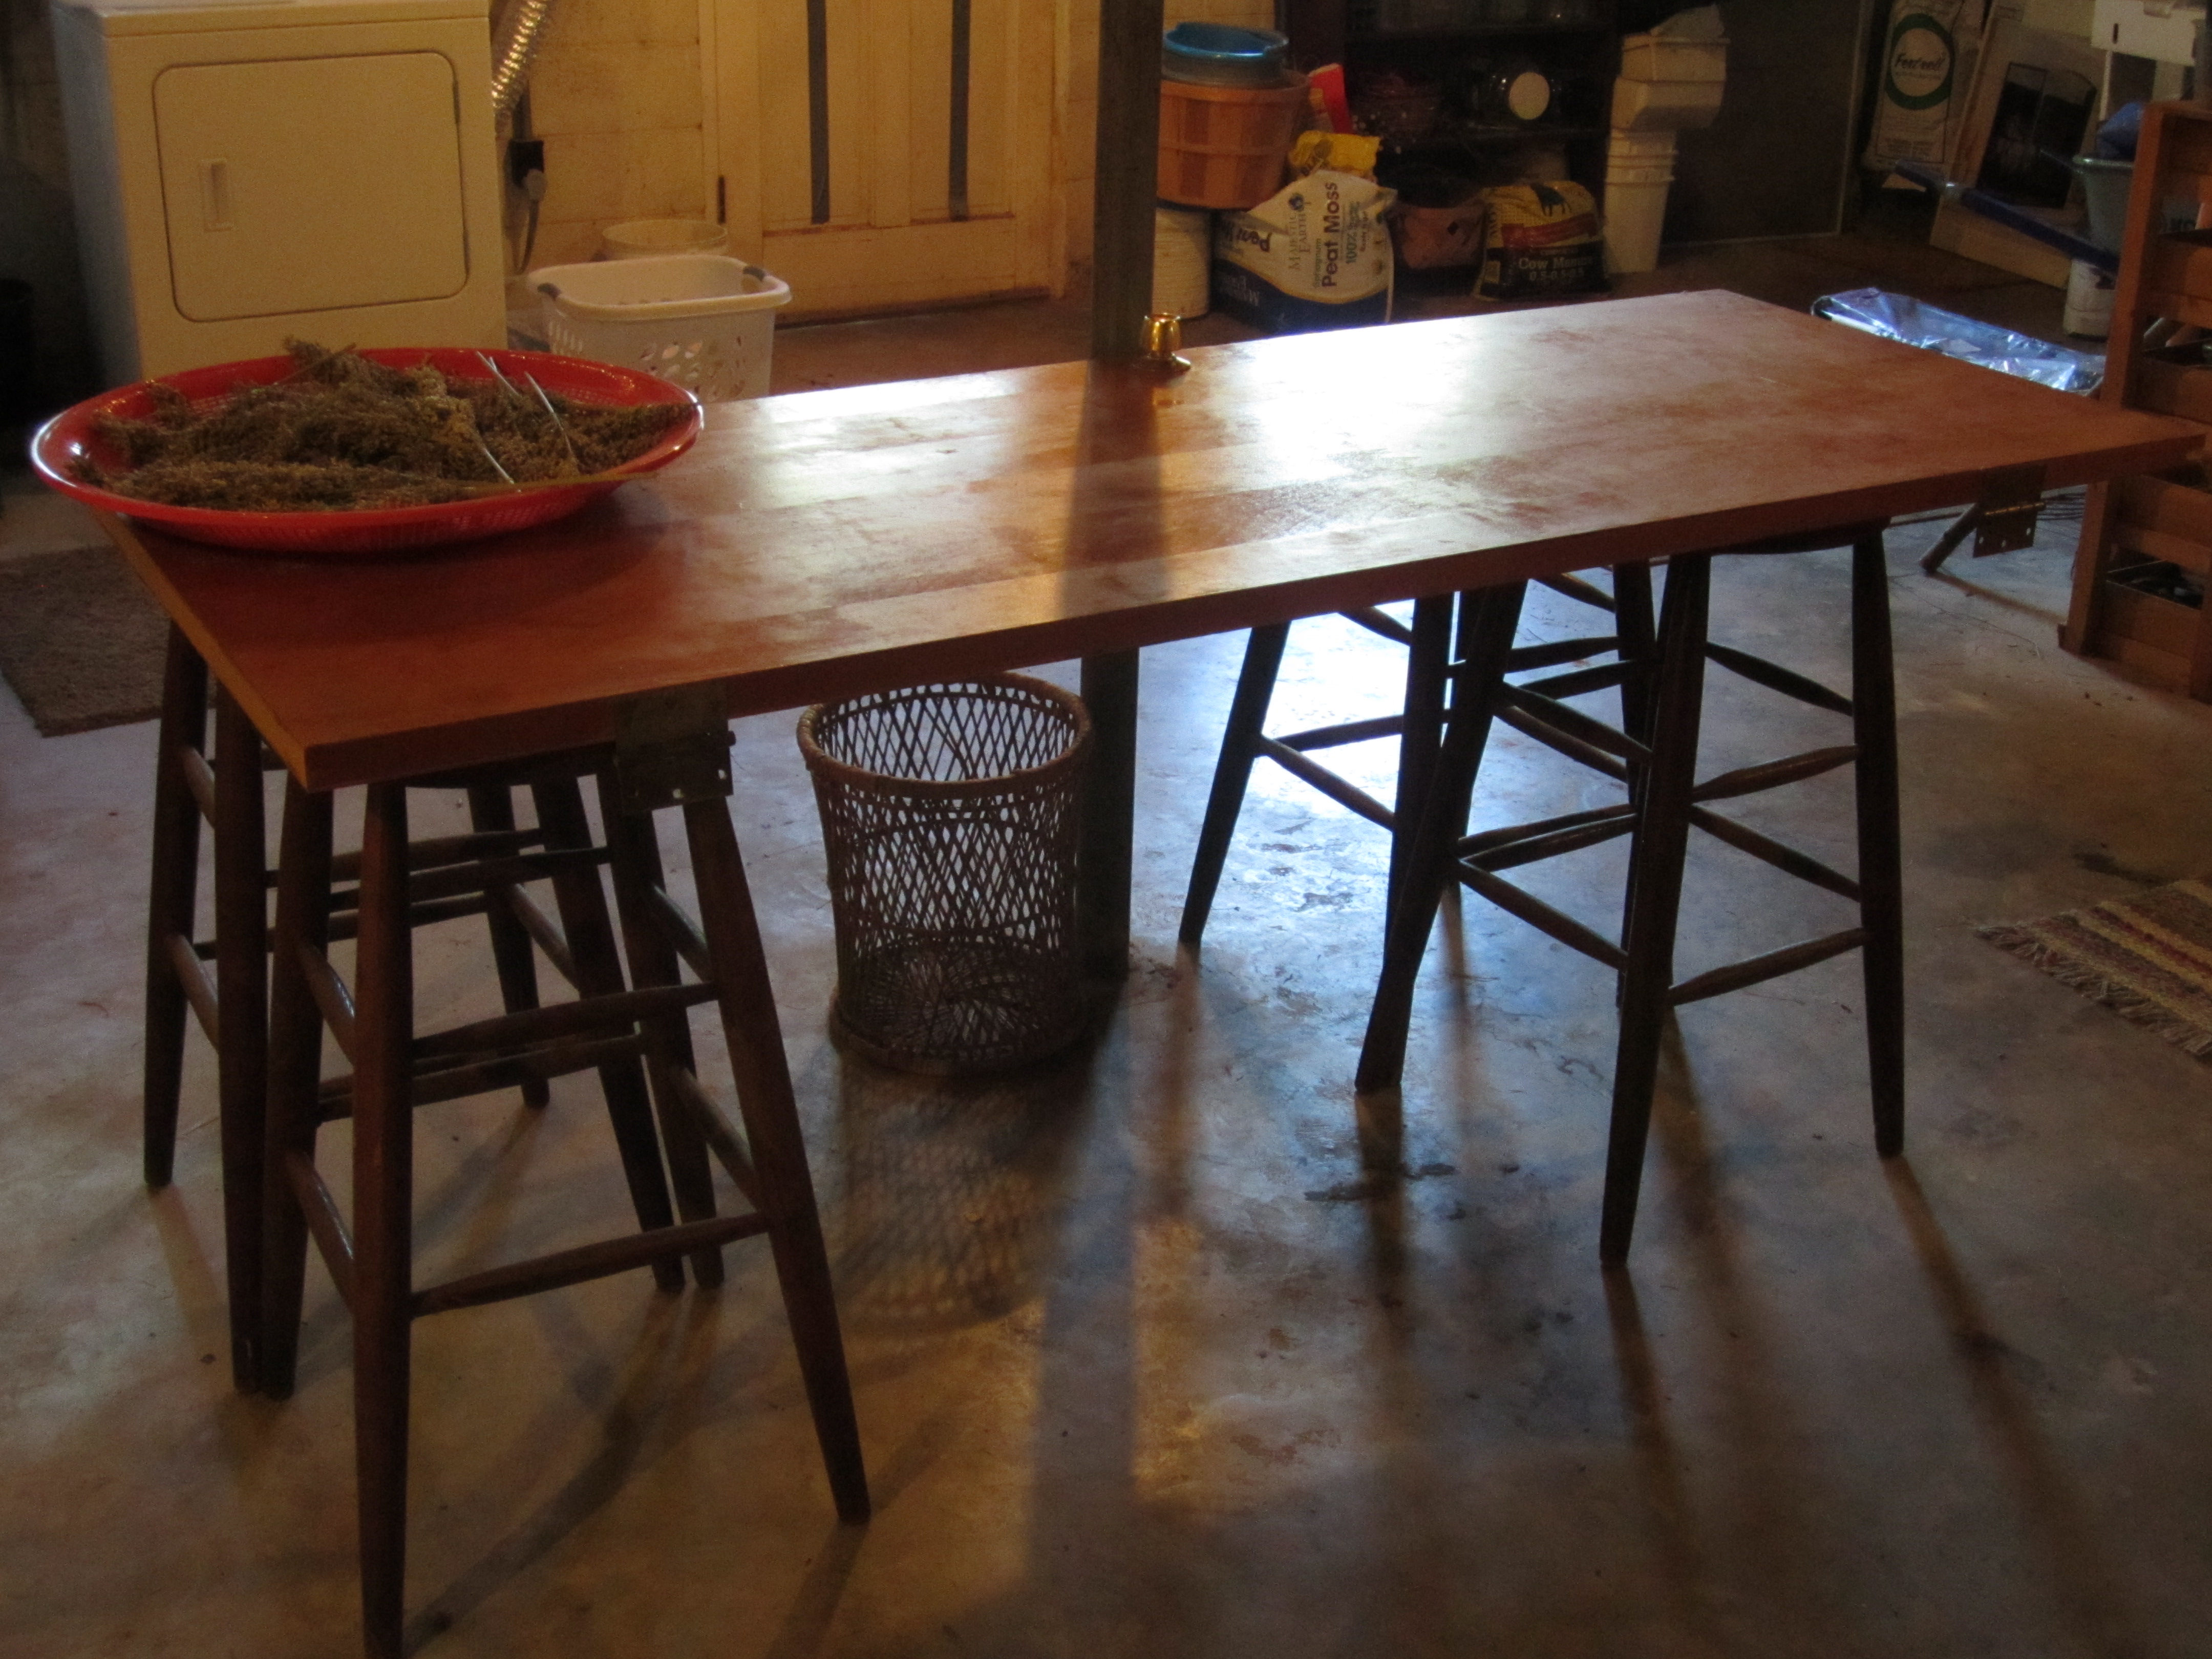
here is the table… back in the basement and without its table cloth
the cocktail tables were also simple and fun to make. we chose our prettiest 2 plastic rain barrels, turned them upside down, and added an old sign and an old table top that we found in our woods as we were cleaning up for the wedding! more fabric from the same bolt on top, and a lovely wooden vase made by my father to keep the fabric from blowing off just in case of wind, and you’ve got a unique and free cocktail table perfect for a homestead wedding!
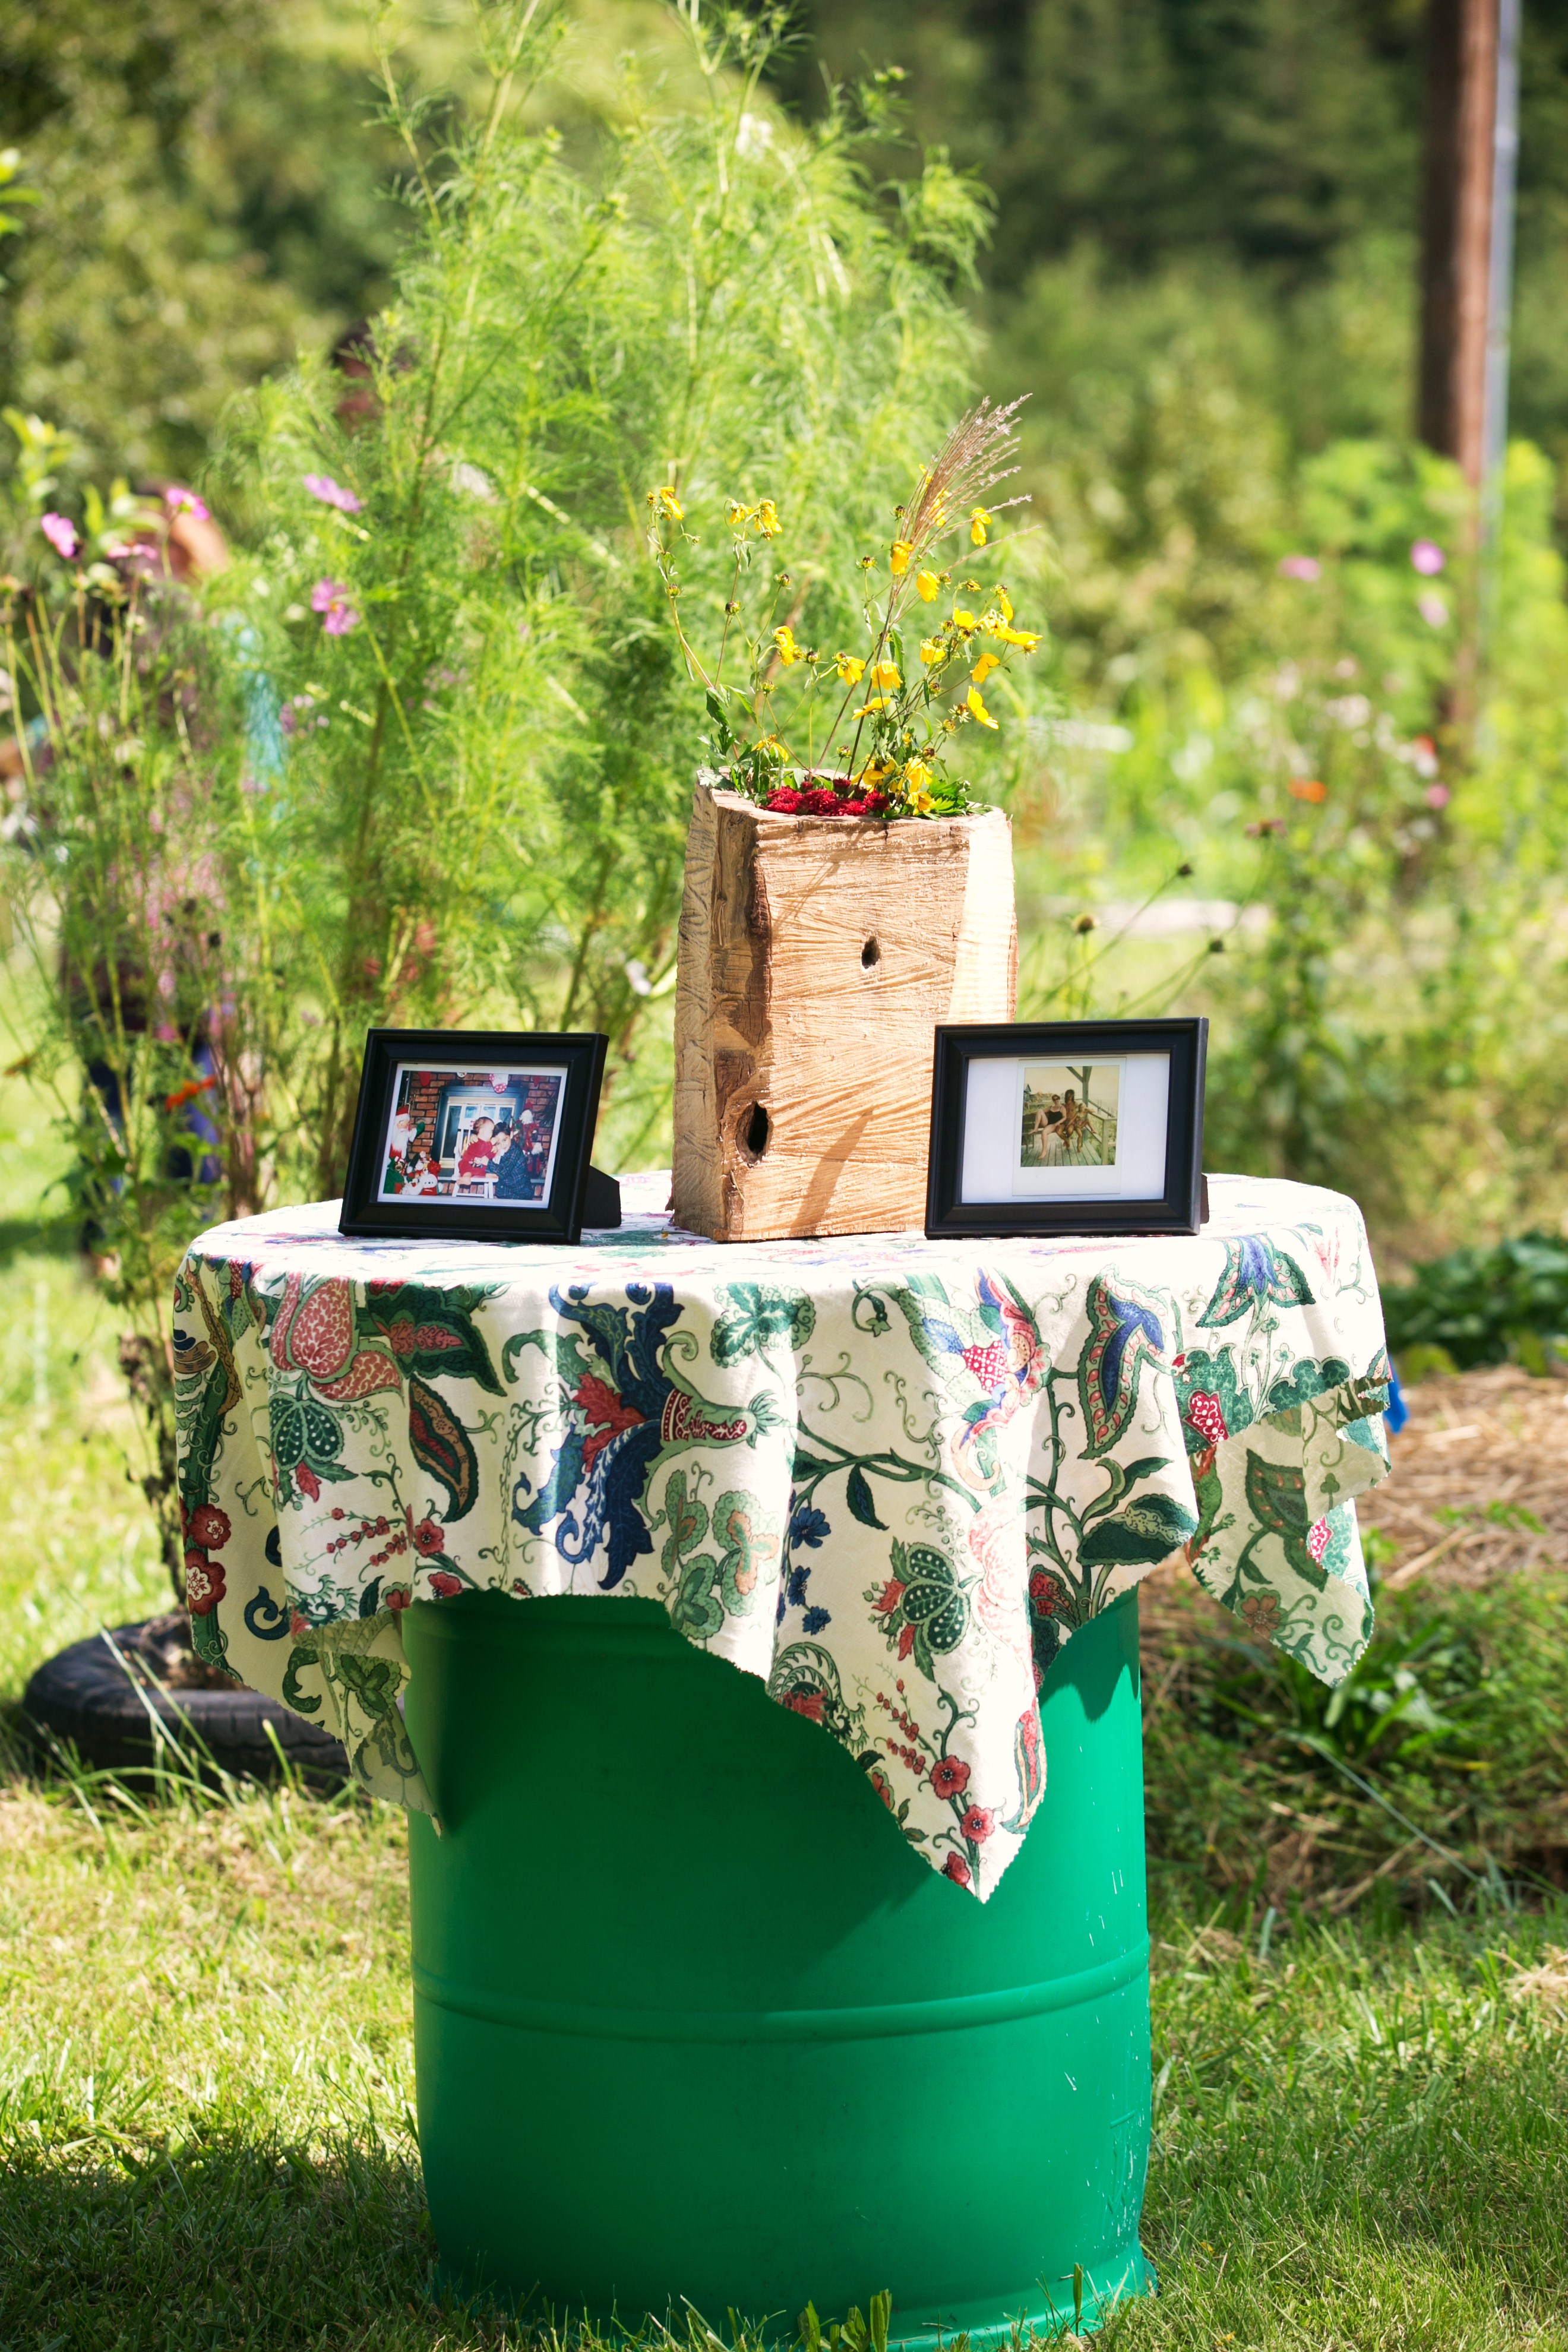
photo by Jenny Tenney Photography
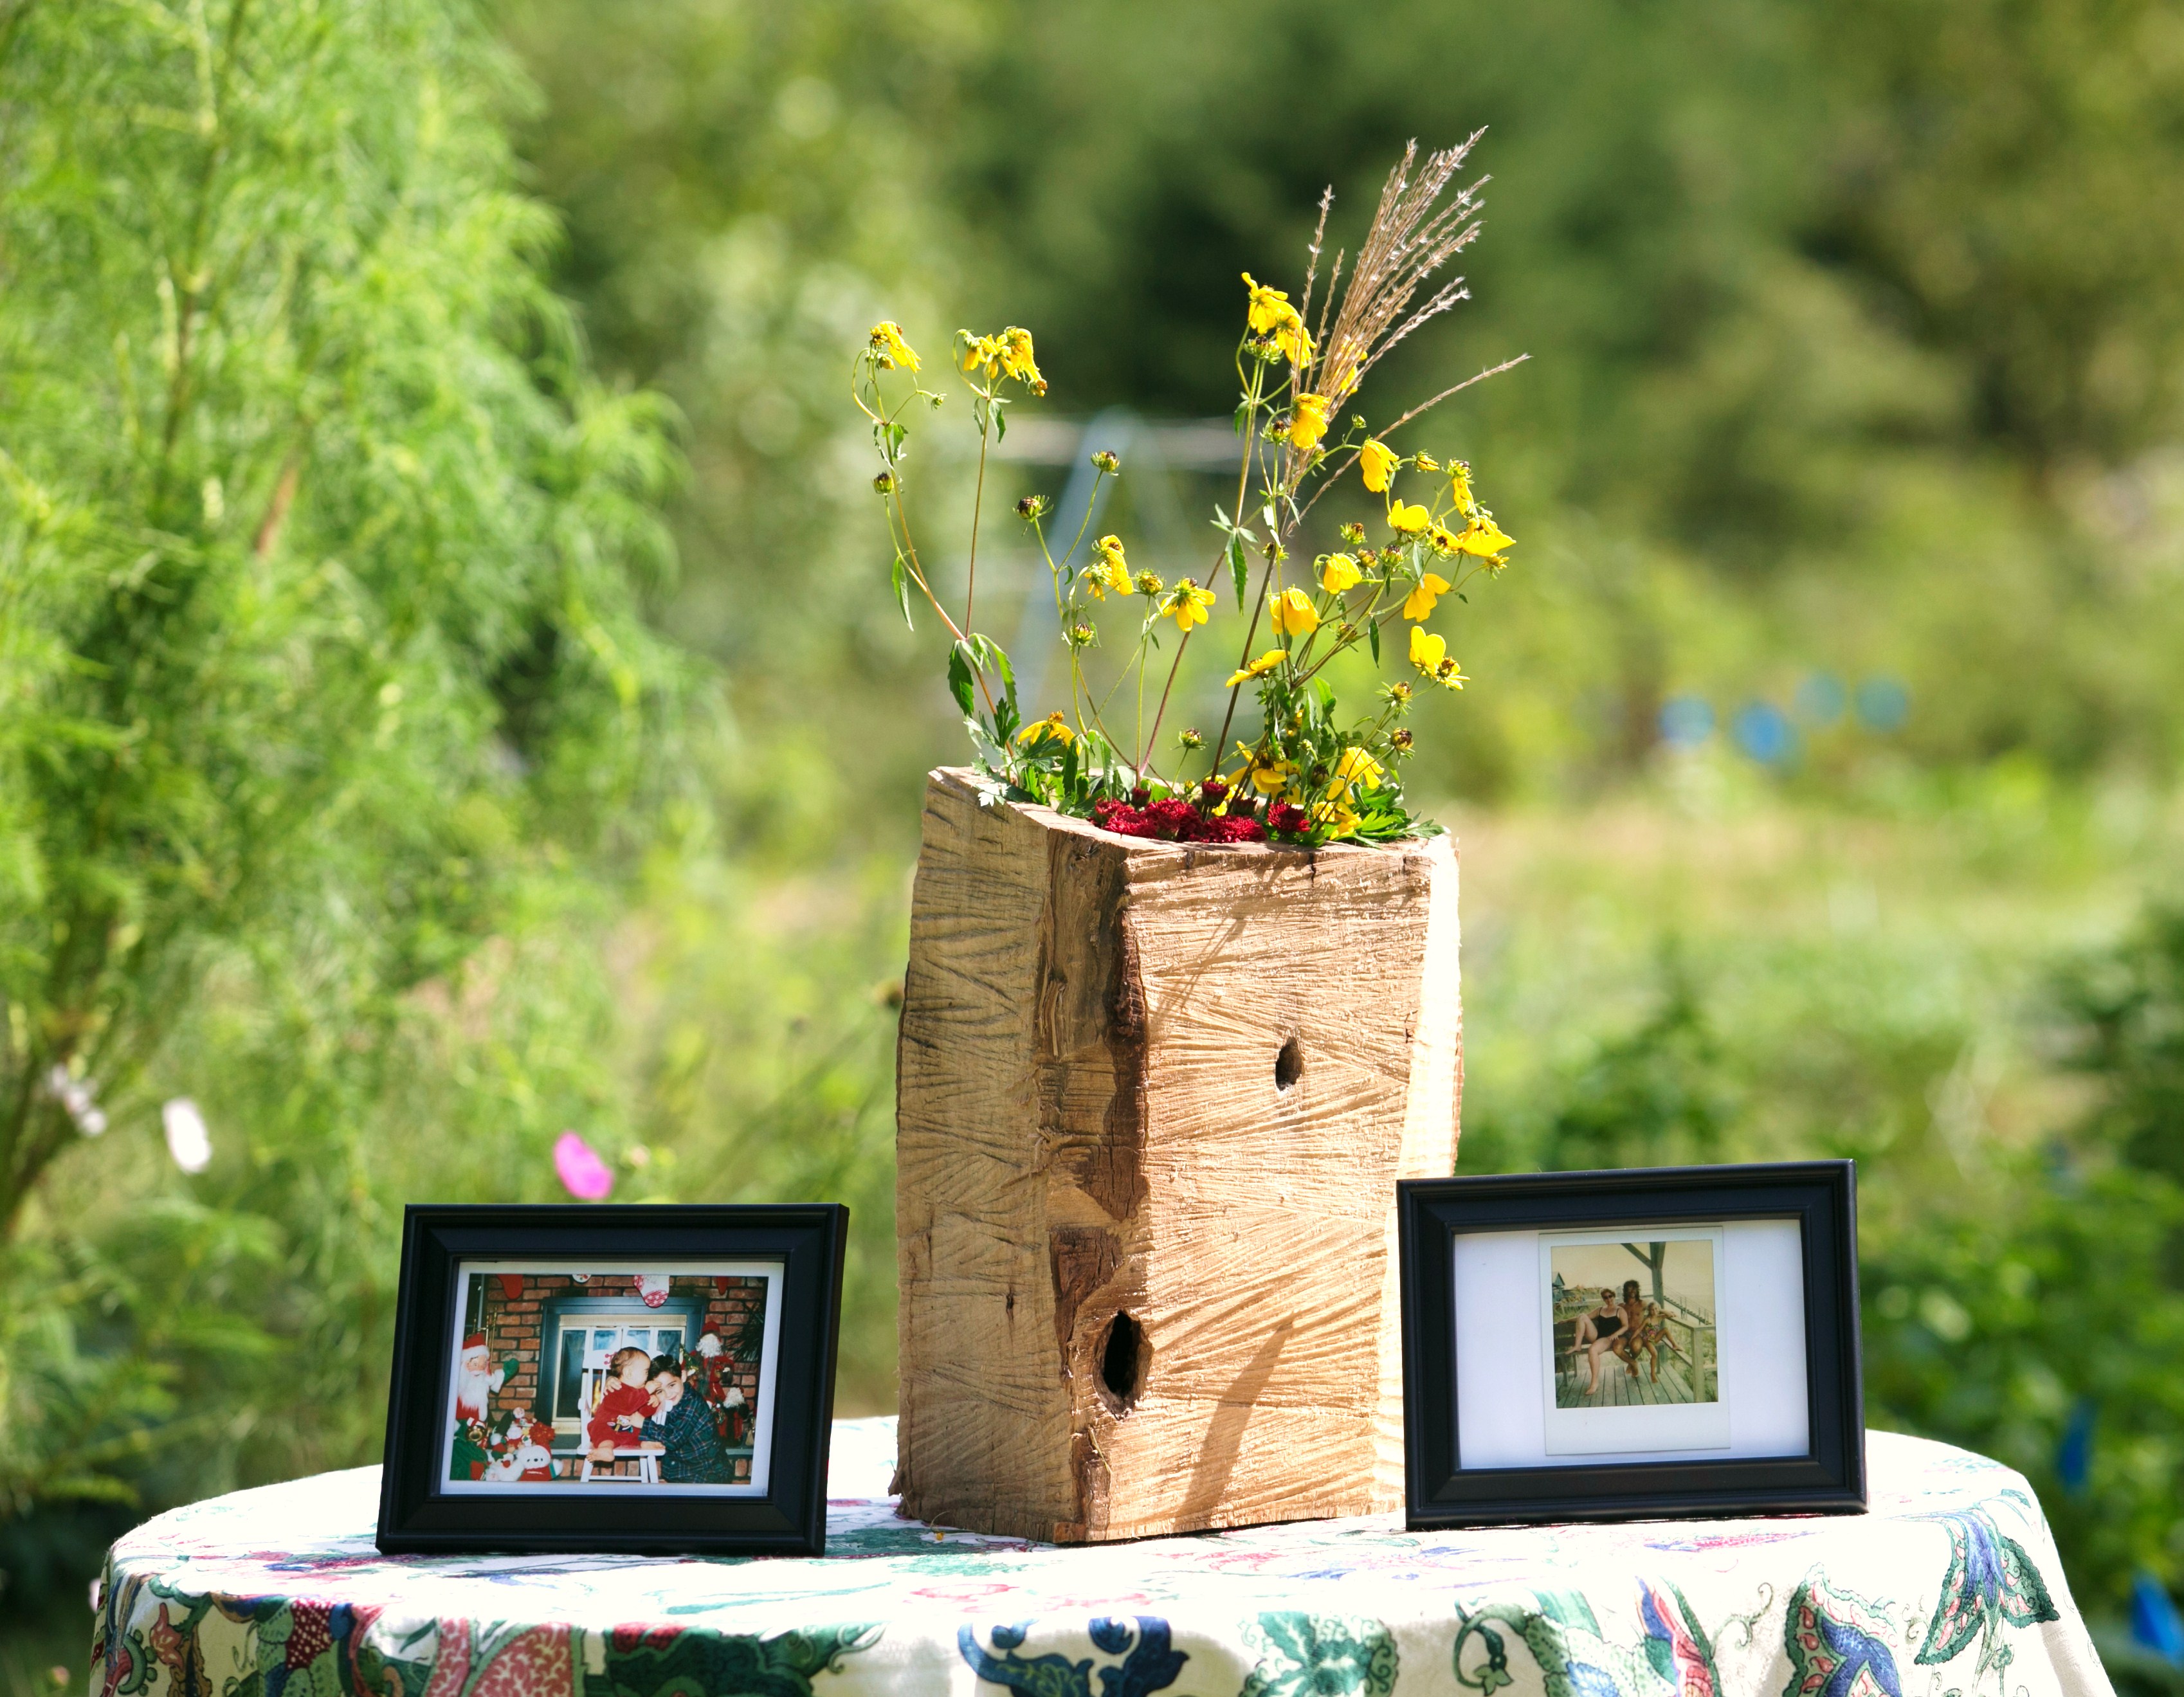
photo by Jenny Tenney Photography
another table that held the water cooler and cups was really more bolts of fabric on top of an old washing machine! you never would have guessed!
needless to say… it is definitely possible to create tables and seats (more on this later!) from materials you have around your homestead. and, if you are anything like us, you’ll love making creative, memorable, and cheap surfaces for your wedding guests to use as tables!
.:.