KW Homestead

Pasture Raised Poultry & Edible Landscaping Plants Since 2013

Month: February 2014 (page 1 of 3)

Restoration Agriculture: A Great Talk by Mark Shepard

Yesterday, while doing the dishes, I listened to/watched an awesome presentation by Mark Shepard of New Forest Farms. It was a long talk, over 2 1/2 hours, given at an Acres USA conference, but it was solid permaculture gold.

He begins with a look at the unsustainability of our modern agricultural system that relies on annual crops (corn, soy, wheat, etc.) and finishes with a description of his farm in Wisconsin that uses agroforestry techniques and permaculture principles to produce an abundance of perennial staples and livestock. Mark is a history buff, and he talks about the roles of annual agriculture and soil loss in the collapse of civilizations throughout time.

He draws much of the inspiration for his farm from the naturally occurring oak savannah biome, where large mast bearing oak, beech, and chestnut trees tower over scattered shrubs (hazelnut, apple, cherry etc.) and grasslands. This ecosystem captures much more solar energy than a corn field, and has the ability to sustain more pounds of mammal flesh than any other biome in the world. By grazing hogs, cattle, sheep, geese, turkeys, and chickens through his contour based, polyculture hedges, Mark Shepard has built, and continues to build a system with the potential to change farming history.

This talk was particularly exciting because Mark is actually doing it. He is producing food at the level necessary to supply grocery stores and urban centers. His entire point is that his method of farming, called Restoration Agriculture, is one that increases in yields and fertility over time, indefinitely, while decreasing in expenses. He argues that this is the only way to sustainably feed the world, and shows that permaculture can be profitable on a large scale commercial farm.

Check out the video if you have time and are into this kind of thing. The images are just stills of either Mark or his slides from the presentation, but he’s an engaging and funny speaker, and won’t disappoint.

wedding on the homestead: doing it our (ochre) way

we are getting married!

well, not yet. not until september 27!

and yet, of course, it is time to start brainstorming and setting some wedding plans in motion. plans, plans, plans!

first of all, i would like to say as the future bride/legal life partner that this is an exciting time! we might not be celebrating our wedding in the classic way, but we are celebrating it with style (our own!) and love!

us

it’s us: jason and emma!

as jason and i discussed what we wanted the ceremony/big-fun-time-party to be like, we quickly realized that we wanted to give as much or more as we were getting. now considering that we aren’t wealthy folks, we can’t give expensive things or pay for the hotel rooms of our loved ones. but, we can give of ourselves in as comprehensive a way as possible! we realized that we want our loved ones to know that we are grateful that they have chosen to share our big event and our lives with us, and we can do that by sharing with them our way of life, with many of our philosophies embedded within.

here are a few things that we are doing our ochre way style:

  • wedding location: it will be here, on our homestead. we will be celebrating in our backyard and we’ll have the barn, paths through the woods, and the pond for people to explore!
  • family roles throughout the ceremony: we plan to include family members in the ceremony, either as speakers or as “officiants” of some sort–we’re not exactly sure in what manner but we know it will include our moms and dads in more meaningful ways than in a traditional wedding.
  • decorations: the wedding is going to be informal but with certain style elements! i’ve got a wide color scheme–basically all fall leaf colors (any shade of red, yellow-orange, green, and brown) and we plan on asking all family and friends to wear some fall colors so that we can be a sea of fall leaves together. everyone is really part of this wedding and i want everyone to be constantly aware of our shared identities and family community! my entourage (a joke–since i am not calling them my “bridesmaids”) will each wear one of the fall colors (in whatever shade or style they decide!). decorations will be things like wooden vases, wild flowers, etc.
us

us visiting arches national park (we’re the two goofy looking ones in the front!)

  • an extended timeline: most of jason’s family live outside the state and we definitely want to enjoy them as much as we can while they are visiting. partially for this reason, and partially because i have always found weddings to be way to whirlwindishly short when they start in the evening, we’ve chosen to begin our wedding celebrations in the early afternoon. this way, jason and i will have hours of time to spend time with loved ones, building our excitement together as one big extended family, and doing what all families do best: eating, drinking, and dancing.
  • the food: we decided that outsourcing the food production and the meal wasn’t going to work for us. so, we’ve decided to prepare most of the meal ourselves with some help from close family members. we’ve included favorite family recipes, delicious homegrown crops, and even a version of an earth oven for baking meat and vegetables that i learned how to make and use in peru, where jason and i met.
  • the music: it will be dance, dance, dance music! dancing is one of my favorite things on the planet and i’m sure almost all of our family and friends will shake some booty with us. and i’m really excited about the songs we’ll be playing and how we will build our playlist… my next step in wedding planning is to email everybody (and their momma) and ask them to send me a list of some of their favorite songs. i can’t wait to see everyone jump up for their chosen songs during the night!
  • party favors: i can’t say what they will be (i don’t want to give the secret away just yet), but i can say that they will be homegrown and homemade items!

i intended for this to be a short list of our plans for our lifelong partnership ceremony/wedding, but as you can see, i got carried away! i will leave you with this and move on to printing our save-the-date cards we just finished designing last night (another thing we wanted to make/do ourselves!). 7 months to go…

.:.

cutting mushroom logs: the magic begins!

i’m excited to report that we’ve officially begun our magical, mushroom adventure! this weekend my father and i cut 50 oak logs to serve as mushroom homes for the next 5 years!

we cut both white and red oak logs, to compare them as growing mediums and for the visual variety. the mushrooms that we are growing this year love oaks the best! we made both 3-foot and 4-foot logs, based on diameter of the limb/trunks (i have to be able to lift each of them for soaking in the future!). as luck would have it, 24 of the logs ended up as 3-footers and 26 as 4-footers. talk about balance!

red oak

a red oak (leaning in the foreground) that we cut, only using the bottom portion that was alive at time

oak tree

my dad cutting an oak!


when selecting trees, we picked ones closer to the road and ones that we could use most, if not all of, once felled. one of the trees we picked was broken off and hanging about 15 feet above the ground, so we cleared the area of the danger of the hanging wood while also getting our logs. we did not use the hanging portion of the tree, though, because that part had been dead for some time. we left that behind for future firewood and selected the green portions of the tree. choosing green wood is important because you don’t want to give bugs or molds and other fungi time to move into the dead wood before you inoculate. bugs might eat your spores and other fungi might compete with your own mushrooms!

my dad felled the tress with his chainsaw. ever since i was a kid he has impressed upon me the importance of chainsaw safety. the approach to felling these trees was no different than other times i have done tree work with him: i stood well away and was “ready to run” even though the trees were certainly on the small side!

after each tree hit the ground, i walked a wide circle around him (never walk up behind a chainsawing person!) and pulled the measuring tape to 3- or 4-foot lengths, depending. dad made a shallow cut at each measured length and once the entire tree was sectioned he cut the logs into individual pieces. some of the white oaks we chose were dead at the top (one of the reasons for choosing them), and this dead wood was also left behind for firewood or perhaps adding to hugelkulture beds soon.

after finishing each tree, we carried the logs to the road, taking careful not to scratch the bark too badly (the bark is important here, folks!)

in all, we cut 6 trees, half in the red oak family and half in the white oak family. our mushroom logs’ diameters range from 3-inches to 8-inches. once all the trees were done we loaded our trucks and drove them to the house.

logs

mushroom logs loaded in our truck

when we unloaded we were once again careful with each log, and i pruned the logs of any small limb nubs with a hand saw and held the logs still while dad chainsawed larger knots off. the purpose of this is to make sure that we can drill holes uniformly over the log before inoculation, as knots can be tough on drill bits.

our drying oak logs (with emma)!

our drying oak logs (with emma)!

now that we’re done “cleaning up” the wood, the logs have been stacked against the back of the house to dry for about 3 weeks until the wood’s natural anti-fungal defenses have mostly broken down (this decay generally gets into full swing about 2 weeks after cutting).

and there the logs will sit until we inoculate them in 3 weeks. now it’s time for stage 2: ordering our spores and other related gear (wax, drill bits, etc)!

.:.


Micro Pond Update

We got some rain on Saturday, just a little but it was enough to completely fill the pond I started to dig. It’s 3 feet at the deepest spot, probably holding close to 300 gallons of water, and has a large catchment area that includes at least two of our garden swales.

hand dug pond permaculture

Our small pond full of water after 1 morning of rain

It’s muddy, and I’m not sure if I want to line it or not. The positives of lining it are better clarity and less leaking through the sides and bottom. The positives to an unlined pond are less materials, easier installation, and increased water filtration in the surrounding soil. We’ll see.

The small pond will create a unique habitat and micro-climate near our garden which will attract all sorts of beneficial wildlife like frogs, lizards, dragonflies, and birds. These helpful characters will help control insect populations, giving our crops a better chance to make it to harvest. The water in the pond will also act as a temperature regulator, helping to moderate both hot and cold conditions. The water in the pond will also be available to use for irrigation, and during heavy rain events will backflood into our most downhill garden swale.

This small, hand dug pond will make our garden more efficient and increase the amount of edge. By slowing down and storing more energy/water, we increase the productivity of our system in an ecological way and are able to obtain yields that were unavailable to us before. All these, and many others, are reasons to consider adding a small pond to your garden if you don’t already have one. If you do have one, how is working? What sorts of interactions and consequences have you observed?

natural childbirth and birth centers: the beginning

i’m still shocked and awed by my recent experience at natural beginnings birth and wellness center.

my close friend delivered her first child, a daughter, early yesterday morning, february 20th. i’ve spent the past few months talking with my friend about all sorts of birthing expectations and pregnancy experiences. so much of this whole experience has opened my eyes, and while i considered myself to be moderately well-informed about natural birth (if one really can be without witnessing one or giving birth oneself) all the reading and learning and listening can’t prepare for the amazing experience that is natural childbirth.

the past two days have been bizarre for me… i sometimes forget what i have seen and “come to” thinking about the depth of the experience and how it is so truly unlike most other experiences routinely seen in the modern world.

one part science experiment, one part adventure, and one part god, natural birth is truly remarkable. i won’t speak in too much detail today… i first need to talk with my friend and ask her how much she is comfortable with me mentioning, but i will give the highlights.

birth center logo

a great birth center in statesville, nc!

first of all, i was excited to see the birth center where her daughter was born, since this birth center in statesville, nc is only 1 of 2 in the state and we are possibly interested in birthing our child at this same location in the future. i found the staff to be amazing… calm, collected, relaxed, and knowledgeable. also, they were willing to talk and answer all of my placental and other questions!

my friend had her child via water birth, as did another one of my close friends. she relayed her enthusiasm over being able to labor in the water throughout the experience, and it was apparent that being in the water was soothing and easier on her body. she was able to move around whenever she wanted and she was the first one to touch her newborn girl, plucking her out of the water with joy and awe on her face and exclaiming “our baby!”

witnessing a natural birth is truly difficult to explain. one thing that i can say about it, is that it is inspiring! in the past few days i have felt empowered in new, different ways… thinking: if my friend can so gracefully and beautifully birth a spiritual human entity into the world, what do i have to worry about or complain about? i have never seen anyone work so hard in my life, without complaint.

this experience has caused me to realize that strength is so much more innate and animal than we realize. that our animal selves know what to do, and how to do it. to immediately decide that a drugged and numb labor and birth is the ideal is fallacy. not only does an unquestioned leap into a hospital bed deprive a woman of an amazing animal experience, but it also deprives her of an amazing spiritual one, too.

i will have much more to say about my experience of the birth soon, but for now i can only say how much my friend inspires and awes me. if only one day i can be as heroic and as humble as she is, then i will truly know the beginnings of motherhood.

.:.

Hand Dug Pond: Stage 1

First off, happy birthday Heidi!

Today felt like spring. I was excited and invigorated, so I decided to do some outdoor chores.

I pruned our dwarf apple trees, and started my apple propagation by cuttings experiment (more on that another day). While walking around the yard and enjoying the weather, I revisited an idea I had about digging a small garden pond near our raised beds.

hand dug pond

Some of the tools I used to dig our micro garden pond.

I’ve researched and Googled tiny ponds a few times, and I just felt like trying. I used a few different tools; a shovel, mattock, maul for tamping, and some post hole diggers, as well as a wheelbarrow. I moved from one tool to the next depending on what worked best at the time, for about 3 hours, and the end result is a nicely shaped, roughly 5 ft. diameter oval pond that is 3 feet at the deepest below ground level.

I’m not yet sure if I will impound any water with a dam, but I did separate the topsoil from the subsoil, which is primarily mineral rich clay.

hand dug pond

The beginnings of our new 5 ft. diameter and 3 ft. deep tiny pond.

There are a few options for the final layout of this small pond, and It has the potential to interact with all of our garden swales. I may even have it completely surround our yaupon holly onto an island. We’ll decide soon.

I learned a few things today, that hand digging a micro pond is not that difficult, and that you can accomplish significant water capture very quickly. Also, don’t overload your wheelbarrow in muddy conditions. It will get stuck and tear up the land, or worse fall over and spill it contents in the wrong place. This concept would apply to bigger earth-movers as well in any other permaculture mainframe installation.

I’ll keep you updated on the hand dug pond, and I recommend getting out there and playing in the mud. You can really, really learn a lot about your land when it’s up to your chest!

Some Livestock Options for the Upcoming Year

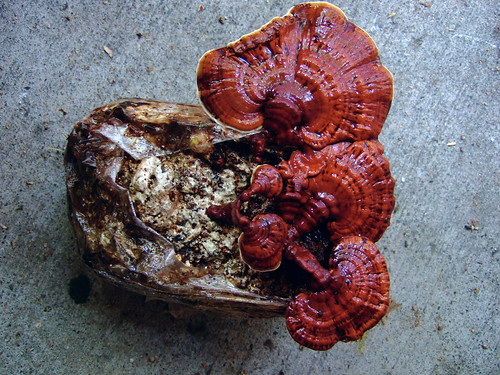
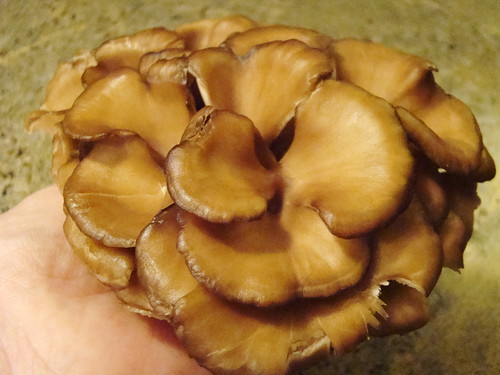
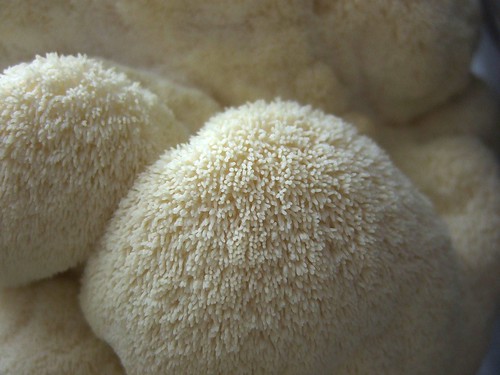
I’ve been thinking a lot lately about the coming year. With the nice rise in temperature we’ve been experiencing, it’s hard not to think about spring and I find myself contemplating next year’s garden and livestock plans. On the garden front, we have some thoughts on expanding our vegetable garden and putting in more raised beds. We’re starting our mushroom crop this year but I’d also like to put in hundreds of trees, bushes, and vines in a more perennial system, a food forest that follows permaculture principles and techniques.

On the animal front, we already have a couple dozen chickens, mostly standards but some bantams as well, and I think we’ll try splitting them up and running the bantys in a chicken tractor setup. I’m hoping this will give them better access to food and forage, and a chance to lay more eggs and possibly go broody and hatch some chicks.

I’ve also thought a good bit about expanding our livestock operations. I don’t think we need or want any more chickens, other than the young bantam chicks if that should occur, but there is a type of bird that I would like to raise and that I think will work well on our homestead. Geese.

homestead geese

Jack’s geese, photo courtesy Josiah Wallingford

After hearing about Jack Spirko’s successful goose pursuit, I am sold on geese. He’s had excellent weight gains on almost nothing but grass, and we have a good bit of grass. Predator issues aren’t as big of a concern with geese, whose size and group behavior is more intimidating to raccoon, possums, etc. When they are young this probably won’t hold true, so we’d have to deal with that. I can see us running a few geese through our upper yard, maybe with portable fencing, or maybe more “free range” if we somehow seal off the garden from them.

Another species I’m interested in is the good ole pig. But not any good ole pig, pot bellied pigs. I like their small size, good foraging ability, and the fact that they are a lard pig. MMMMnnn… bacon… bacon grease… and lard. Awesome. Topping out at around 70-150 lbs., butchering one of these succulent hogs wouldn’t be the chore most standard sized hogs are. Their small size should also mean that they’ll do less damage on the land, and on fencing as well. Though I hope it doesn’t mean that they turn into some sort of psuedo-goat-pig that can simultaneously climb and plow through fences.

pot bellied pigs permaculture

I don’t yet know how to tackle the fencing issues for pigs, but I’d like to raise them at least partially in the woods and on the forest edge where they scrounge up all kinds of goodies like mast drop and black berry. An idea Emma had was to use some of the abundant medium sized pine trees as living fence poles for welded or woven wire fencing. Pigs would provide both a yield of meat and high quality fat, while at the same time being able to clear and prepare land for future planting. This function stacking makes them a great choice for a permaculture homestead, and is why I’m so excited about potentially raising them on ours.

The last livestock animal that may find itself on our farm next year is another great function stacker. Compost worms. I’m getting really excited about vermicomposting and its wonderful benefits and outputs. As livestock, worms can be used to compost vegetative material, as a protein source for other animals and for their nutrient and microbe rich “worm juice/tea”. Organic material is never hard to come by on a homestead, so passing some of our excess through the worms and turning it into some of the best organic fertilizer available seems to make sense.

vermicompost permaculture

As worm populations can double every 90 days, and compost worms can eat their own weight every day, with about 60% conversion to harvest-able vermicompost (not including worm juice runoffs), a small worm farm or bin can be a huge asset to the small farm or permaculture homestead, both in terms of fertility and potentially as a sideline business.

We are not yet sure which of these livestock we may add to our homestead this year, if any, but I do plan on pursuing them in the future. Pot bellied pigs, geese, and compost worms are in our future. We just need to think a little more about execution and where exactly they fit into our system. We’ll see, and we’ll be sure to tell you about it!

5 Useful Resources for the Homestead

I thought I’d throw together a list of resources we have found useful here at our ochre way. This is by no means an exhaustive list, but just some of the tools I reference if not daily, then weekly.

Books

Gaia’s Garden by Toby Hemenway

Probably the best brief introduction to home based permaculture there is. It’s an easy read, with lots of pictures, charts, and plant lists. A great to place to start if you’re looking to begin using permaculture techniques to design your property.


Dr. Pitcairn’s New Complete Guide to Natural Health for Dogs and Cats


Dr. Pitcairn really knows his stuff, and his book is bursting with information on raising your pets naturally without toxic chemicals. The chapters on nutrition and home made pet food are worth the price of the book by themselves. Its been our main resource with deciding how to formulate our homemade dog food, and is without a doubt the best book out there to help dog and cat owners navigate their own adventures in organic and natural pet care.

Edible Forest Gardens (2 volume set)


This set from Dave Jacke and Eric Toensmeier is the ultimate reference for permaculture design for food forests and forest garden systems. This great resource covers everything from ecological theory to plant spacing, guilds, and breakdowns of mature forest gardens. The plant tables in the appendix are unbelievable with information on bloom times, edibility, medicinal qualities, root structure, and so much more for hundreds of species. An invaluable tool for anyone planning a food forest.

Online

The Survival Podcast

Jack Spirko’s podcast on permaculture, homesteading, and liberty is something I listen to everyday in the car to and from work. with over 1200 episodes, he has covered topics from hunting squirrels to cooking with herbs. He regularly interviews some of permaculture’s most influential people, like Geoff Lawton and Paul Wheaton. Not only is the show a great resource, but the TSP forum is a great place to learn and discuss homesteading and other topics as well.

Permies.com

Brought to us by Paul Wheaton, permies.com is the best permaculture forum on the internet. This is the place I check first if I want a brief summary on anything related to permaculture or homesteading. A great resource.


These are just a few of the resources I would recommend to someone trying to start a homestead, or who one day would like to start homesteading. Stay tuned for more!

our first mushroom adventure: which mushrooms will be magic for us?

we will begin our first homestead mushroom adventure next week, when my father comes to help me cut 30 to 40 red oak mushroom logs for our spring mushroom inoculation!

my father has raised mushrooms before and he is going to be a great resource when we start this mushroom adventure.

on the eve of cutting our mushroom logs–in 3 and 4 foot lengths–i’ve been doing some research on which mushrooms we want to begin raising this year.

here is a summary of what i’ve found on the 4 mushroom types we’re interested in raising, including the health benefits, flavor profile, and the meaning of the mushroom names (how i love to learn about the meaning of names!).

shiitake

drying shiitake mushrooms, photo courtesy jmurawski

shiitake (lentinula edores)

  • shii is the name of the tree, related to beech and oak, that these mushrooms naturally grow on in japan, and take simply means “mushroom.”
  • this mushroom is the species that my father has experience raising and we plan to inoculate most of our logs with these spores.
  • shiitake, like all of the mushrooms mentioned here, are anti-tumor, help to detoxify the body, boost immune function, and regulate blood pressure.
  • to me they taste like calamari when sauteed and are excellent cooked in mass  quantities with nothing more than soy sauce!
  • their fruiting temperature is 50-80 degrees F.
  • their favorite wood is oak.
reishi

red reishi mushrooms, photo courtesy Wendell Smith

reishi, ling chi, or ling zhi (ganoderma lucidum)

  • this mushroom’s scientific name means “shining skin, shining,” named for its glossy sheen.
  • reishi mushrooms contain ganoderic acids which alleviate allergies by inhibiting histamine release. they also improve liver function, and thus help with detoxification.
  • eating this mushroom is said to provoke feelings of peace and relaxation.
  • their fruiting temperature is 70-80 degrees F.
  • their preferred wood is oak.
maitake

a delicious maitake mushroom, photo courtesy Janet Hudson

maitake (grifola frondosa)

  • grifola refers to the mythological griffin. it is also called “hen of the woods.”
  • it is very popular among mushroom lovers!
  • this mushroom stabilizes blood sugar, blood pressure, and may have an effect on free radicals.
  • their fruiting temperature is 50-65 degrees F.
  • their preferred wood is oak.
  • click here for a great article on maitake mushrooms.
mushroom

lion’s mane mushrooms, photo courtesy Wendell Smith

lion’s mane (hericium erinaceus)

  • in korean it is called “deertail mushroom,” and you can see why. how cool!
  • this mushroom helps with memory and can even ward off dementia by stopping neurological breakdown. it also relieves digestive tract issues such as ulcers, and can aid is fighting digestive tract cancers.
  • their fruiting temperature is 60-75 degrees F.
  • their preferred wood is oak, but they also like maple.
  • click here for a great article on lion’s mane mushrooms.

for more information or for placing your own mushroom spore order, check out fungi perfecti and mushroom people.

.:.

maple syrup icicles: an unexpected surprise

maple tree

our maple tree, showing its foliage in fall 2013

when we moved our chickens a few weeks ago, we decided to put their mobile pen and house underneath a small maple tree that we have in our front yard. in order to do this, i had to prune some of the smaller branches that came lower than my height, so that we could attach the bird netting to the top of the pen (keeping chickens in and swooping hawks out). without removing some of the smaller, downward growing limbs and twigs, the netting would have been tangled and ridiculously hard to hang up.

the pruning of the lovely maple and the hanging of the netting went off without a hitch, but i noticed something interesting the next morning…

the weather had been below freezing the night we pruned the tree and there were many little (and some not-so-little) icicles formed where we had cut off small limbs and twigs. some of these icicles were 6 or 7 inches long and remained all day. i broke off one and sampled it! and behold… nature’s first popsicle! i certainly tasted a faint sweetness in the frozen sap.

maple popsicle

a delicious maple popsicle, formed at the end of a trimmed twig

i’ve recently learned that one of the legends about how the native americans first discovered the sweet sap of the maple was by stumbling across icicles formed at the end of broken twigs, just like me!

whether or not this legend is true, i certainly learned a lesson that day: discovering things accidentally by doing and by experimenting (as we adapted our netting to work around the tree) is often the best way to learn new things. because while researching and just already knowing things is valuable, sometimes you just need a new “ah ha!” moment to get your gears turning.

now our gears are turning and we’re thinking… “what about harvesting sap from some of our maples to supply us with the delicious maple syrup that we love?”

and now the seed of a new idea has sprouted, watered by the experience of trying that maple tree popsicle!

.:.

Older posts

© 2024 KW Homestead

Theme by Anders NorenUp ↑