KW Homestead

Pasture Raised Poultry & Edible Landscaping Plants Since 2013

Month: March 2014 (page 1 of 2)

moving logs, digging holes, washing eggs, cleaning the house, and sleeping when possible!

this is a partial post… simply to explain why i don’t have the time to write more today. some of the reasons are listed in the title but there are others as well…

we’ve just been so busy!!! which is, of course, a good thing. but also a tiring thing.

we’ve both worked everyday the last two weeks with weekends filled with volunteering at my school’s garden and inoculating shiitake mushroom logs. after work we do our chicken chores and then this past weekend we moved our chicken pen and dug 16 large holes for planting our fruit trees that just came in the mail (yay!). we’ve also been moving and soaking our inoculated mushroom logs and today after work i stacked and labeled the logs to better layout a future soaking schedule. jason planted cabbage and broccoli.

not to mention, i finally got to clean the house on saturday for the first time in like, a month, and we spent last night cooking for the week.

i hope these don’t sound like complaints, because they’re not. but still, what a list!

exciting, though, because when we’re busy doing these tasks, we’re busy doing what we want to do with our lives.

and so, now… happy sleeping to all!!!

oh yeah, but first… what’s on the to-do list for tomorrow?

.:.

farm food friday: oma’s curried deviled eggs recipe

i love deviled eggs!

i know many people who don’t like them, and i suspect that that’s because they’ve only had simple deviled eggs made purely with mayonnaise. my mother’s recipe is far more delicious and when i make them, i eat one after another after another…

i do not have an exact recipe here, since most of the mixture is based on your own personal thoughts about how much curry or relish you enjoy. simply add the ingredients below to your boiled and crushed egg yolks.

a boiled egg thought: my method for boiling our eggs is to salt and boil water, add all of the eggs, cover and continue to boil for 1 minute. after 1 minute, i cut off the heat and let the eggs sit in the hot water for 10-12 minutes. afterwards, i place them in a bowl of cool water so they don’t continue to cook inside their shell.

once the eggs have cooled, i peel them and slice them in half, popping out the boiled yolks into a separate bowl (same way as most folks).

eggs

our orange-yolked aurora eggs. these were just sliced after boiling and ready to be made into deviled eggs!

and then… i add the extra delicious ingredients, adding a little bit of each to start:

eggs

the finished product! i admit, this batch turned out messy and a little bit ugly but i was in a rush and it was still yummy!

  • mayonnaise
  • garlic aioli mustard from trader joe’s. such a delicious, flavorful, and also spicy mustard that we love! if you don’t have a favorite or gourmet mustard, any sort will do!
  • relish
  • pickle juice. we use the juice from our very own greenbean pickles that have been pickled with salt, garlic, jalapeño, and dill. very delicious and great for intestinal health.
  • black pepper
  • cayenne pepper (certainly a little bit until you’re sure spicy is for you)
  • and the big, awesome ingredient: curry powder!

i always add a dab of this and a pinch of that in the beginning so that i can keep my ratios right. then i add more spice or liquid/sauce once i do a taste test.

enjoy! if you make this recipe, let me know how it turns out for you!

Starting Mimosa From Seed

It’s that time of year again, spring. Every homesteader and gardener knows that spring time can be a hectic and eventful season where we try to start plants, plan crop rotations, and consider new livestock options for the homestead. I’ve been trying to accomplish a least 1 new homestead related activity everyday for the last few weeks, and it’s gone well. Between Emma’s Mushroom endeavor, and our new food forest, we’ve been plenty busy. Lately, I’ve been starting some support species from seeds, and I wanted to detail that process here with a specific nitrogen fixing tree. Mimosa.

mimosa support species permaculture

Mimosa trees are both beautiful and extremely useful in permaculture design

Mimosa (Albizia julibrissin) is a short lived tree that is often considered an invasive species, although I’m not too worried about that, as it fixes nitrogen, improves soil fertility, attracts many insects, and is a beautiful permaculture plant in the garden. It is also easily shaded out by other trees, and though it coppices, is not a long lived species. We plan on using mimosa trees as a support species in our forest garden, and encourage permaculturalists in North America to consider this species as well.

Mimosa is easily grown from seed, and as we have a few on our property, I decided to gather some local genetics and propagate a few dozen more. The seed pods hang onto the tree way into winter making seed collection very easy. Even with our recent late winter ice storms, there are still some pods hanging around, though not as many as in January. I gathered some pods from 3 trees, 1 in our backyard, right where the food forest is going in, and 2 from by the pond.

mimosa from seed permaculture

dried mimosa seed pods, ready to be shelled


I then used my thumb to half shell half crush the pods and get to the tiny black seeds. This took a little practice, but I eventually figured out a system. After gathering about 50 or so seeds, I put some water on the stove to boil. I let this water cool for a few minutes, and then poured it over the mimosa seeds. This scarification process helps to break down the hard seed coat present on many legume seeds, and allows the seed to absorb water, thus beginning the germination process.

mimosa from seed

a hot water soak is often all it takes to help leguminous tree seeds germinate


I let the seeds soak overnight, and in the morning I planted only seeds that had swollen up into a tray. I’ll see what kind of germination I get, but I think it will be fairly good, as these growing mimosa from seed seems very similar to growing honey locust from seed.

mimosa permaculture support species

plant only swollen seeds, as these are the ones that have absorbed water and will germinate quickly

These trees will go in around our fruit trees, and most will be sacrificed as mulch and fertility components. I may try an experiment and just pour hot water over the whole seed pods and see how that effects germination. It would save the somewhat tedious step of “threshing” the pods.

Anyway, our support species list is growing nicely, we have almost 300 seeds sown of honey locust, black alder, siberian pea shrub, and now mimosa. I cant wait to get them into the ground, and start building fertility!

kids wondering… Will Chickens Eat Pizza?

Welcome back to Kids Wondering…

For those of you who do not live on a farm, you might be wondering what sorts of foods chickens will eat!

Chickens don’t just eat seeds and grass, that’s for sure! Join us in the video below for more insight into what chickens really will eat…

.:.

So, to review… Will chickens eat pizza and other interesting foods?

YES!!!!

And the were-you-paying-attention question of the day:

Where do you see our black cat, Dodger, in the video? Let us know if you can find him lurking about!

.:.

Using Geoff Lawton’s Mineral Supplement Recipe to Revitalize the Land

A huge problem in the world today is the constant erosion of our soil. Over many years, this process leads to nutrient deficient and dead soils that grow less nutritous plants every year. If we follow the food chain up, any livestock that eat these plants will suffer nutrient deficiencies, and any meat, eggs, or dairy that we obtain from these animals will likewise not supply a full spectrum of minerals and nutrients necessary for healthy life.

Bantam Chickens Homesteading

Livestock, such as chickens, can help us cycle nutrients and minerals back into the landscape.

One way to combat this unhealthy cycle, and remineralize the land, our livestock, and our food, is through the use of supplemental minerals. By feeding a full spectrum of minerals to our animals, in addition to high quality feed, not only do we improve the quality of their health, meat, and eggs, but we also improve the quality of their manure. By cycling these nutrients and minerals through livestock, they become bio-available to plants, which readily soak them up and perform better than ever. If we continue this cycle, and either mulch, compost, or feed these plants back to our livestock, we can rapidly increase the fertility of the land, and remineralize eroded and damaged landscapes, all while enjoying a bonus of the healthiest plant and animal products imaginable.

Geoff Lawton is where I first heard of this remineralization process, and his supplemental mineral recipe is great. This recipe is enough to feed to 1 dairy cow every day at milking or 10 chickens once a week.

  • Start by boiling up a cup or two of clean water.
  • Add 1 tsp. of copper sulfate. This worms the animals, but is a toxic compound that can poison them.
  • So, to neutralize the dangers of the copper sulfate, but still get the worming effect, add 1 tbsp. of dolomite lime.
  • To balance out the pH add 1 tbsp. of flowers of sulfur, an acidifying element to balance the alkaline effect of the lime.
  • Next, add 1 tbsp. of 2 types of rock dust minerals. For example, 1 tbsp. of greensand and 1 tbsp. of azomite.
  • Add 2 tbsp. of kelp, a dried mineral rich ocean product. This contains all of the minerals of the land (which all erode out into the ocean) in a slightly different form and ratio.
  • 1/2 cup of apple cider vinegar. This adds more nutrition, and helps with the digestion of some of the minerals.
  • 3 tbsp. molasses. An extra boost of iron, and a nice sweet taste makes this concoction a delicious treat for all livestock.

This mix is stirred together, added to a bucket of chopped forage, and fed to the animals. Geoff credits the bones of this recipe to Pat Coleby, an Australian author who writes natural animal care books for farmers and pet owners. Pat’s take is that animals do not have health problems or diseases, but rather are suffering from a nutrient deficiency, and that it is up to the farmer or pet owner to supply the correct nutrients and minerals. This treats the cause of the problem as opposed to the symptoms.

There is probably some wisdom there when it comes to our own health as well. Regardless, the first step is to remineralize the soil, and there isn’t a more efficient way than feeding a mineral supplement through your livestock and having them pre-process it for you into a plant ready state, creating an oasis of fertility and nutrient density in your backyard.

*Don’t forget to pre-order your Heritage Thanksgiving Turkey!

spring is here: and the celebration of flowers begins!

although we welcomed spring last week, i haven’t really had the time to stop and think about what that means until today. as we all know, spring, of course, means flowers! it also means planting and growing vegetables, and the beginning of the hard-work-every-day-on-the-homestead phase of the year. this time of the year is fantastic, filled with excitement about the upcoming growing seasons, the fresh air (and the desire to be outside in the sun), and the anticipation of eating, eating, and eating-some-more our homegrown crops.

today i finally took the time to notice and photograph the flowers that have just recently started to show their true colors!

daffodils

daffodils are my very favorite flowers, ever. i love the different varieties, i love the way they smell, i love having them growing all around! i love them! i had originally wanted to get married during daffodil season to be sure to have some around, but spring turned out to be not-the-best time for us to have a big celebration here at home.

the daffodils came up a few weeks ago, around early/mid-march and have been going strong ever since. when we got some freezing and icy weather shortly after they came up, i was worried about the blooms, but the already existing blooms recovered well and new blooms just keep on coming!

daffodils

daffodils growing by our front walk

daylillies

yum! not only are daylillies wonderful to look at, they are also delicious! the flowers can be eaten, but my favorite parts are the “greens” (the fresh shoots that have just come up). they are wonderful when sauteed in olive oil and soy sauce, not to mention nutritious.

these guys just popped out a few weeks ago, and since i never transplanted them out of a bucket from last year, i was glad to see them (since i was worried that being in a metal bucket above ground during the 7 degree nights had killed them).

day lillies

daylillies just starting to join the spring flower dance!

irises

our irises are planted in a bed next to the house, and we don’t have any blooms yet, but we do have some fresh, green growth. i am looking forward to seeing their large purple blooms in the next few weeks. these flowers ventured above ground about the same time that the daylillies did.

irises

irises: a new beginning!

forsythia 

i’ve finally learned what the name of these bushes are (because jason keeps telling me every time i simply say “that yellow bush by the road”). their lovely yellow flowers just appeared mid-march and if last year is any indication, there should be shocking, 4-foot tall, bright yellow poof balls in our yard soon.

forsythia

one of our many forsythia by the road beginning to bloom

bradford pear blooms

we moved into our house almost exactly a year ago, and i remember that our bradford pear went into bloom right after we moved in. i will always associate the bright white blooms with the happiness of our housewarming month, and i’m glad that i finally got a picture of it this year! because the flowers are fleeting, that makes them even more special; the tree started to bud about 2 or 3 weeks ago and finally bloomed a few days ago. we should only have another week or so of seeing the flowers before the petals start to blow away in the wind, blanketing our backyard with the best confetti ever–a perfect celebration of spring!

our blooming bradford; bolt loves the spring too!

our blooming bradford; bolt loves the spring too!

happy spring to all!

.:.

farm food friday: oma’s green bean casserole

my mom makes the best green bean casserole, partly because she always uses green beans from my dad’s garden and partly because, well, she doesn’t open up any cans while making it–she makes it from scratch. this is not the first or the last of oma’s recipes that you’ll see on our blog (oma is the german name for  grandmother–the name my mom wants to be called once grandkids arrive).

i just tried my hand at recreating her recipe a few days ago, and i can say that i think i did a pretty good job. maybe you’re thinking, “it’s not thanksgiving… why the sudden enthusiasm about green bean casserole?”

well, as is the tradition with farm food friday, i try to share some recipes that highlight a certain homestead ingredient that we (or you) might have a lot of or might just really love eating! hence the green bean casserole idea.

a little bit about my love for green beans: it started so early that i can always remember loving them, even as a young child. i loved them so much, in fact, that in my school days i would always say that green beans were my favorite food when asked. all the other kids would look at me like i was crazy, since they had all said pizza, ice cream, or spaghetti. i also can’t seem to write or type green bean as two words, and i have to backspace and correct myself each time because instead i type greenbean. i don’t think my interest in compound words is to blame, rather that i’ve always imagined that green beans are the beans, worthy of mono-word-dom. all other beans are secondary to me, and i imagine they always will be.

so now that you know what sort of greenbean fanatic i am (yes, the vote is in and i can now resume using greenbean rather than green bean), you might be even more interested in this week’s farm food friday recipe. yum!

the ingredients:

  • 3 pints of greenbeans (grown in our garden, snapped, boiled, and frozen in their own broth since september). greenbean broth is super nutritional, and once you use the greenbeans for the casserole, i recommend saving the broth for drinking later. it’s best when warm!
  • 1 or 1 1/2 large onion(s)
  • 10 garlic cloves
  • 6 medium or large baby bella mushrooms (optional). once our shiitake mushrooms come in we will be using them instead!
  • milk (i use unsweetened coconut milk, but whatever you use for baking or cooking will be fine)
  • olive oil or butter
  • flour
  • garlic powder
  • salt and pepper
  • soy sauce
  • french fried onions (optional)

the gear:

  • a large saucepan
  • a medium-sized casserole dish
  • large spoon, whisk, knife
  • cutting board
green beans

our greenbeans, frozen and preserved since september 2013

onions

diced onions!

veggies

sauteing veggies–after adding the garlic and mushrooms

casserole

the casserole mix, before baking!

the directions:

  1. before you begin cooking, drain the liquid from your greenbeans (but save it!) to have them ready to mix in when the time comes.
  2. dice and saute the onions (in plenty of olive or butter) on medium-low for about 10 minutes. add some salt and garlic powder while stirring.
  3. dice the garlic gloves and mushrooms and add them once the onions appear transparent. add a couple dashes of soy sauce while stirring.
  4. at this point you will begin to make the rue in the same pan as the vegetables. the key is to keep the ratio between the olive oil/butter and the flour equal. so, add as much of these ingredients as you like (depending on how much liquid you would like your casserole to have) but pay attention to your ratio and be sure to create enough rue so that once you stir in the greenbeans you still have some stir-ability. i believe i added about 1/3 cup of flour to my pan, and a little bit less than 1/3 cup of olive oil (since there was already a good bit in the veggie mix). use your whisk to stir this in well.
  5. add a couple more dashes of soy sauce and a bit more garlic powder, salt, and pepper.
  6. add around 1 cup of your milk and continue to stir the concoction with the whisk.
  7. this is the time to check your rue; taste it if you’d like. add any more of the spices or more flour, oil/butter, or milk if you feel like the recipe needs more balance.
  8. when you’ve decided the rue and veggies are good-to-go, stir in your pints of greenbeans.
  9. once the greenbeans are mixed evenly among the other ingredients, transfer all to your ungreased casserole dish. spread the mixture evenly throughout the dish and smooth the top.
  10. bake in the oven for 40 minutes, at 350 degrees.
  11. briefly remove the casserole from the oven and sprinkle as much or as little french fried onions over the top that you like (i put a ton of them on top, while my mom doesn’t put any).
  12. bake in the oven for another 10 or 15 minutes, depending on your desired crunch factor.
  13. serves 6-8 average folks, or 3 or 4 gluttonous jasons and emmas. enjoy!

p.s. an added bonus to this recipe… it tastes even better as leftovers, since the rue and vegetable flavors have had time to meld. next time i plan to make a double batch so that it lasts longer in our house than just for 2 meals.

.:.

Nitrogen Fixing Trees in Our Food Forest

Yesterday I talked about using herbaceous support species in food forest design and establishment, and how both annual and perennial herbs and plants can perform many of the same functions as typical support trees. While this is true, I wanted to also point out some of the nitrogen fixing trees that we will be planting this year into our food forest as support species.

support species permaculture

240 Support species started from seed, ready to germinate and go into our forest garden.

First on the list is honey locust. This is an awesome tree. It can be an overstory tree if you let it, but it coppices easily, making it a prime candidate for chop and drop mulching. It fixes nitrogen, and flowers for a long period of time in late spring and early summer, providing an excellent nectar source for bees. It also yields huge amounts of sweet tasting pods with edible seeds. The seeds can be eaten by humans, but chickens, cattle, and goats are especially found of them. Honey locust trees are easily grown from seed, provided they are soaked overnight until swollen, or nicked and soaked prior to planting.

Another support tree that we plan on planting is black alder. Black alder fixes more nitrogen per acre than any other native species. It grows rapidly, easily, and coppices. It’s eaves break down rapidly, increasing soil fertility above ground while it fixes nitrogen below ground. A pioneering species, black alder is often found growing in poor soils and wet sites. It’s wood is highly valued, especially for uses where it is submerged in water, such as docks. I can envision using some black alder poles as a base for a floating chinampa garden in our pond. Needless to say, we are excited about black alder.

Siberian pea shrub is another nitrogen fixing permaculture plant that will be interplanted among our fruit and nut trees. A tall growing shrub, it fixes nitrogen and produces a very high protein seed that is palatable to chickens and other livestock. I consider it a temperate climate version of pigeon pea, as it performs many of the same functions but is extremely hardy, to at least zone 3. Siberian pea shrub is easy to grow from seed; it germinates quickly after an overnight soak and thin sowing.

These are the three plants that I have going in a speedling tray at the moment. I planted about 240 of them, so there should be plenty to fill the gaps in our food forest, and we won’t feel so bad about cutting them down for mulch as the system progresses. Over the next few weeks, I plan on starting some more species, including mimosa, goumi, black locust, and russian olive. All of these support species fix nitrogen, and should supply ample fertility for our new food forest.

Herbaceous Plants as Food Forest Support Species

Emma and I are getting closer and closer to establishing the first iteration of our homestead food forest. A food forest is, not shockingly, a forest specifically tailored to produce edible food and is a probably the most well known and talked about aspect of permaculture.

A primary distinction between food forests and orchards, is that a food forest consists of multiple species that occupy multiple layers (tall canopy trees, vines, shrubs, groundcovers, etc.) and work together to create a sustainable ecosystem of abundance and self regulation. Compare this to a typical orchard, where fruit trees, often a single species or variety, are laid out in grids with only grass underneath. This is not a complete system, and farmers are thus required to spray herbicides to kill weeds, fertilize with chemical fertilizers, and truck in bees to pollinate their crop.

In a food forest, a fruit or nut tree is surrounded by a myriad of support species, all performing different functions to ensure the best possible outcome for the whole system. Think of these plants as the main fruit/nut tree’s entourage.

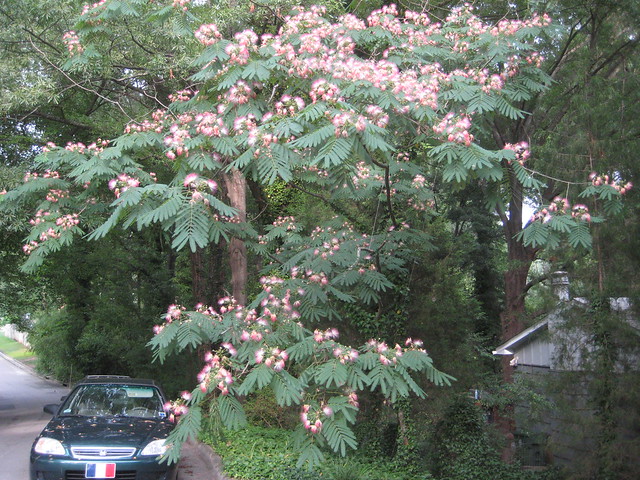
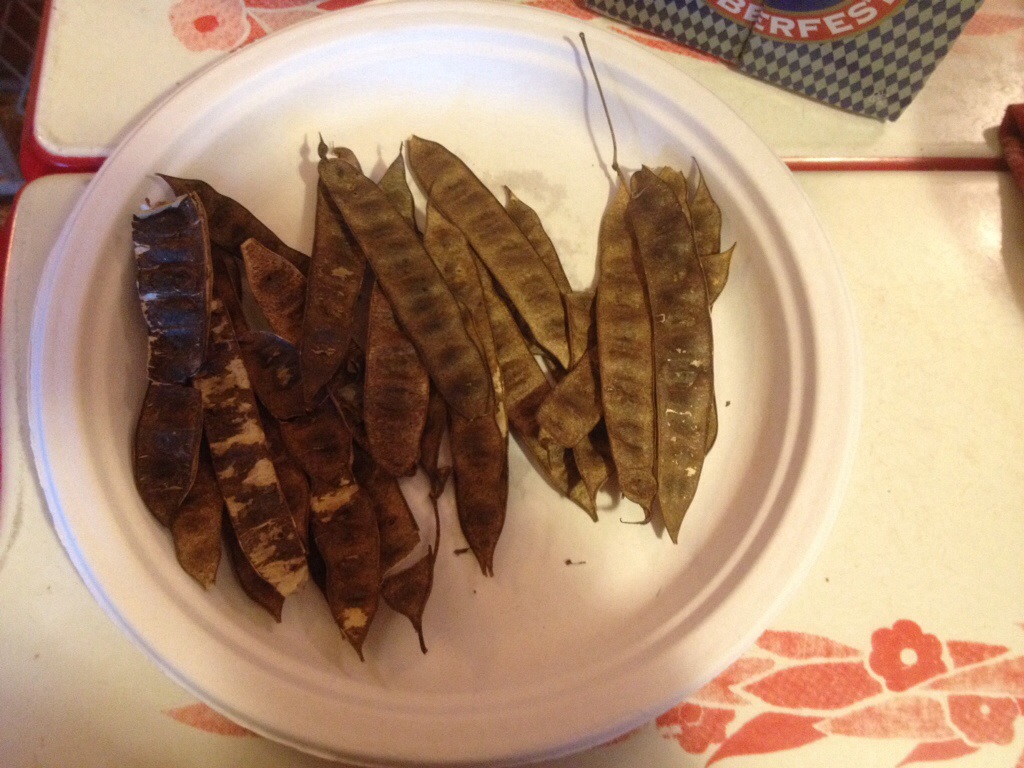
Typically, these support species have been nitrogen fixing trees and shrubs like leucaena and moringa in the subtropics, and black alder, locusts, and mimosa in the temperate regions. These trees grow quickly, nursing up the productive crops, while supplying nitrogen both above and below the ground via mulch or rhizo-bacteria.

But what about using herbaceous plants as support species? In a temperate climate food forest, this may be a great idea. Some advantages to using herbaceous plants are their quick growth in spring and summer, a rapid decomposition of green material, smaller sizes (which increase diversity in a smaller space) and the ability to use annuals.

Lets look at some of the options for herbaceous support species.

Comfrey (Symphytum sp.)

This deep rooted perennial is touted in every permaculture book and video as a dynamic accumulator of minerals, high protein animal forage, insect attractor, and medicinal wonder plant. And for good reason. We just received some comfrey root cuttings and will be selecting their homes soon.

Yarrow (Achillea millefolium)

This low growing perennial herb attracts beneficial insects, mines nutrients, and is also a well known medicinal. Though yarrow wont produce the copious amounts of mulch and biomass that comfrey will, it deserves a space in the forest garden.

Amaranth (Amaranthus sp.)

Amaranth comes in many shapes, sizes, and names, but it is a great annual “weed.” Grown for its nutritious edible seeds by both Central and North American cultures, amaranth plants can reach 8 ft. tall in a summer growing season, and some cultivars can produce 1 pound of tiny seeds per plant. The leaves are edible, for both animals and humans, and are some of the healthiest greens you can eat, right up there with dandelion.

Although it is an annual, it readily self seeds, and will pop up next year unassisted under most circumstances. Amaranth makes a great support species, especially early on in a food forest, because it is extremely drought resistant and has thick roots that travel deep into the soil. These roots break up compacted soil, and as they decompose, allow for efficient water infiltration in the system where its needed most. Lambsquarter (Chenopodium sp.) is a related plant that can serve a similar function.

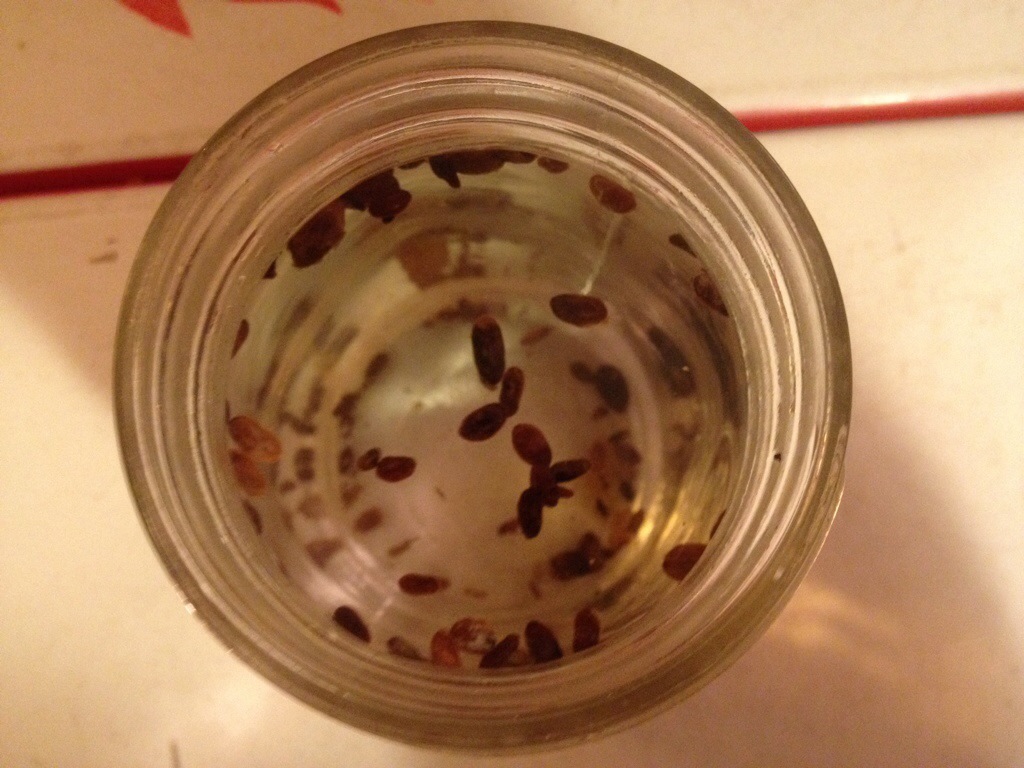
Chia (Salvia hispanica)

We grew some chia this year, and were very pleased with our results. Geoff Lawton has been using chia to pioneer land into forest in Australia, and then harvesting the valuable chia seeds as a byproduct of food forest implementation. Chia’s blue flowers are extremely attractive to both honey and bumblebees, and I think their strong scent probably helps to confuse pests. Another annual, chia is easily grown from seed, and you are almost guaranteed to have volunteers popping up next year.

Jerusalem Artichoke (Helianthus tuberosus)

This sunflower relative can reach towering heights of up to 13 ft., topped with numerous pretty yellow sunflowers. Oh, did I mention its perennial? Sunchokes produce copious amounts of organic matter, attract bees and other pollinators, and also produce an edible tuber yield high in inulin. A very valuable crop in its own right, Jerusalem artichoke fits nicely in a fruit tree guild, especially if you have a pig tractor to run over them.

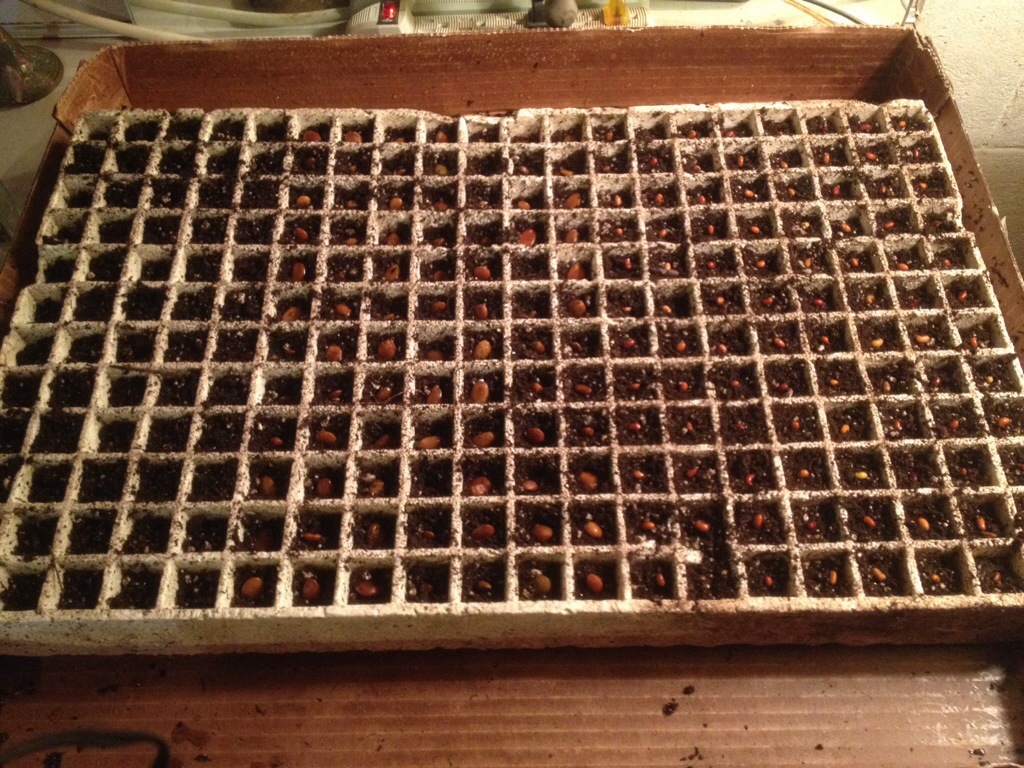
These are just a few examples of herbaceous support species that can be used in a food forest. Support species are critical to the success and health of forest garden systems, and these roles don’t always need to be filled by woody trees, bushes and shrubs. Having said that, we will definitely be using such plants in our system. In fact, just yesterday I sowed over 200 support tree and shrub seeds; a mix of honey locust, black alder, and Siberian pea shrub. Yet, like everything else in permaculture, a diversity of species is critical, and by including annual species in the mix, we will be able to stack more functions and yields into our new food forest, while making it more resilient and efficient.

from plant to pesto: basil and its promises

basil, basil, basil!

rare is the person who doesn’t use basil in their cooking! jason and i use basil in heavy quantities, especially in soups, beer breads, pesto pasta salads, and most especially fresh in stir fries during the summer and fall!

basil

photo courtesy of bethcoll

although we may think of basil as an italian herb, it originates from india! there are different sorts of basil, of course; the variety that we grow and that most people use in italian cooking is called “sweet basil.” the specific “sweet basil” variety that we planted in 2013 and plan to plant again this year is called genovese.

basil also has health benefits (of course!). the essential oils found in basil have been found to be antiviral, antimicrobial, antifungal, and might even fight cancer. exciting! it certainly is delicious, and basil and its sibling species are cultivated by people all over the world.

the time is nearing for us to plant another round of basil “bushes,” and we still have a good bit left of our harvest from last year! this is because our processing and storing of last year’s crop was simple and not time consuming. therefore we were able to store it all without wasting any.

my mother taught me how to make pesto many years ago, and making pesto can be a great way to store basil (she uses walnuts instead of pine nuts), but she also taught me an even simpler and more long-term versatile way to “keep” our basil for months and months. this way doesn’t require that you purchase parmesan, nuts, or other important pesto ingredients.

easy = basil + olive oil & put it in the freezer!

most of our basil is stored this way, with a few bags of dried basil (which is also super easy!) still left.

to freeze your basil, all you need to do is wash the leaves and pull them from the stems. jason and i prune our basil bushes periodically and process a little as we go through the growing season, but at the end we simply cut the entire basil bush and wash the whole bush with our shower’s spray nozzle. we have a huge colander (3 feet in diameter) that works great for when we are spraying the bushes down. then we set to pulling all of the leaves off by hand. the plus side: your fingers smell like delicious basil for days!

after we have gallons of loose basil leaves, we put them in our cuisinart food processor with some olive oil and blend away, making sure to add enough oil so that the mixture is a little bit slushy. this helps the basil freeze better and staves off any freezer burn that might happen after months in the ice box.

basil

last september’s frozen basil: bagged and jarred

last september, after the big, last harvest, we stored the basil paste in two different ways: in small glass jars and in small ziploc bags (rolled and sealed to be sure all of the air was pushed out). out of these two storage methods, i much prefer the ziploc bags. here’s why: when i’m making a soup, pasta, or stir fry, all i have to do is get one of the bags out of the freezer, break off as mush basil-paste-ice-cube as i want, and put the rest away. this means i don’t have to thaw the paste before use, as i do with the paste that’s in the little glass jars. so convenient!

currently, we are trying to consume all of our stored basil before the fresh basil comes in. because, one thing is for certain: no matter how easy and versatile frozen or dried basil may be, the best is always fresh!

.:.

Older posts

© 2024 KW Homestead

Theme by Anders NorenUp ↑