KW Homestead

Pasture Raised Poultry & Edible Landscaping Plants Since 2013

Tag: recipes (page 4 of 4)

farm food friday: oma’s curried deviled eggs recipe

i love deviled eggs!

i know many people who don’t like them, and i suspect that that’s because they’ve only had simple deviled eggs made purely with mayonnaise. my mother’s recipe is far more delicious and when i make them, i eat one after another after another…

i do not have an exact recipe here, since most of the mixture is based on your own personal thoughts about how much curry or relish you enjoy. simply add the ingredients below to your boiled and crushed egg yolks.

a boiled egg thought: my method for boiling our eggs is to salt and boil water, add all of the eggs, cover and continue to boil for 1 minute. after 1 minute, i cut off the heat and let the eggs sit in the hot water for 10-12 minutes. afterwards, i place them in a bowl of cool water so they don’t continue to cook inside their shell.

once the eggs have cooled, i peel them and slice them in half, popping out the boiled yolks into a separate bowl (same way as most folks).

eggs

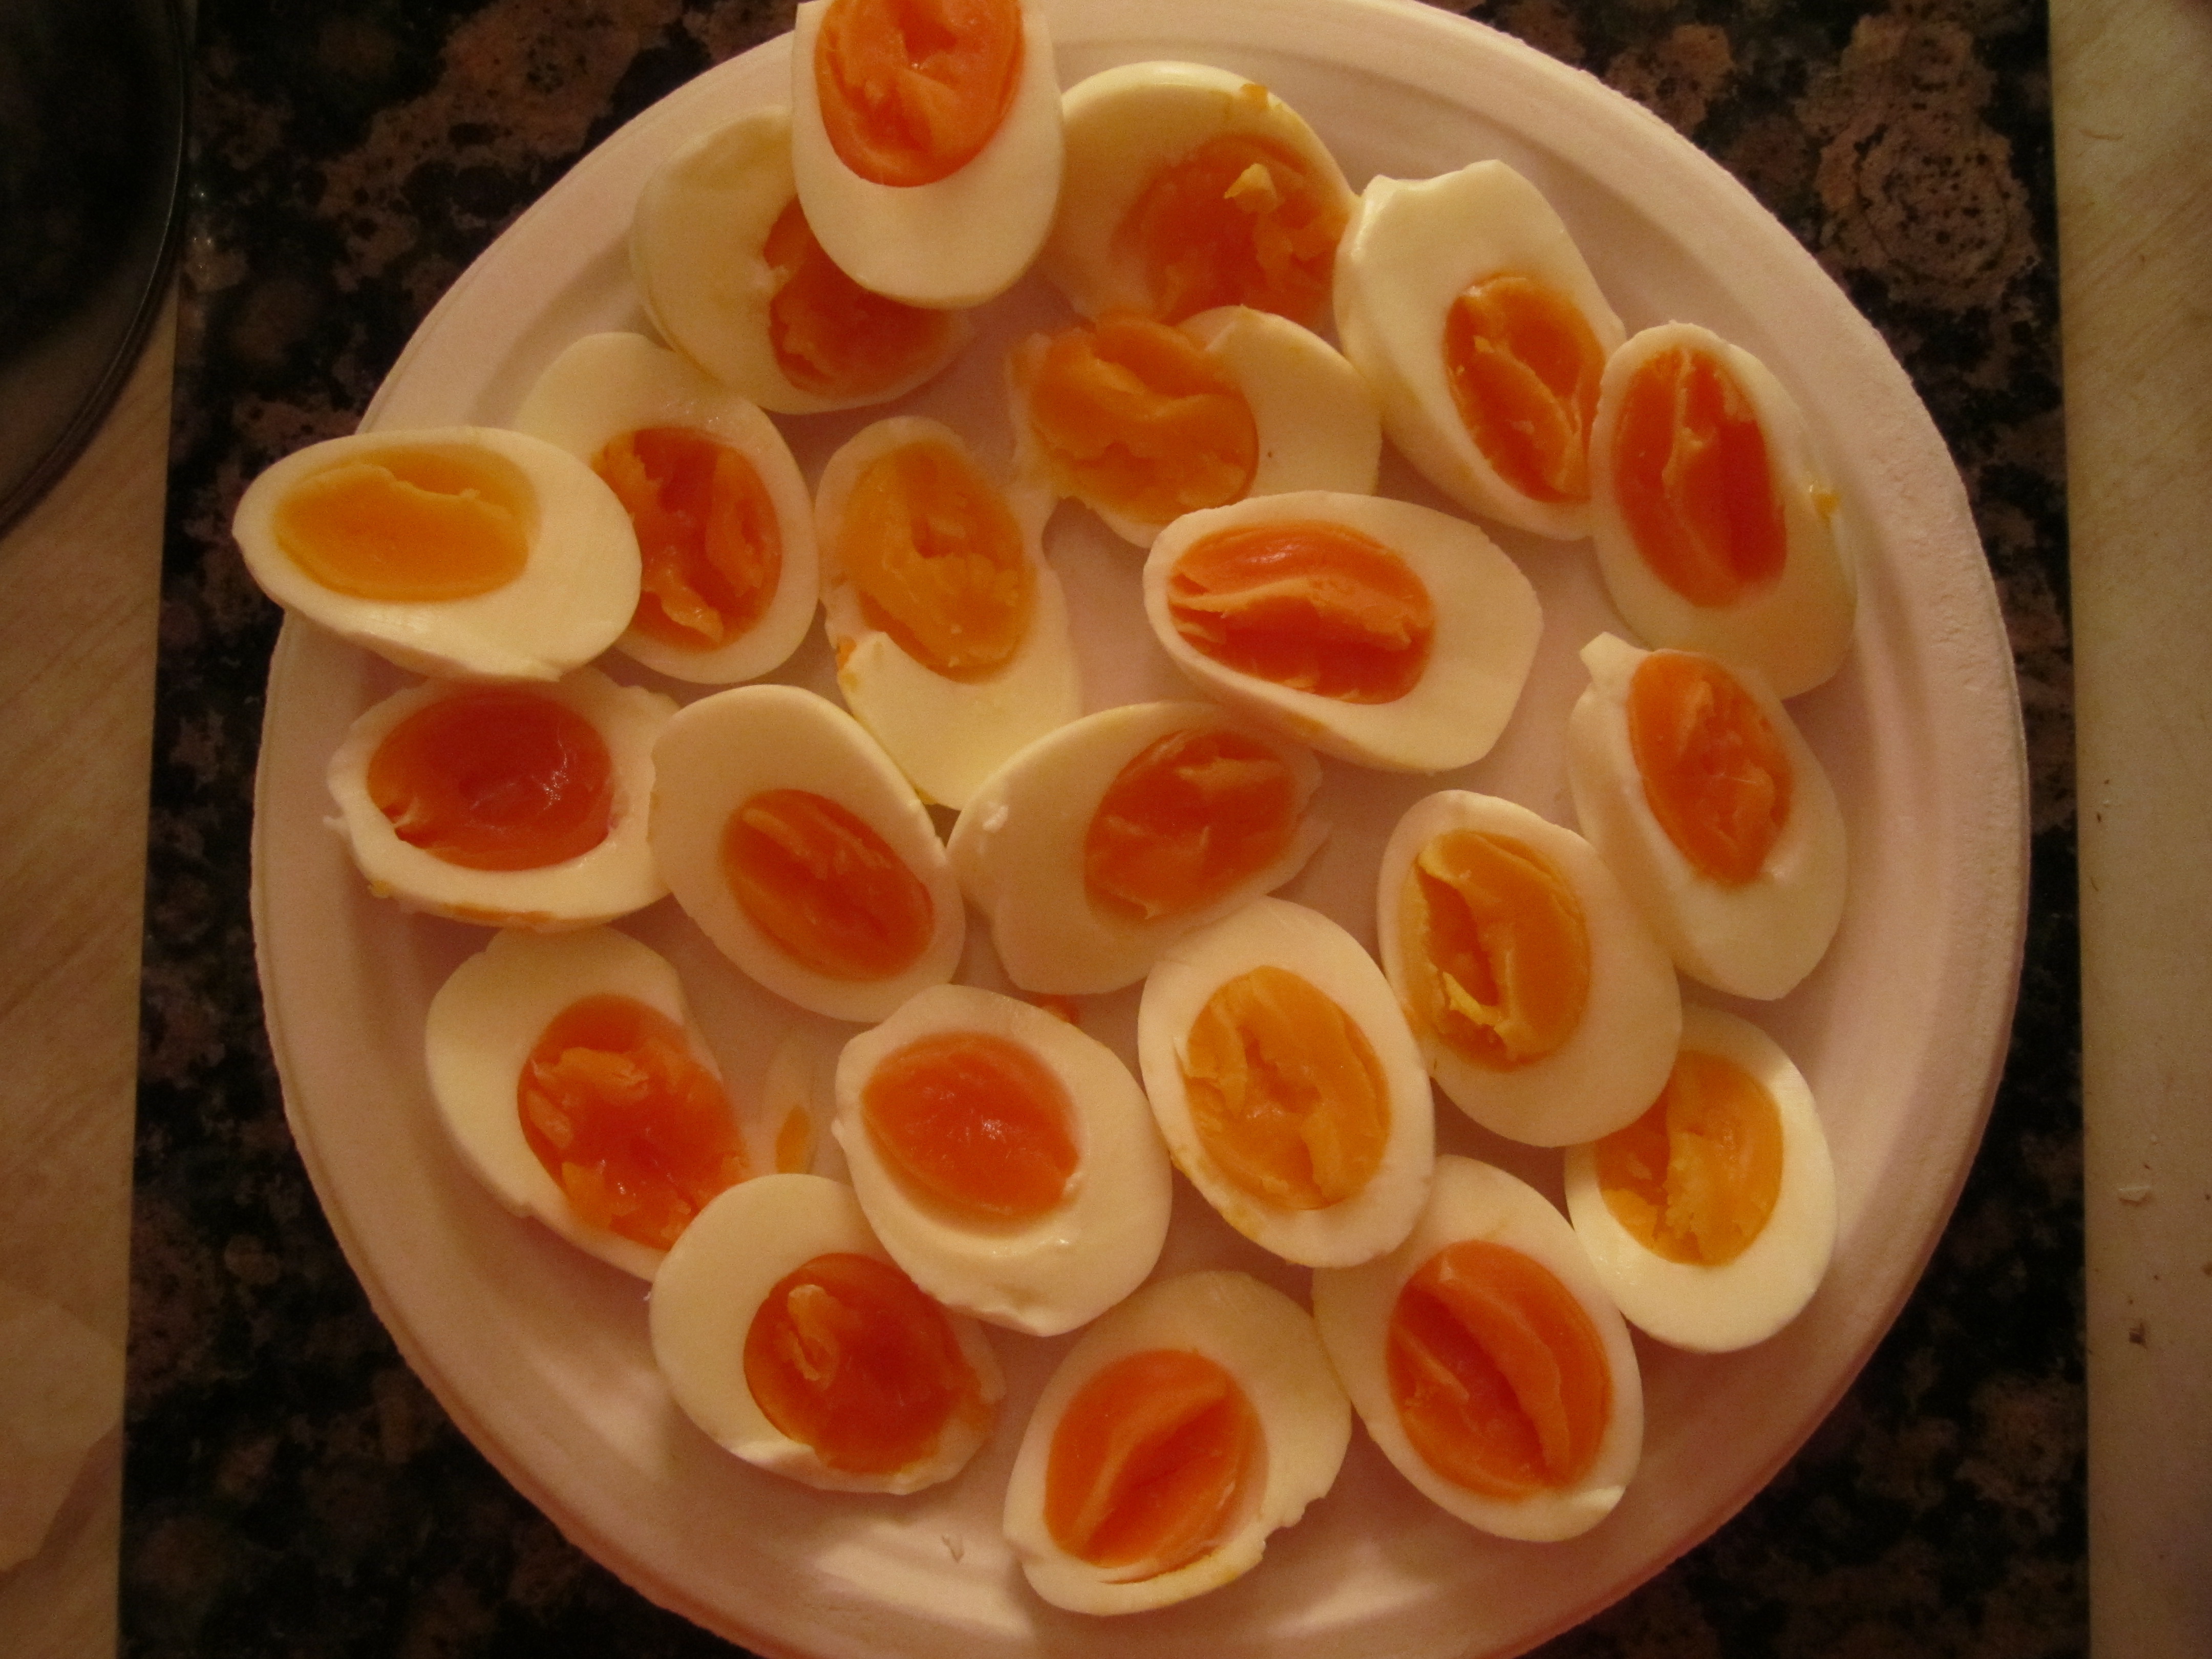
our orange-yolked aurora eggs. these were just sliced after boiling and ready to be made into deviled eggs!

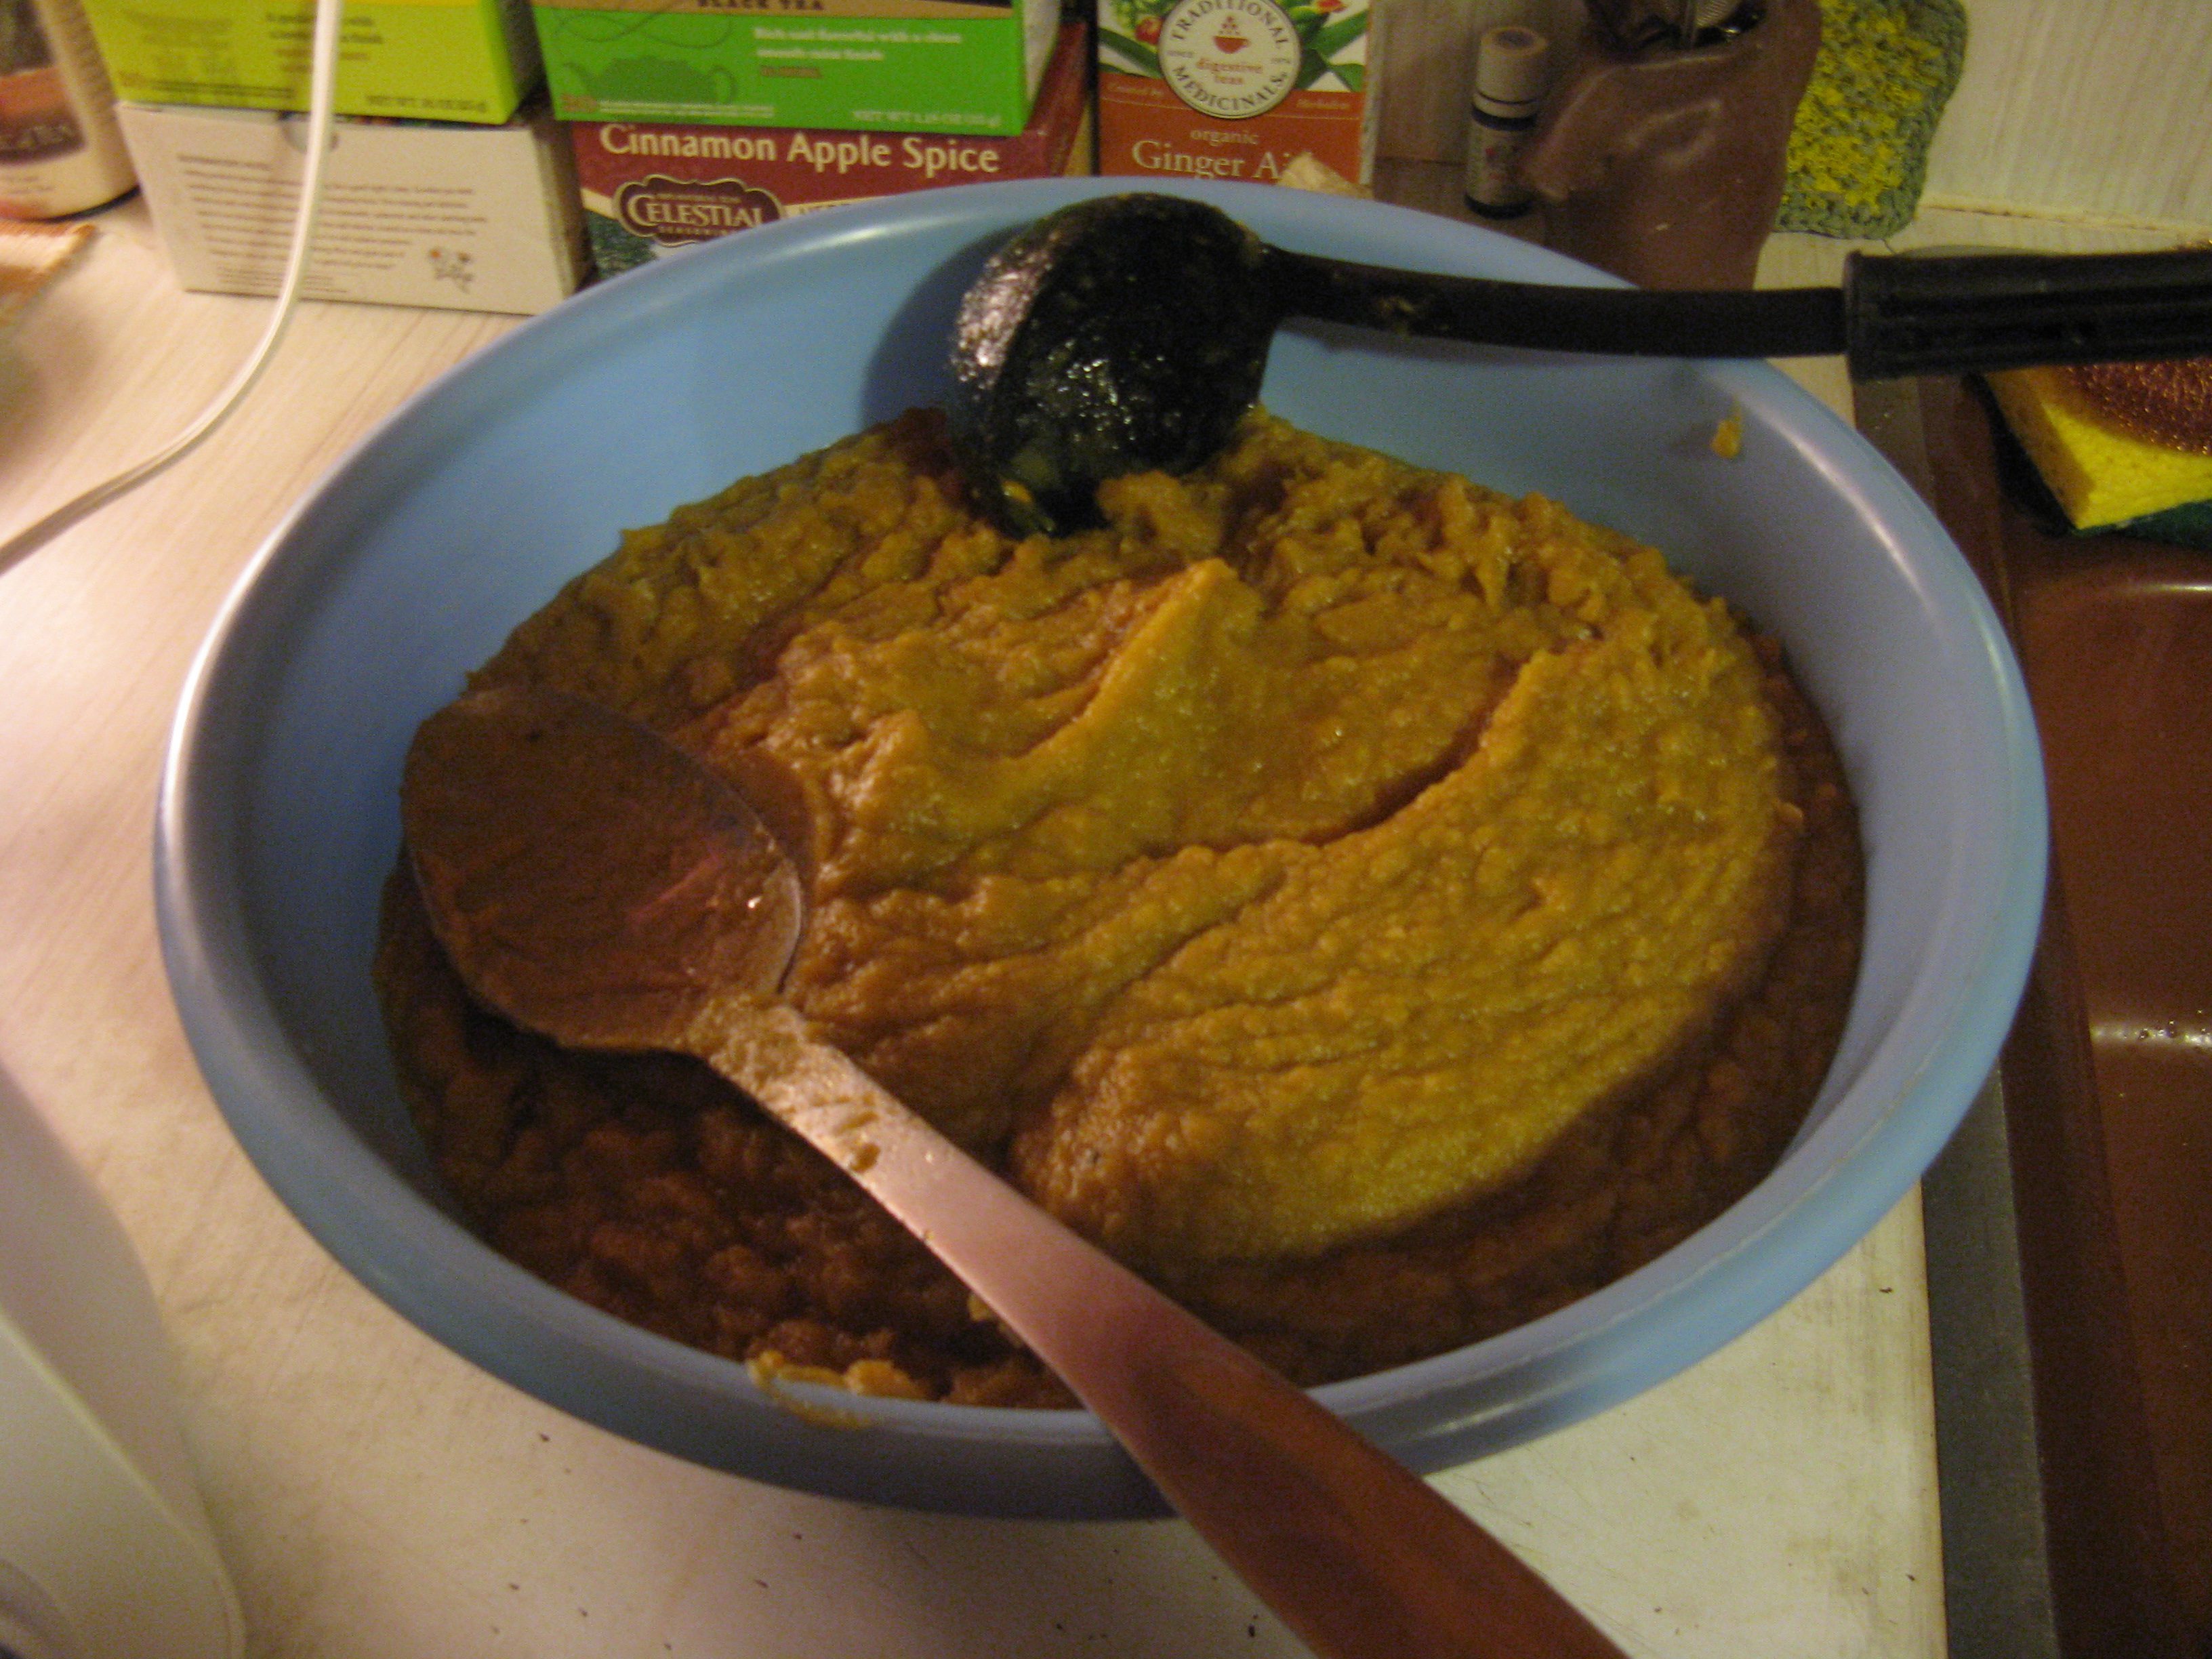
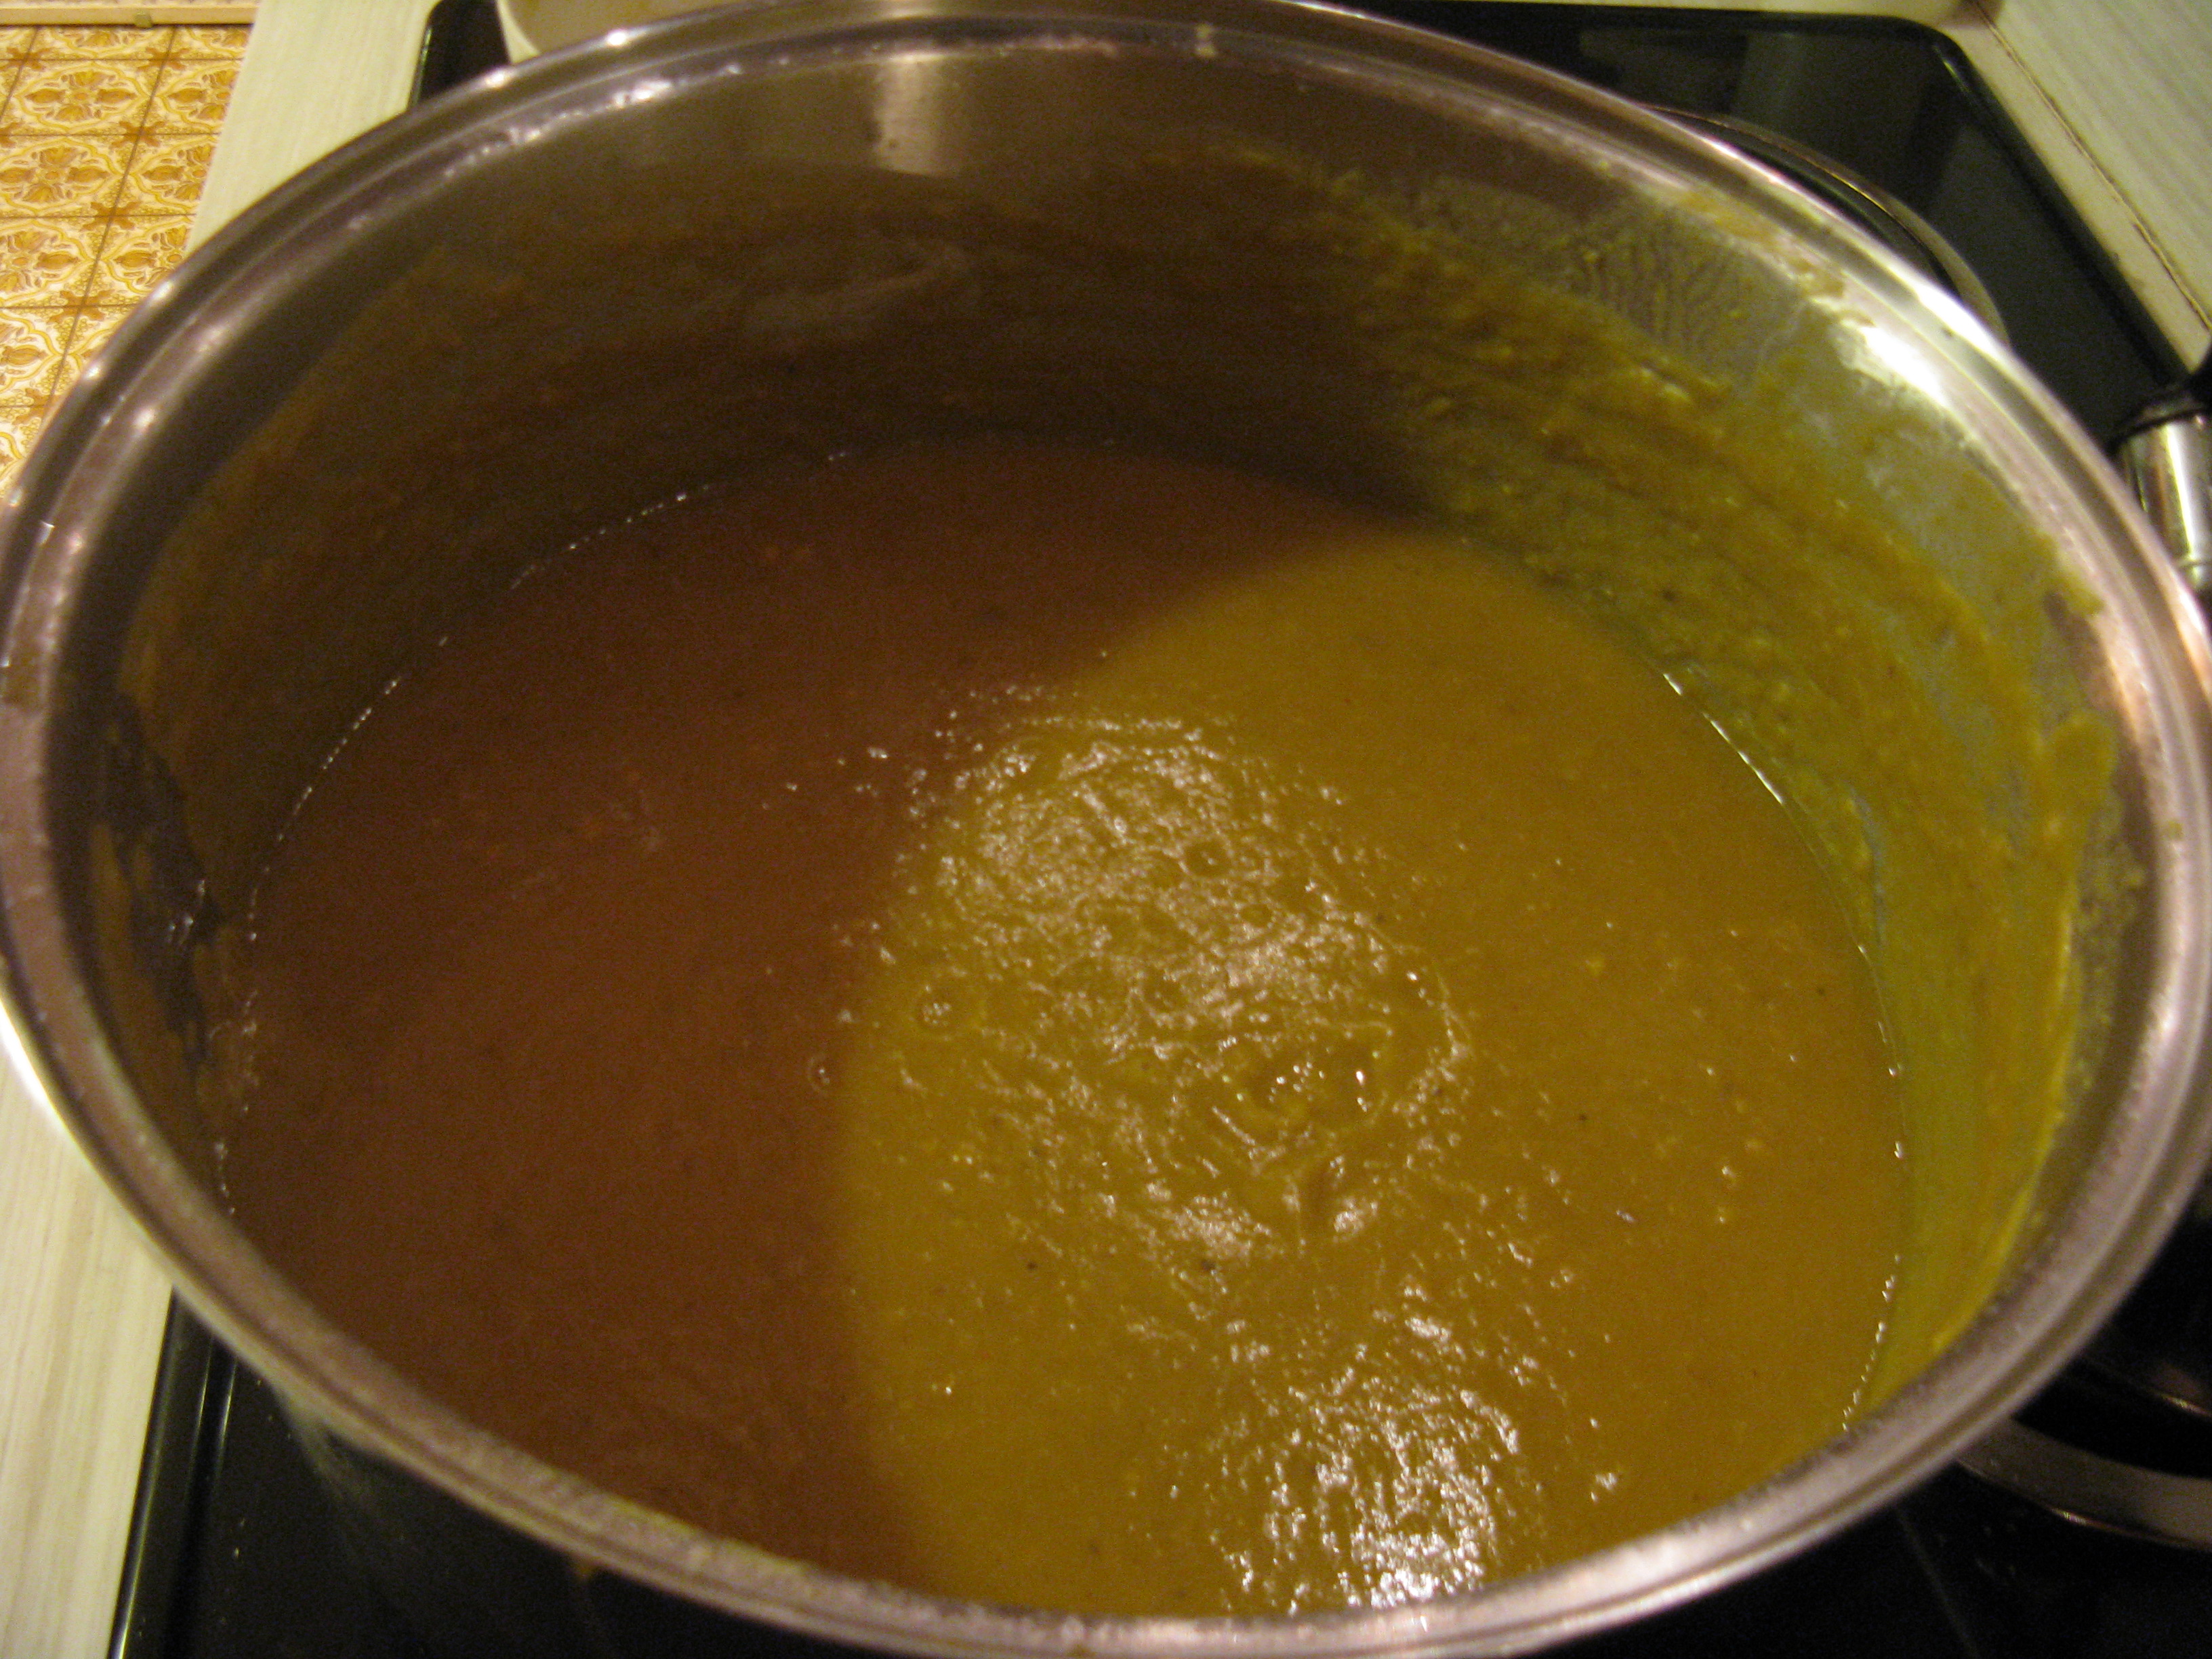
and then… i add the extra delicious ingredients, adding a little bit of each to start:

eggs

the finished product! i admit, this batch turned out messy and a little bit ugly but i was in a rush and it was still yummy!

  • mayonnaise
  • garlic aioli mustard from trader joe’s. such a delicious, flavorful, and also spicy mustard that we love! if you don’t have a favorite or gourmet mustard, any sort will do!
  • relish
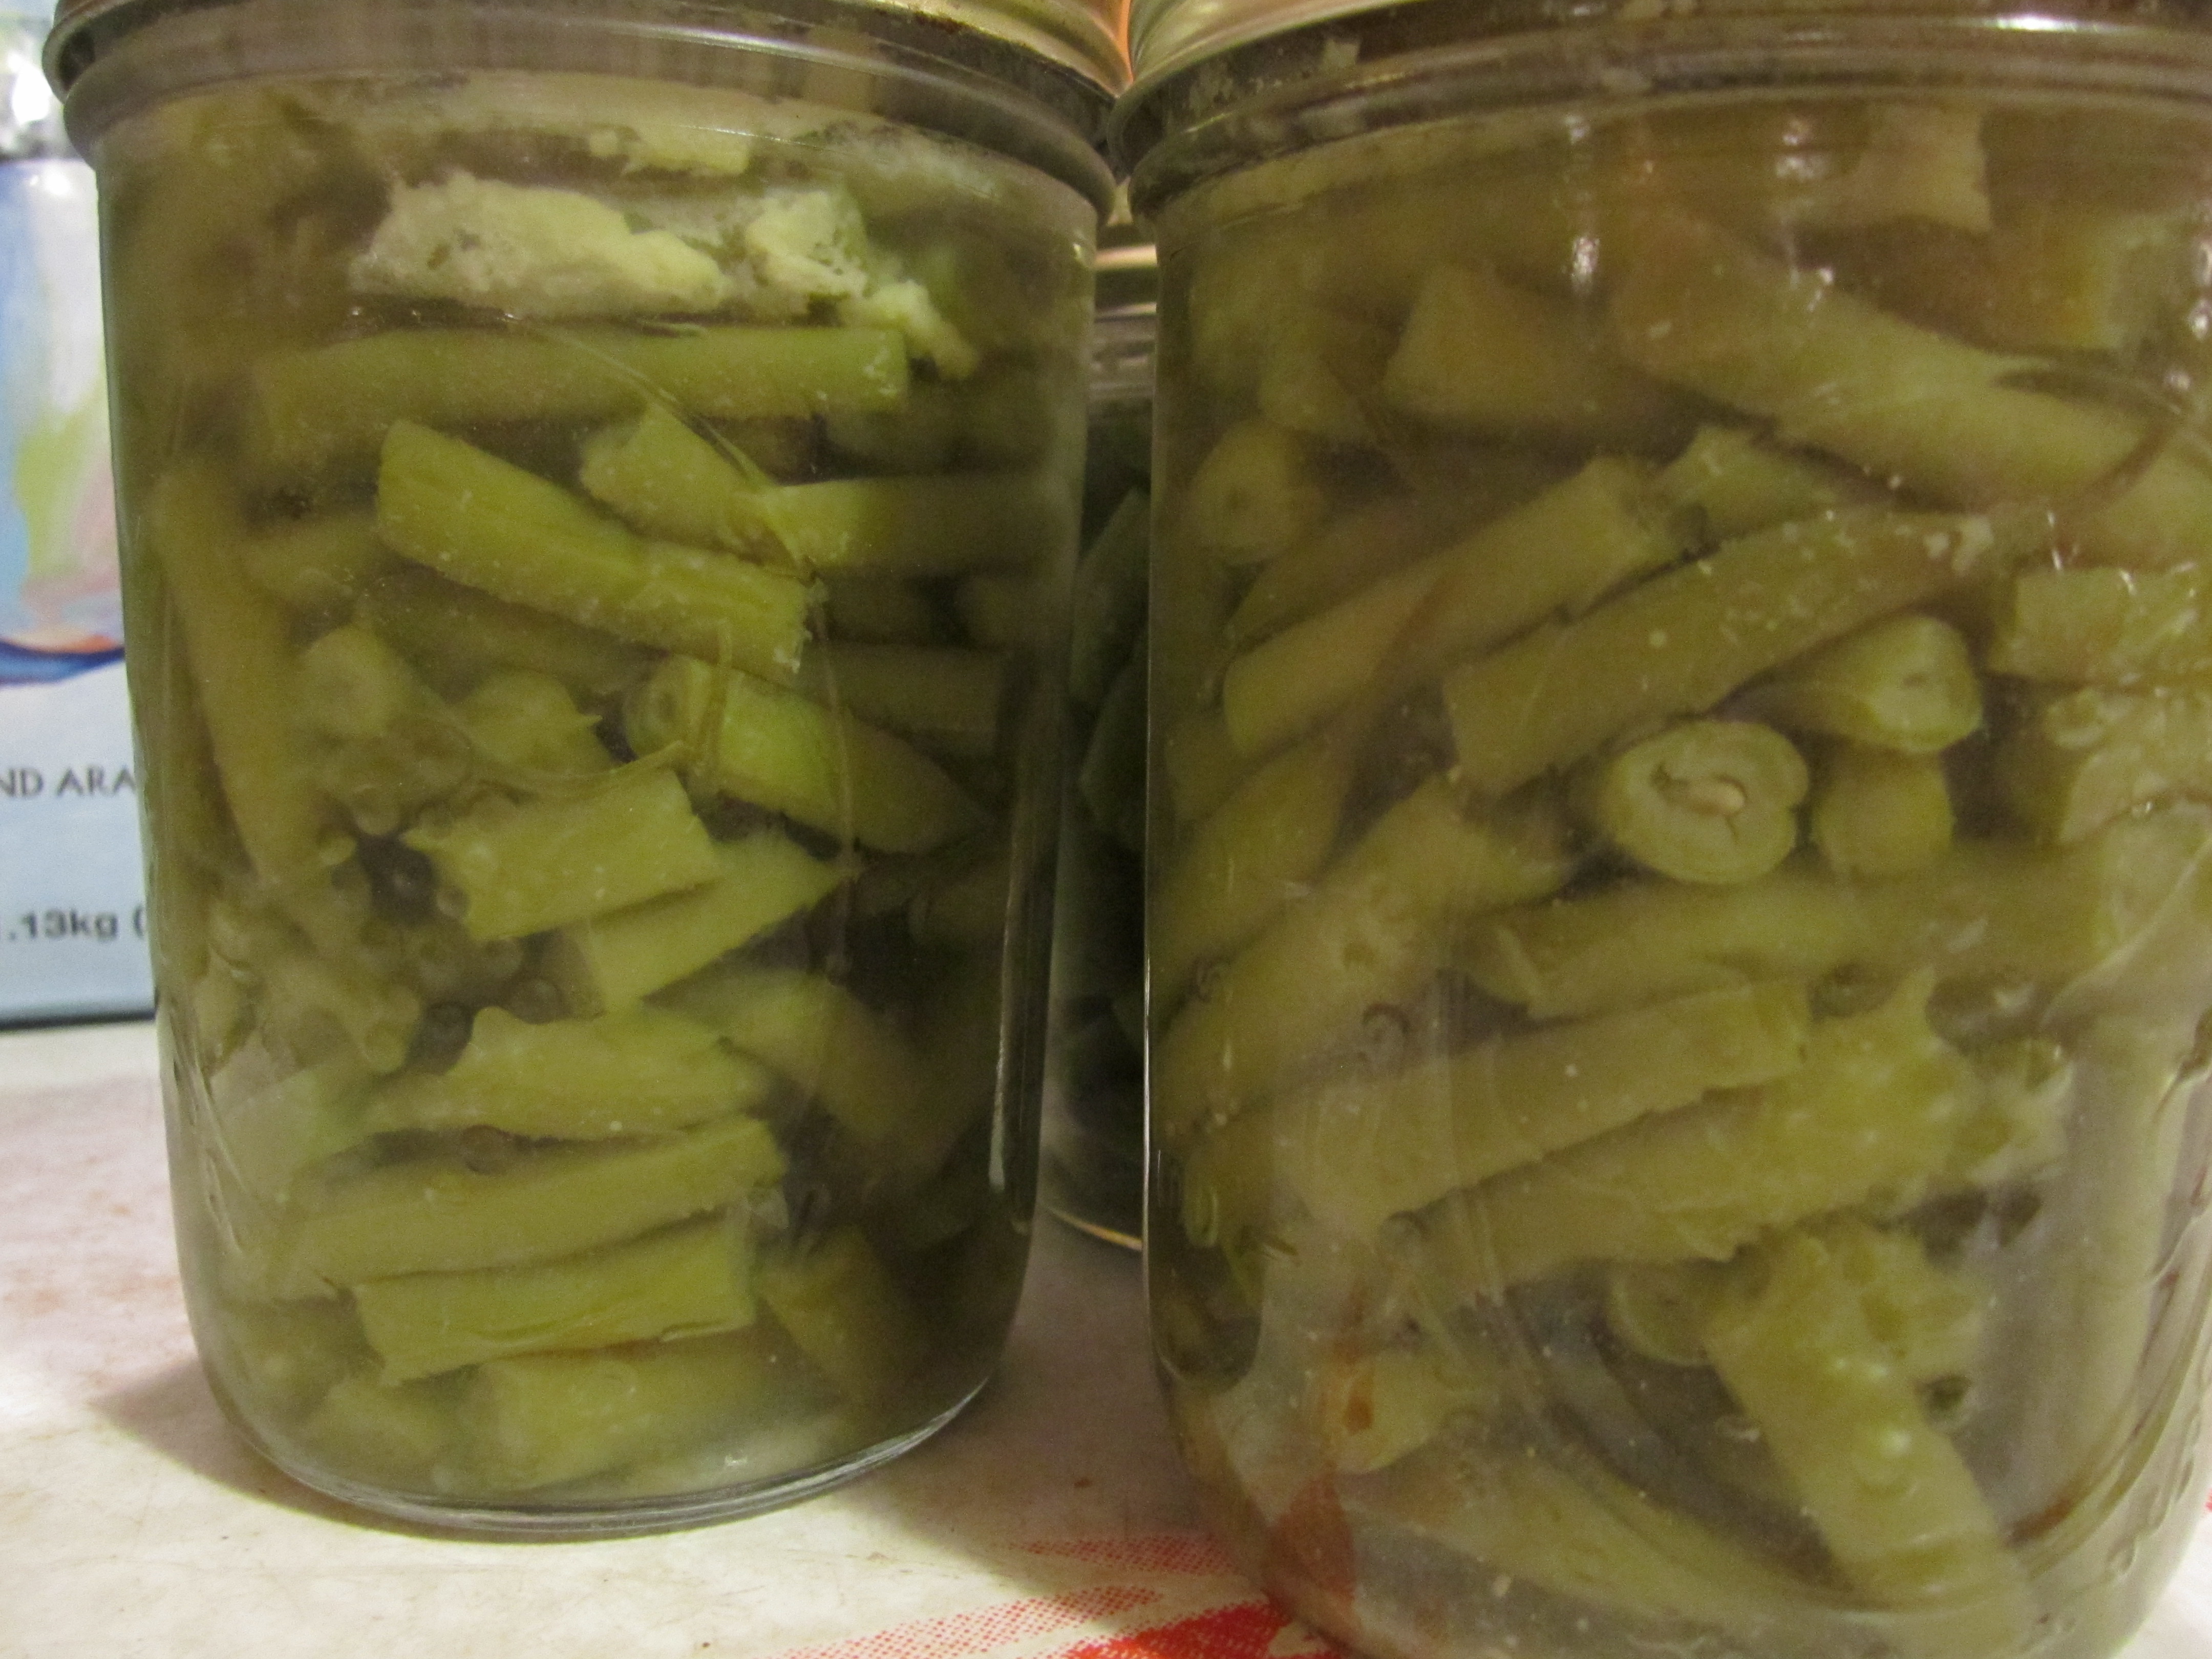
  • pickle juice. we use the juice from our very own greenbean pickles that have been pickled with salt, garlic, jalapeño, and dill. very delicious and great for intestinal health.
  • black pepper
  • cayenne pepper (certainly a little bit until you’re sure spicy is for you)
  • and the big, awesome ingredient: curry powder!

i always add a dab of this and a pinch of that in the beginning so that i can keep my ratios right. then i add more spice or liquid/sauce once i do a taste test.

enjoy! if you make this recipe, let me know how it turns out for you!

Using Geoff Lawton’s Mineral Supplement Recipe to Revitalize the Land

A huge problem in the world today is the constant erosion of our soil. Over many years, this process leads to nutrient deficient and dead soils that grow less nutritous plants every year. If we follow the food chain up, any livestock that eat these plants will suffer nutrient deficiencies, and any meat, eggs, or dairy that we obtain from these animals will likewise not supply a full spectrum of minerals and nutrients necessary for healthy life.

Bantam Chickens Homesteading

Livestock, such as chickens, can help us cycle nutrients and minerals back into the landscape.

One way to combat this unhealthy cycle, and remineralize the land, our livestock, and our food, is through the use of supplemental minerals. By feeding a full spectrum of minerals to our animals, in addition to high quality feed, not only do we improve the quality of their health, meat, and eggs, but we also improve the quality of their manure. By cycling these nutrients and minerals through livestock, they become bio-available to plants, which readily soak them up and perform better than ever. If we continue this cycle, and either mulch, compost, or feed these plants back to our livestock, we can rapidly increase the fertility of the land, and remineralize eroded and damaged landscapes, all while enjoying a bonus of the healthiest plant and animal products imaginable.

Geoff Lawton is where I first heard of this remineralization process, and his supplemental mineral recipe is great. This recipe is enough to feed to 1 dairy cow every day at milking or 10 chickens once a week.

  • Start by boiling up a cup or two of clean water.
  • Add 1 tsp. of copper sulfate. This worms the animals, but is a toxic compound that can poison them.
  • So, to neutralize the dangers of the copper sulfate, but still get the worming effect, add 1 tbsp. of dolomite lime.
  • To balance out the pH add 1 tbsp. of flowers of sulfur, an acidifying element to balance the alkaline effect of the lime.
  • Next, add 1 tbsp. of 2 types of rock dust minerals. For example, 1 tbsp. of greensand and 1 tbsp. of azomite.
  • Add 2 tbsp. of kelp, a dried mineral rich ocean product. This contains all of the minerals of the land (which all erode out into the ocean) in a slightly different form and ratio.
  • 1/2 cup of apple cider vinegar. This adds more nutrition, and helps with the digestion of some of the minerals.
  • 3 tbsp. molasses. An extra boost of iron, and a nice sweet taste makes this concoction a delicious treat for all livestock.

This mix is stirred together, added to a bucket of chopped forage, and fed to the animals. Geoff credits the bones of this recipe to Pat Coleby, an Australian author who writes natural animal care books for farmers and pet owners. Pat’s take is that animals do not have health problems or diseases, but rather are suffering from a nutrient deficiency, and that it is up to the farmer or pet owner to supply the correct nutrients and minerals. This treats the cause of the problem as opposed to the symptoms.

There is probably some wisdom there when it comes to our own health as well. Regardless, the first step is to remineralize the soil, and there isn’t a more efficient way than feeding a mineral supplement through your livestock and having them pre-process it for you into a plant ready state, creating an oasis of fertility and nutrient density in your backyard.

*Don’t forget to pre-order your Heritage Thanksgiving Turkey!

farm food friday: oma’s green bean casserole

my mom makes the best green bean casserole, partly because she always uses green beans from my dad’s garden and partly because, well, she doesn’t open up any cans while making it–she makes it from scratch. this is not the first or the last of oma’s recipes that you’ll see on our blog (oma is the german name for  grandmother–the name my mom wants to be called once grandkids arrive).

i just tried my hand at recreating her recipe a few days ago, and i can say that i think i did a pretty good job. maybe you’re thinking, “it’s not thanksgiving… why the sudden enthusiasm about green bean casserole?”

well, as is the tradition with farm food friday, i try to share some recipes that highlight a certain homestead ingredient that we (or you) might have a lot of or might just really love eating! hence the green bean casserole idea.

a little bit about my love for green beans: it started so early that i can always remember loving them, even as a young child. i loved them so much, in fact, that in my school days i would always say that green beans were my favorite food when asked. all the other kids would look at me like i was crazy, since they had all said pizza, ice cream, or spaghetti. i also can’t seem to write or type green bean as two words, and i have to backspace and correct myself each time because instead i type greenbean. i don’t think my interest in compound words is to blame, rather that i’ve always imagined that green beans are the beans, worthy of mono-word-dom. all other beans are secondary to me, and i imagine they always will be.

so now that you know what sort of greenbean fanatic i am (yes, the vote is in and i can now resume using greenbean rather than green bean), you might be even more interested in this week’s farm food friday recipe. yum!

the ingredients:

  • 3 pints of greenbeans (grown in our garden, snapped, boiled, and frozen in their own broth since september). greenbean broth is super nutritional, and once you use the greenbeans for the casserole, i recommend saving the broth for drinking later. it’s best when warm!
  • 1 or 1 1/2 large onion(s)
  • 10 garlic cloves
  • 6 medium or large baby bella mushrooms (optional). once our shiitake mushrooms come in we will be using them instead!
  • milk (i use unsweetened coconut milk, but whatever you use for baking or cooking will be fine)
  • olive oil or butter
  • flour
  • garlic powder
  • salt and pepper
  • soy sauce
  • french fried onions (optional)

the gear:

  • a large saucepan
  • a medium-sized casserole dish
  • large spoon, whisk, knife
  • cutting board
green beans

our greenbeans, frozen and preserved since september 2013

onions

diced onions!

veggies

sauteing veggies–after adding the garlic and mushrooms

casserole

the casserole mix, before baking!

the directions:

  1. before you begin cooking, drain the liquid from your greenbeans (but save it!) to have them ready to mix in when the time comes.
  2. dice and saute the onions (in plenty of olive or butter) on medium-low for about 10 minutes. add some salt and garlic powder while stirring.
  3. dice the garlic gloves and mushrooms and add them once the onions appear transparent. add a couple dashes of soy sauce while stirring.
  4. at this point you will begin to make the rue in the same pan as the vegetables. the key is to keep the ratio between the olive oil/butter and the flour equal. so, add as much of these ingredients as you like (depending on how much liquid you would like your casserole to have) but pay attention to your ratio and be sure to create enough rue so that once you stir in the greenbeans you still have some stir-ability. i believe i added about 1/3 cup of flour to my pan, and a little bit less than 1/3 cup of olive oil (since there was already a good bit in the veggie mix). use your whisk to stir this in well.
  5. add a couple more dashes of soy sauce and a bit more garlic powder, salt, and pepper.
  6. add around 1 cup of your milk and continue to stir the concoction with the whisk.
  7. this is the time to check your rue; taste it if you’d like. add any more of the spices or more flour, oil/butter, or milk if you feel like the recipe needs more balance.
  8. when you’ve decided the rue and veggies are good-to-go, stir in your pints of greenbeans.
  9. once the greenbeans are mixed evenly among the other ingredients, transfer all to your ungreased casserole dish. spread the mixture evenly throughout the dish and smooth the top.
  10. bake in the oven for 40 minutes, at 350 degrees.
  11. briefly remove the casserole from the oven and sprinkle as much or as little french fried onions over the top that you like (i put a ton of them on top, while my mom doesn’t put any).
  12. bake in the oven for another 10 or 15 minutes, depending on your desired crunch factor.
  13. serves 6-8 average folks, or 3 or 4 gluttonous jasons and emmas. enjoy!

p.s. an added bonus to this recipe… it tastes even better as leftovers, since the rue and vegetable flavors have had time to meld. next time i plan to make a double batch so that it lasts longer in our house than just for 2 meals.

.:.

farm food friday: savory venison stew recipe

we have another snow day on our hands and what better way to spend the day than slurping up a delicious and nutritious venison stew?! this recipe is jason’s newest specialty, who fearlessly makes soups without written recipes, and due to his copious adding of spices, they always turn out to be excellent!

jason has made this stew twice so far, and included different vegetables in the pot based on what we had in the house at the time. i’ve asked him what exactly he added to these soups, and his response has been: “you know what i do, you know, earthy spices.”

in order to make this stew more manageable for those of you at home, i’ve put his description of just how he does it into my own words:

in an ideal situation, which means having all of the ingredients around that we want to use, this is what goes in our savory venison stew…

the ingredients:

  • venison butt/rump roast (or any roast of beef that you would like to use, preferably with the bone or with any stew meat)
  • one large onion
  • 4 large carrots
  • 3 large shafts of celery
  • 5 or 6 medium-sized potatoes
  • salt & pepper
  • 5-10 garlic cloves and/or garlic powder, oregano, basil, paprika, 1-2 bay leaves
  • red wine
  • olive oil
  • beef broth, chicken broth, venison bone broth (if you’ve made some in advance), or just plain water if you don’t have any broths in the house.

keep in mind that if you are missing any of these ingredients, you need not abandon ship yet! any other earthy spices that you have (such as rosemary, etc.) can be added/substituted and other vegetables can be included. for example, the second time jason made the stew, we did not have potatoes or onions. he instead added more celery and included our own sweet potatoes, which turned out to make a different and interesting soup!

some things to have prepared first:

  • have your crock pot out and ready to go! if you do not have a crock pot, i recommend getting one, as it can be left on all day while you are at work without any risks associated. but, if you do not have one currently, you can certainly use a large pot and cook the recipe on your electric/gas stove on low/medium.
  • set your meat out of the fridge for about an hour so it has time to warm up.
IMG_1486

savory venison stew, 4 hours into cooking. yum!

and the directions:

  1. cut onions, carrots, celery, and potatoes into medium-sized pieces.
  2. rub a seasoning of salt, pepper, garlic powder, paprika, oregano, basil, and olive oil over the meat. pre-heat the oven to 400 degrees.
  3. place cut vegetables (as well as whole garlic cloves, if you are using some) into a deep, large, casserole dish.
  4. douse the vegetables with olive oil and generous amounts of all of the above-mentioned spices. add 1/4 cup of red wine over the spread.
  5. place the meat on top of the vegetables and put in the oven for 10 minutes or until the meat is braised and brown and the vegetables have a roasted look.
  6. once dish is removed from oven, transfer the meat and veggies to the crock pot and add 1/4 cup of red wine to the casserole dish and stir while scraping the bottom. this ensures that you get all of the little, roasted pieces of food and spices! add this mixture to the crock pot.
  7. add 1 or 2 bay leaves. decide now if you want more spices added, based on your personal tastes and add them!
  8. fill up your pot/crock pot with your choice of broth!
  9. cook the stew in your crock pot on low for about 8 hours (longer wouldn’t hurt) or on your stove on medium or low until the meat can be easily shredded but before your vegetables are reduced to a pulp!
  10. serve and enjoy!

.:.

farm food friday: roasted sweet potatoes, raw spinach, pecans, and parmesan

jason and i gave my dear friend, georgia, some of our sweet potatoes and she created a delicious recipe from our crop:

she roasted the diced sweet potatoes tossed in olive oil and pink himalayan rock salt on 350 degrees for about 30 minutes. then she tossed them with raw spinach, pecans, and fresh grated parmesan.

georgia's meal was well-plated as well as yummy. this is not surprising considering the great artist that she is!

georgia’s meal was well-plated as well as yummy. this is not surprising considering the great artist that she is!

delicious! i believe we’ll have to try that ourselves!

.:.


farm food friday: sweet potato ginger soup recipe

this is to be the first of many posts detailing farm fresh recipes with homegrown ingredients!

let’s start with a recipe that suits the cold weather well… perfect for a snow day or gelid temperatures. It also makes use of our abundant sweet potato harvest.

snow day on the farm!

snow day on the farm!

a few days ago, when i had a snow day off from school, i made a triple batch of my sweet potato ginger soup. i made this much because jason’s family is coming to visit soon and my dear friend, who has a marvelous photography and portraiture business in north carolina, is about to have a baby. i wanted to be sure that she had a little bit of easy-to-reheat and nutritious food on hand after the baby comes!

the sweet potatoes i used when making my triple batch

the sweet potatoes i used when making my triple batch

here are the ingredients:

  • 4 large sweet potatoes (raw, peeled, cut into 1″ chunks)
  • olive oil
  • 2 large onions (peeled and chopped)
  • 1/4 stick of butter
  • sugar
  • 8 garlic cloves (or even a few more!)
  • garlic powder
  • 3 teaspoons of freshly grated ginger
  • cayenne pepper
  • 64 oz. chicken broth
  • salt, pepper
  • a food processor or blender

some things to have prepared first:

  • peel and chop up the potatoes (they take a bit of time) and onions
  • set out your food processor/blender
peeling sweet potatoes

peeling sweet potatoes

diced sweet potatoes

diced sweet potatoes


and the directions:

  • heat olive oil in a large pot (don’t skimp on the olive oil, but you can add more later if needed). put in the diced sweet potatoes and onions and cook them on medium for at least 10 minutes, stirring frequently.
sauteing the diced potatoes and onions

sauteing the diced potatoes and onions

  • add thickly sliced garlic cloves. let these ingredients cook for 10-30 minutes on medium (continue to stir frequently), until the potatoes begin to brown and become mushy around the edges.
add garlic cloves to the pot

add garlic cloves to the pot

  • lower the heat and add just a pinch of sugar and all of the butter. allow this to cook at least 10 minutes longer. continue to stir frequently. grate your ginger during this time.
i use a simple, handheld grater for my ginger

i use a simple, handheld grater for my ginger

  • add the ginger, as much cayenne pepper as you like, salt, and pepper. stir and saute for 1 minute, until the ginger becomes fragrant!
  • add 1/3 of the chicken broth. cut back up to medium and simmer for 20+ minutes or until the potatoes are soft.
add chicken broth and continue to simmer

add chicken broth and continue to simmer

  • mash the mix while it cooks and add another 1/3 of the chicken broth. add a bit more garlic powder, cayenne pepper, salt, and pepper (if desired).
mashing the soup!

mashing the soup!

  • once most potatoes and pieces of potatoes are cooked through, cut off the eye of your stove and let the soup cool off sufficiently before placing portions of it in your food processor/blender. i use a cuisinart food processor and it does a great job pureeing the soup. we are hoping to get an immersion blender sometime this summer, though!
  • blend the soup in installments, placing the pureed servings in a separate container. once the soup is all pureed, add it back to the pot and reheat on a medium temperature.
freshly pureed, waiting in a separate container

freshly pureed soup, waiting in a separate container

  • add some or all of the remaining 1/3 of the chicken broth (this depends on how thick you want your final product to be).
  • add more of the spices, if desired.
the finished product. delicious!

the finished product. delicious!

  • serve and eat. yum!

note: i always think it is an excellent idea to make extra and freeze some for a future date. soup reheats so well, after all!

.:.

homemade dog food!

when we got bolt as a puppy in july of 2013, jason and i wanted to make sure that we started off in the best way possible with him, health-wise (A great resource for us has been dr. pitcairn’s complete guide to natural health for dogs and cats).

bridey was 7 when i inherited her from a friend, and she had always eaten the same purina dry dog food. i tried to switch her to a new dog food one time, years after i got her, but her bowels did not agree. i also also tried to give her homemade dog food (chicken, rice, and other ingredients) and her body didn’t like that either. since she’s clearly doing fine on that same old purina dry food, i’m loathe to change her routine on her now.

bolt's first day at home, sleeping under the corn

bolt’s first day at home, sleeping under the corn at 10 weeks old

but with bolt, who we got as a puppy, we wanted to be sure he grew up to be a big, strong, farm dog. so, we wanted to do something different and natural.

our latest dog food recipe for him per day is:

  • 4 or 5 cups of diced, raw venison
  • 4 or 5 cups of grated carrots
  • 1 clove of garlic
  • a pinch of green sand mineral supplement
  • a pinch of kelp mineral supplement
  • as much olive oil as desired
  • a dash of salt
  • a dash of cayenne pepper

every few days we add a small pinch of diatomaceous earth or raw pumpkin seeds to help prevent intestinal parasites.

our future plan is to begin adding brown rice to the mix for both dogs and to continue giving both of them a boiled or raw egg to eat every few days.

with the above recipe, bolt always gets a small amount (maybe a half of a cup) of his dry dog food for the crunch factor. eating the dry dog food always slows him down, too, which is nice!

three cheers for strong, healthy puppies and dogs!

IMG_1174

bolt, at 10 months, with a bit of carpet fuzz hanging from his lips!

.:.

Newer posts

© 2024 KW Homestead

Theme by Anders NorenUp ↑